• The move to the new server is done. There are some software and database maintenance updates in process. This has us passing the hat around to help out. We appreciate any donations. Seriously, even a dollar helps. The payment page may be found here - https://www.audiokarma.org/support.html

Yamaha CR-820 - guidance and possible help needed

JorgenSWE

Member
Hi!

Greetings from Sweden! I'm new here and new to old Yamaha receivers. This is also my first post. A while back I managed to lay my hands on an CR-820. It was bought an online thrift shop. It was a long shot, since I did not know about its internal condition, but what caught my eye was the outward condition was close to mint, looking at the pictures. So I went ahead and bought it. The intial prize was about 260 USD. However, as it turned out it was basically "dead" upon arrival. The only thing lighting up was the red diods, no sound from the speakers nor the headphone jack. Beacuase of this I managed to negotiate it down to 60$, since it basically was a non working unit that they had sold to me. If that is a ggod or bad thing remains to be seen.

I have read up on refurbisihing this kind of receivers on this forum. From what I have understood, this can be related to the protection curcuit being engaged. I have ordered a refurbishing kit to swap all the capacitors, starting on on the power supply and working my way down to the amplifier section, one bit at a time until the whole unit is done. Of course also clean the pots and push buttons. Also using a DBT. My intital question to this forum is as follows.

Are there any useful test I can do prior to starting the swapping process?

What other general recommenations do you have that would help me as far as determening what is wrong with the unit? Or, is the best route to start swapping components right away and see what happens? I do have some basic knowledge in electronics back from my school days, so I can work a multimeter etc. I do not have an ocsilloscope at this point.

Thank you for guiding me through this!
 
Register to hide this ad
Welcome !!!!

One thing you can do is bring up on the DBT with your DMM connected tot he speaker outs. and see if there is any DC voltage on them a few mV's is ok but anything higher suggests a problem and most likely bad output transistors.

There will definitely be a more seasoned tech along to get you to the specifics.

Also down load the manual from here in the digital documents forum or from Hifiengine . You'll have to sign up for that but its free.

So once you get the down load and it passes the DBT id check the main DC voltages are there on the power supply .

Athanasios
 
Hi!

Thank you Athanasios. I will follow the suggestions you have made. Hopefully I will have the DBT made over this coming weekend. This project is just getting started. I will report back whwn I have done the measurments.

Forgot to say that I have downloaded the service manual and schematics.
 
Last edited:
Hi!

So I completed my build of the DBT and measured the speaker outputs, non of them shows any presence of DC voltage, meauring in the mV range. Measured with an anlog meter. Now I need to wait for the components to arrive before I can begin the renovation.

A question: In respect of the transistors in the amplifier section, is it advcable to change them too? Or only if found defect? They seem to be original from looking at them.
 
A question: In respect of the transistors in the amplifier section, is it advcable to change them too?
Certain replace any known bad "actors" if fitted, eg, 2SC458LG. Top 10 list of problem transistors
upload_2022-2-18_8-1-54.png

Generally, I wouldn't replace others, exception being the differential pair TR701,2,3,4 which I'd replace with a hfe, Vbe matched pairs.
Also depends
 
Hi!
So finally the shipment arrived with all the capacitors (first order got lost somewhere so a new was sent). Will as soon as time permits start to replace them one by one. Would there be any general reccomendations as to how to go about this? As I have understood things, you normally start swapping the power supply and the amp section. Then you move on to the tuner and tone control boards. Any help is appriciated! Cheer me on folks!
 
Depending on your skill level probably best to do in stages so starting with the power supply (most in need?) makes good sense. Unually insert the smaller caps first if space is tight. Retest after completing each stage (power supply, L&R power amp, tone stage, EQ, protect)
 
Hi!
Well, I have pulled out the large filter caps and a few aother small caps around the power supply. Most of the are very low in capacitans compared to marked value when measured and the esr value fluctuated around 1.5% and 1.5 ohms. The large filter caps measured ~ 6460uf and esr 1.2 ohms vloss 2.6%. They are marked 10 000uF.
 
Hi!
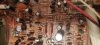
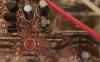
So, I managed to swap all the caps in the power supply and amp section. One mishap, I had managed to svap polarity on the 1000uF cap, but hopefully managed to salvage the situation. Might need to swap it for a new one, since it got really hot (yes, some smoke occured. But I guess this is what may happen, think I was a bit unfocused at the time) or a bit tired. So lesson learnt!!

Also saw that I had forgot to replace on cap and I couldn't recall the value of the one I pulled out. Had unfortunately gone in the bin with the others before I noticed. But looking at the schematic I think I found the value, 47uF. Please see attached picture. Please correct if I'm at fault, as it needs to be replaced with the correct value.

Managed to measure some voltage on the pins.

+27.4V
-13.8 V
+12.3
-12.2

No sound from the receiver at this point. So where to go from here?

Any help is appriciated in order to move forward!
 

Attachments

  • IMG_20220320_184251__01.jpg
    IMG_20220320_184251__01.jpg
    102.8 KB · Views: 27
Missing cap appears to be C710 4.7uf/6.3V, use a 16 or 25V replacement
EDIT: Should be 47uf/6.3V
upload_2022-3-21_7-4-55.png
 
Last edited:
Hi!

Thank you! According to the schematic I have, it shows that C710 should be 47uF. See attached picture. Is this a typo error then?

I have also need to clearify, I tested only with the tuner, but that part has not been recapped. Possibly no sound because of that.So I will hook something up to the aux to see if there is any sound.
 

Attachments

  • Screenshot_20220320-211434__01.jpg
    Screenshot_20220320-211434__01.jpg
    66.4 KB · Views: 6
  • Like
Reactions: mbz
Managed to measure some voltage on the pins.

+27.4V
-13.8 V
+12.3
-12.2

Assume these were taken at the +12M, +12, -12, +30 pins
Service manual has the following guiding values, note all voltages are +ve
+30 TR806e +30.1
-12 D805 Cathode +20.7V (maybe someone can confirm this should be -ve)
+12 TR808e +12.3V
+12M TR809e +12.3V

Check for significant DC offset by measuring dc voltage at bias TP1, black meter probe connected to chassis/GND.
Repeat for bias TP3 and GND, expect less than 100mV
 
Hi!

On TP 1 i get no reading.
On TP 3 i get 13.4 mV.

Could you please point out the other test points where to measure. Cant find the number for the transistor, but assume it might be the one with the heat sink.

For the diod, not quite sure what diod to measure. Find three in that area.

Thank you!
 

Attachments

  • 16478109340732786602383147876381.jpg
    16478109340732786602383147876381.jpg
    94.2 KB · Views: 13
Yes, correct, I measured on the four pins. Connecting to aux did not make any difference. Still no sound, but did not expect that either.
 
On TP 1 i get no reading.
On TP 3 i get 13.4 mV.
TP3 is great, TP1 reads 0mV or maybe OL in which case change voltage range to 20V or 200V...

+30 TR806e +30.1
-12 D805 Cathode +20.7V (maybe someone can confirm this should be -ve)
+12 TR808e +12.3V
+12M TR809e +12.3V
The transistors/diodes mentioned are for information only for mapping from the test points to actual location in the circuit. The measurements should be performed at the test points below,

upload_2022-3-21_8-39-8.png
 
Good Morning!
Managed to measure some voltages again, with the correct range on the multimeter. Here are the results:

TP 1 = 36.6V
TP 2 = 36.6V
TP 3 = 13.3 mV (but varies a tiny bit)
TP 4 = 17.4 mV (but varies a tiny bit)

+30 pin measures +27.4V
-12 pin measures -13.8V
+12 pin measures +12.3V
+12M pin measures +12.3V
 
Back
Top Bottom