• The move to the new server is done. There are some software and database maintenance updates in process. This has us passing the hat around to help out. We appreciate any donations. Seriously, even a dollar helps. The payment page may be found here - https://www.audiokarma.org/support.html

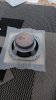
Yamaha NS-670 woofer repair help needed

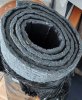
Rockwool -- fiberglass

Yeah, I've noticed. I did throw it away, vacuumed the loose stuff. Will put some proper damping like sheep's wool. Was scared it will fly across my room with woofers removed and my second set of speakers pumping - didn't wanna inhale this stuff. Had the same type of damping in my other set of speakers. And I replaced it too and never looked back - although with thick foam and felt mat - this time I think I could do better with Yammies. I'm starting to think the problem with water condensation could begin with fiberglass application all along - but it's just a wild guess.
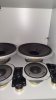
283337201_1397397857429269_6472827581020223336_n.jpg 281481396_384005286838417_2722514696611537334_n.jpg 281823025_738016503903935_307358422013568085_n.jpg 282063045_343303874400053_7277612297859239688_n.jpg 282786022_798922254407689_7013285416359214468_n.jpg
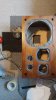
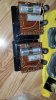
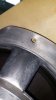
At the process I did inspect the other drivers, same condensated water on the magnets! Cleaned what I could. Along with wet magnets and some moldy stuff- wet wipes and paper towel came in handy. The other stuff won't come off - so I did leave it at that.

281440575_1700656166936600_8427929292066139374_n.jpg 281528060_2947596202053282_1333726978833064662_n.jpg 281750953_343820174344774_2087988333472196328_n.jpg 282858006_3067432456806954_359828314921373293_n.jpg 281837814_353187370138008_3053521570553351133_n.jpg
Cleaned Yammies or at least as far as I could. There's still much work to do. But it all will start with woofers, I guess. Then I want use proper damping material and see the state of those crossovers - there's one bent "pin" on terminal too. So I thought about making my own similarly to someone which redid the NS-1000s terminal->https://i.imgur.com/XQWxjw9.jpg because those "new" ebay ones are extra expensive. As expensive as my woofers repairs so its kinda not worth it- or maybe someone has different links? I would appreciate it. Thanks in advance!
 
Last edited:
The repair shop agreed to recap the crossovers along with woofers repair. So I will send those too. Fingers crossed.
 
Update found a carpenter willing to do them justice. So next step will be original veneer renovation. Repairing all the deep scratches and beat up corners. Filling, tarnishing, staining, varnishing- with matt or semi-matt varnish. Will try to choose similar colour to original Walnut.

He made a nice deal about 45 bucks with work and materials included. So if all goes well, they will look brand new.

Looked a bit for a proper new damping material found a low density sheep wool and wadding- didn't decide yet but it should properly replace the fiberglass. From what I've read its density shouldn't be very high. The original felt mat has this purpose so second damping material shouldn't be so dense and I'm going with that.

I already have a bubble wrap and some styrofoam boards to secure the woofers and crossovers for shipment.

I also bought a loot of washers, some nuts and metric screws to make distances so that the speaker does not rest on the suspension and the membrane secured in a cardboard box. The price was per kilo and it was also very cheap. I thought it was a pretty cool idea. The repair shop itself proposed such a solution when shipping by courier and also that it should rest on some soft styrofoam board in a cardboard box.

Will try to unsolder the crossovers on the weekend.

I still have isopropyl alcohol and I bought a chamois cloth so I'll try to clean the midrange drivers baskets one more time of those moldy stains.

If they still do not come off, I can use steel wool with a very low gradation numbered 000 - I think it equals the water paper with it's low gradation. Shouldn't scratch anything at all.

I'm also considering sending the tweeter and mid driver for some magnetization. If I'll do it all I'll do it all, I guess.

BTW can I use isopropyl alcohol to clean the magnets of all the drivers just to be sure the won't start getting wet yet again or will it be an overkill? Will ask the shop about it too over the phone tomorrow. Just to be extra sure.
 
Last edited:
Sunday unsoldering aka you're gonna have a bad time if you wanna unsolder this - loose all you're curses in Polish and start cursing in English and Japanese edition ;)
Part I
284596108_5983802494970156_7565361482648569538_n.jpg 284389977_343710571030326_1090325816963745078_n.jpg 284352148_399305928786804_9001845445734557797_n.jpg 284381956_1293281057872601_5217917668509189260_n.jpg 284189259_709004160305386_5076803319533514814_n.jpg 283925859_717095422828236_325422049324092463_n.jpg 283876762_384607070377846_844598360550463151_n.jpg 284046310_700499991235778_7545965331288264175_n.jpg283681787_685955479173927_9137039758834974217_n.jpg 284243206_405132541487601_2218365610800452534_n.jpg
Every, yes, every wire was put in through the connector soldered on then but around the connector 3-4 times and soldered again - sometimes there was a centimeter of wire... Around the connector...
 
Part II
284385440_538247044452794_7847123957253243856_n.jpg
Even on the crossovers

So I started to mark the drivers with crossovers numbers so I know which driver goes in where originally just an OCD thing.
283847226_433301811982237_6567788777483726288_n.jpg283969163_1464797317266514_5160299318570211417_n.jpg283970352_1594959950877074_1955769367249676735_n.jpg
And after a while I got a nice pace of going through this. Heat it up with my 1980s Polish soldering Iron, use some tweezers, and so on and so forth.
284278738_1059752741591908_5801798802834226576_n.jpg 284317260_754911918854420_3343507351224986498_n.jpg
Until eventually I emptied out both of Yammies.
284204153_5131358490283480_5299791274748278149_n.jpg
So carpenter will have something to work on. But will get back to this eventually.

For now - drivers ready for packaging

283813408_5151442221613039_2992304544481400120_n.jpg283981513_1166045407517395_2153206613176894302_n.jpg 284310233_721742379278483_7302956427575403986_n.jpg
And crossovers for recap and a few other things I have in mind. Those original main + and - wires look as a potential bottleneck I intend to remove, if I am going to recable them with OFC wires because otherwise there is no point in doing this. Will do a next part of post since I've hit the limit in uploading images.
 
Last edited:
283994858_1422003974889114_3079667067486553027_n.jpg 284054592_3046323032344896_5867493541049813573_n.jpg 284016423_905217127041782_1782118787128933162_n.jpg
So if the guy has the wire to make coils, why not replace it with solid copper wire in protection jacket? Cannot think about anything else which will fit into the original PCB solder points. So here's my thought. Along with recap of course. I want to change the terminal too while I'm out at it all since one is bent as hell.

Now, the project I started doing yesterday to secure them woofers in a nice package. The repair shop is gonna be surprised.
Secured a free baffle board and some other free stuff along the way. So I've scrapped the idea of using washers as spacers.
Part I
So here it goes:
284839430_1205254960246278_530929191565871823_n.jpg
Just a rough outline, that came into my mind. I've cut them with that in mind... And...
284196550_435575098394958_5650647544775678355_n.jpg
Rough product. not finished, just checking in stuff.
284646673_5093575704030345_1303272786864815237_n.jpg
Marking holes.
284225564_269891308644544_2349872026849876088_n.jpg
Splinter removal. Did a few of those. And eventually it transformed into this. Double screwed things:
284333651_537087368139817_8129030862268712583_n.jpg
Shipment securing frame for woofers v1.
284839430_351270400440262_4604597899630953162_n.jpg
I've hit the image limit again so making a new post.
 
Last edited:
Part II
284237064_4843428349099252_6288821007065692946_n.jpg
It looked good until I've noticed that v1 kinda failed.
284854738_1369746490174243_8829099321869675126_n.jpg
I needed some longer metric screws. But I've solved it today. Behold the v2. Well technically its v1.5 - changed one thing since I couldn't find any spring washers in m5 so I originally used m6s. But changed it yet again to two m5 nuts acting as spring washers.
284605181_1218616375546203_4871025078686495494_n.jpg 284876306_698198218148989_4855393859531930111_n.jpg 284920299_414165230566944_782814764006355619_n.jpg

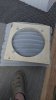
THE PACKAGING of first woofer + anti shift magnet protection I've thought of on the fly(since magnets are in need of cleaning either way I've used some tape too- didn't wanna have coils completely damaged or something if I can prevent it by even 1%):
284797986_550808636629013_8599411219423015379_n.jpg
Two styrofoam boards at the bottom, my securing frame + anti shift magnet protection v1 ;)
284587952_1817253851778312_7300262233779171745_n.jpg 285008608_2205221092978861_2455354791511491758_n.jpg
v2
285246863_533325088454815_641554026278112735_n.jpg
And a finishing touch of 2 styrofoam boards. I kinda ended up without anymore of styrofoam boards to package the second woofer. But will have more tomorrow, I think.
284838685_370790228235243_6126800657244287369_n.jpg
Cleaned what I could at the end. Will update you guys as things progress. BTW wide lens made my room look extra small :rflmao:.
 
Last edited:
So I also consider changing the terminal on the woofers itself. Was thinking about those caraudio ones and the ones I saw on the higher end Yamaha woofers, I think. The non soldering ones just put in the wire and screw it in kinda terminal. I could then use a thicker OFC wire like an 1.5mm in the main split that goes into the woofers. But dunno if those things will fit. Any suggestions? Will attach the image of original one in the box- I snapped a photo just in case. It looks like a pain to solder wires around in this closed space which it normally is. With my soldering skills I'm afraid to do this it's like in the woofers itself. I can see in the back of my mind solder dripping on lower suspension or me doing a hole in the membrane... So that's why this idea came from.
 

Attachments

  • Screenshot_20220602-080921_Gallery.png
    Screenshot_20220602-080921_Gallery.png
    510.8 KB · Views: 14
The package is shipped with 550 euros/590 usd insurance ;). 20kg, 2x woofers, 2x mids,2x tweeters,2x crossovers. I redid the woofers package to a more redefined "version" .

received_559057389184342.jpeg received_563036195213996.jpeg

More styrofoam and bigger "anti magnet shift" blockade ;). The rest of the stuff is in two carton boxes reinforced with styrofoam boards at each side + a whole lot of bubble wrap. Everything is packaged tight. So it's like bubble wrap pressing against another bubble wraps. Should be at the shop on monday. Will keep you posted.
 
Last edited:
Update, so the repair shop guy did all the other scheduled jobs he had.

And he now started to work on the first woofer. Fingers crossed.

I also found an curious bit of info which I confirmed with him. He was an engineer working in Polish audio firm on audio drivers. He may have even handled the drivers in my second set of speakers while it was in production in the 80s.

We will see how he handles the JA2501A woofers ;).

He also asked about the lower suspension/spider/spring pad kit because he may have to unglue it to properly center and magnetize the bass drivers. Any luck with that or is this a lost cause?
@ehoove @avionic
I'm worried now. But maybe it will go smoothly - I was under the impression he won't have to touch it. But, oh well. If they glued it like they soldered the wires it may prove to be difficult.

Meanwhile I have chosen caps for the crossover recap inspired by this thread https://audiokarma.org/forums/index.php?threads/yamaha-ns670-re-cap.678406/page-2#post-14826300

@rogerfederer

They are available all in-stock in Poland in online shop from Warsaw - I already emailed the repair shop! Those are extra cheap.

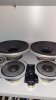
I also ordered new damping for Yammies and my second set of speakers -polyester wool mats, sets of two 600 x 330 x 30 mm mats.
I also decided to copy the felt mat damping in my second set of speakers too -inspired by what Yamaha engineers did. Which was the only original damping I did not touch in Yammies.
287203952_782769409558810_6881841982853315609_n.jpg 287405150_734476011008451_6100642472259487046_n.png
Got a hold of similar felt mat in Poland, so here it goes.

Polyester wool mats link -> https://www.thomann.de/gb/visaton_daempfungsmaterial.htm
I ended up buying 12 packages. Should be enough for four 45-50L speakers ;).

There was a bunch of sheep wool no names stuff online here in Poland and I was kinda scared it wouldn't be properly cleaned and secured - moths and other stuff plus much of this stuff was in loose fibres. So I made a bet on polyester wool mats which are clean and packaged tight from Visaton - an audio firm from Germany. Looks good. Lots of positive feedback in the comments on Thomann.

And I won't have to worry about moths eating up on the cloth surrounds on Yammies if I use those ;).

Lots of work ahead!

Excited to work on Saba damping next week on my birthday and see if I can improve things with new damping.

And I can take my mind of Yammie issues and not to think about the repairs all the time. Might as well do something else in the mean time.

Plus I will have a point of reference how Visaton damping will work in Yammies instead of fiberglass mats.
 
Last edited:
Yeah, so updates:
-I reached out to Yamaha through Yamaha Deutchland division, got in touch with audio department. Then got forwarded to Yamaha Europe Parts division it was a long shot and I suspected nothing will come out of it. But they searched in warehouses and no parts were found. Asked for some specs- long lost in the archives but they were kind enough to respond and I even got a case number.
- The tech successfully removed the dust cap with intension of reusing it.
- Spider was unglued in one piece.
- Magnet is opened already.
- Coil was scratched something was probably in the magnetic hole of the faulty woofer.
- He measured the voice coil already, has proper specs and proper number of turns, and he knows how to successfully redo it to proper specs.
- There's unusual size of voice coil former is used in this speaker, so its being custom made for me. It will take a while longer till at least 15 or July to put the first speaker back together.
- Apparently original caps have lost not so much of capacitance- he said its within 10% of loss. So I decided to order Daytons just incase and play on the original caps a bit.
- He's preparing for opening up Tweeters and Midrange drivers to clean them too since they had the same condensation as woofers. Then they will be properly remagnetized too.
- He said when his done with the first woofer he will measure the strength of remagnetized magnets out of curiosity because its one of the biggest magnets he's ever handled on any woofer. And it looks premium.

I have started to play with damping materials in my second set of speakers. Felt mat was a bust, too dense and I can't properly copy the same damping materials as in Yammies, so I've switched up to polyester wool only. It's not itchy at all and has similar density as Yamaha fibreglass and its in similar mats and you can cut it! Nice stuff.
 
Last edited:
Yeah, sorry for not posting in last couple of months but I have a really serious health issues. So stuff was put on hold. I'm still kinda am so my schedule is a mess.

Anyways Yamaha repairs are progressing in slow pace.

Current status. One woofer repaired fully, he cutoff the dust cap, put in new voice coil custom made, cleaned stuff, centered, reglued, remagnetized and put together, he reused the dust cap. Second woofer wasn't opened up since it was behaving ok, he only cleaned what was rotting from the outside and glued it from the outside too so magnet won't shift he also painted the basket so it would hold everything in place, the second woofer was remagnetized too.

As I wrote earlier hee measured the crossover and said the caps are in their tolerance so he did backdown on recap.

I decided to put the thing together on original caps but since I have all of their specs and Dayton Audio caps are available in Poland I will order them just incase.

And I haven't have had the chance to properly listen to them on original caps. So there's that too.

He haven't have changed the wires too on crossovers, so I ain't putting any new wires ofc wires in the loudspeakers enclosures too because there's no point. It should make minimal difference. And the repairs will drag out.

Unfortunately no new terminals on woofers, he did backdown on that too but I guess it kept the price down too.
Midrange soft domes and tweeters were opened up to make sure there is no moisture, cleaned and remagnetized too.
Total cost of all his repairs was around 120$.

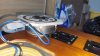
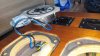
20221011_191658.jpg 20221011_191650.jpg
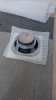
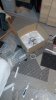
All stuff is back in one piece.

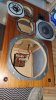
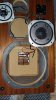
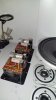
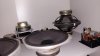
I also hunted down the original and rare first edition woofers for my Saba loudspeakers - you can see them in top right corner. Still have to redo those, original voice coils from the 80s in there. And they showed me how the current manufacturers repair department botched my current woofers in Saba. Will redo those with my tech and fixed up my current Saba woofers, will have him copy the original voice coils. I will end up with 4 rare woofers for my second set of speakers, I guess. But that's after my NS-670s will be put together.

20220721_185917.jpg20220721_185859.jpg
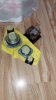
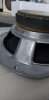
Magnets of both Yamaha woofers look like that now. Still have to clean the stuff up. But it's a minimal job. Still kinda disappointed he did not clean it... But anyways
20220721_185910.jpg
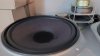
The repaired woofer

Some close ups of his job
20220719_192626.jpg 20220719_192645.jpg
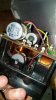
New voice coil is glued quite clean to the cone. Dust cap kinda sticks a bit, there's no glue edge. He did use minimal doses of it. Spider looks like it will hold. Minimal tear - lots of glue there. Looks promising.

I have CR glue used by many manufacturers of speakers to glue dust caps to cellulose cones, its thick so it does not drip, white when first applied, when it dries out it turns transparent. So I will do similar edge to original edge to make it look as close to original as possible.

For comparison reasons:
20220719_192623.jpg
Untouched dust cap. And original voice coil.

Woofer moves freely now, no scratching whatsoever but it was a dry test only for now.

Next month carpenter is willing to redo the enclosure veneer. I hope I will have time to focus on this.

Will try to keep you guys posted but in longer intervals now, I guess.
 
Last edited:
Back
Top Bottom