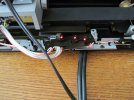
• The move to the new server is done. There are some software and database maintenance updates in process. This has us passing the hat around to help out. We appreciate any donations. Seriously, even a dollar helps. The payment page may be found here - https://www.audiokarma.org/support.html

Yamaha PX-3 photointerrupters and other issues causing problems

Fishead

Gone fishin' Steada just wishin'
Subscriber
I was making great progress with the recapping of my PX-3, everything went very smoothly and the caps that were no longer available were replaced with equivalents and all polarities were closely observed, checked, re-checked after which all the solder joints were checked again as well by touching them up just enough to get the solder to melt and harden again. I had help from a great tech at Mouser in finding appropriate substitutes for the caps and all but a few were identical in specs. The couple that weren't were the same in mF but a bit higher in voltage, which I have read and was told that would be OK.

So, when I closed the table up I was surprised that I got NOTHING when I touched the 30 button, aside from the light coming on. The same went for all the other buttons, lights came on, but no movement. The fast forward and reverse functions are gone now too. Previous to the recap, I had only the 30 button NOT WORKING and the arm would not lift when at the end of the record. Now none of that works. I can get the platter to spin if I physically move the arm towards the record and while it spins, I have no way to drop the tonearm down nor does it then respond to any of the buttons. I can stop the platter spinning by physically moving the tonearm back to the rest position. I inspected the photo interrupters and they are all shining quite brightly, adjusted the position of those and still.....nothing.

I'm hoping someone can give me some suggestions as to how to "awaken" the thing......is there a "reset" button somewhere that I don't know about? I'm at wits end after working on this all day so I'm going to go to sleep and hope the answer comes in a dream or that someone here can enlighten me. I took pictures of everything when disassembling the table so am sure I got all the cables on there right again. They basically only go one way, so not much to screw up on there. I'm so bummed! Hope someone has some ideas......thanks in advance amigos.
 
Register to hide this ad
Maybe reconfirm that all the connectors to the boards are seated correctly. With that kind of board setup, it's quite easy to miss a connection or misalign the connector, leaving a board non-operational. It's a possibility in particular if you disconnected the boards to solder. Even if you think they're all connected, it won't take long to check again.
 
Thank you for your suggestion. I have disconnected and reconnected those connections at least 3 times......this last time, I did so very carefully and refreshed the solder points thinking all that connecting and reconnecting may have created a cold joint. One question though, there are 3 heavy gage wires, two red and one blue, that connect to the main board and appear to be coming from the power transformer in a way I'd not seen before. They literally wrap around a post and the only way I could see of getting them off to remove the board was to "unwrap" them and then re-wrap them on there when re-assembling things. Why would those not have a dedicated connector and instead be wrapped thusly? It does not seem like a good "patent" if you ask me.....is there a way to do this better? I thought about just soldering them on but then I got to looking carefully and noticed that the posts they go on are connected via some plastic housings and getting them hot would almost surely melt that, so have simply re-wrapped them best I could. After doing so, I get right at 21VAC between the posts that have the blue and red wires connected to them. And yes, I did mark one of the red wires so I knew which post it went back on to. Such a mystery......
 
I've seen wire-wrapped posts on some turntables; not sure if they used that much beyond the 1970s. I believe it was done with a tool, so rewrapping it yourself wouldn't be as neat, but the connection at least would normally be fine. I expect a lot of people add some solder too if they can do it without overheating anything. Or they avoid unwrapping at all if they can. Unfortunately I'm at a loss about the cause of your problem, so I hope someone else has ideas. I mentioned the connectors because with that type it's easily done to misconnect or forget a connection, and it happened to...er, someone I know.
 
Yes, the wrapping was a little difficult but I managed to get things back on to where they appear almost identical to how they were originally. Took some time and patience, but yeah, a tool would be far more ideal! A light touch with a pair of needle nose pliers was the way I did it and got the wrap to look almost factory, but the bigger problem is why doesn't my tonearm move and none of the buttons work, despite all lighting up???
 
Thank you for providing all of this information. I'm pretty limited in terms of being able to read schematics so this will be another challenge no doubt.....thing is, aside from the 30 button and the thing not lifting at the end of the record, everything else was working so it literally has to be something that I did while replacing the caps. Also, the fact that all the lights come on when I push any button......I just don't get the corresponding action from the tonearm. I'm pretty sure the optical sensors are OK (I've called them photo interrupters and maybe that's a mistake??) as they light up with what appears to me to be a good, strong beam and I keep going back to what all was working before I did the work. You'd think that if the optical sensors were bad or going bad, this would have been evident prior to my job. I was hoping the recap would get the 30 button and the arm lifting at the end of the record and returning to rest working again......not there yet!
 
Yep, that's why I mentioned that......only two were not polarized, the rest were and that was the first thing I did when I was finished, went back and checked each cap I replaced and observed that I had gotten that right. I'm thinking that somehow there is no power going to the arm but it will have to wait until tomorrow before I have time to pull it apart again.
 
I think it‘s the photointerrupters. If the LED‘s appear bright it does not mean they are OK.
I had an identical problem after „improving“ something in one of my PX-2. It was working before I opened it, and, surprise, auto functions stopped working after I was finished.
In the other PX a previous owner had replaced the resistor in series with the LED‘s with a lower value to shift their brightness. Obviously a temporary workaround for aged photocouplers. R37/680R is the resistor in the PX-3.
Just anecdotal, a few days ago I replaced the signal cable in my PX-3 with a better one (Mogami 2534). Afterwards the platter did not stop any more. The right limit microswitch of the tonearm was not working any more. I did not touch this area at all while I was working on the TT. These machines are genuine divas.
 
These machines are genuine divas.
Amen to that!!!

I'm just wondering what would have changed because as I've said, everything but the 30 button and the lift and return at the end of the record were working before I changed the caps.......that's what has me wondering and logic would suggest that it's probably something I did, perhaps disturbed something that is delicate although I did by-and-large handle the boards by their edges, only on occasion did my hand touch any of the traces or the mounted components aside from the ones I was removing.

I gotta go see if I can read some voltages but I'm not much more than a novice when it comes to the electronics end of things. The schematic previously offered is no doubt what would help to find the problem but unfortunately, I never learned to read one of those, mainly because I didn't have much of an understanding of electronic components or electricity for that matter. It's always fascinated me though and each time I do one of these projects, I learn a little more and have a lot of fun. At this point, however, the fun has kinda morphed into a mix of curiosity and nervousness as I'm starting to feel no small amount of intimidation!! :dunno: One step at a time and I trust it will get resolved. I've had several components that were fixed with the help of those here who know about these things so I'm hopeful.
Thanks for your kind observations @Dr. Ear, that is not an uncommon problem with this model of turntable and it may very well turn out to be the case. Still, why would there be zero response from any of the buttons, except the power and 45/33 selector which both still work. I was able to test this by moving the tonearm inward until the platter began to spin and then hit the button for a speed change and it worked flawlessly, both ways. So that much functionality I have, just the other set of buttons to the right of the platter are totally not working aside from the lights coming on.
 
So, when I closed the table up I was surprised that I got NOTHING when I touched the 30 button, aside from the light coming on. The same went for all the other buttons, lights came on, but no movement. The fast forward and reverse functions are gone now too.
everything but the 30 button and the lift and return at the end of the record were working before I changed the caps.......
So, let me get this straight... before your recap job, the only things that did NOT work were:
  1. 30 button,
  2. end of record, lift and return.
Now after your recap, NONE of the buttons do anything, but the button lights turn on when the button is pressed.

Correct?
 
It could be possible due to failure of the micro switch under the tonearm for limiting the tonearm lift motor. Normally in linear tracking turntables there is tonearm lift/lower motor which has limiting micro switches (two nos) for stopping it in raised position and in lowered position. If the said switch is faulty or does not operate as required, then the whole logic of the automatic function is held up as the microprocessor or ic does not get the required signal to start or operate other functions. Hence no other function will operate.

I think it might be your case. I am not aware of this particular unit, buy most japanese turntable manufacturers designed their units that way.
 
Thank you @Robert Lobo! Please, if you can, describe how one might remedy this condition. It is certainly the case that no functions will operate. How did I possibly cause this condition by recapping the boards?
 
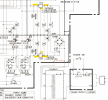
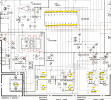
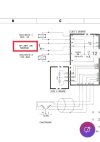
I could locate it on the service manual schematic diagram (attaching herewith). You will have to find it where it is physically located (should be under the tonearm base).
 

Attachments

  • IMG_20250321_140841.jpg
    IMG_20250321_140841.jpg
    51.7 KB · Views: 10
Thanks for this, @Robert Lobo, I'll have a little time today to take a look at it. Being the original owner, I still have all the documentation which includes an owner's manual with a schematic on the last pages. Imagine that! A schematic included in the owner's manual?!?! Ahhhh......those were the days, eh? Now if I could only make sense of the dang thing I'd be in binness!

As an aside, not related to this particular issue, the voltage switch has both 110 and 120 Volt settings. I measure the voltage from our wall sockets at 122V, so should this switch be set to 110 or 120V? Always wondered about that.....

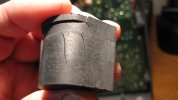
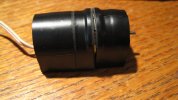
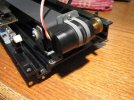
Also, in examining the motor for the tonearm drive I notice that it is cradled in a fairly heavy rubber basket of sorts. Mine is showing a fair amount of cracking and I wonder if this should/can be addressed and how?

IMG_5218.JPGIMG_5219.JPGIMG_5220.JPG
 
Last edited:
I decided to make a "yoke" of sorts using electrical tape, cut to the proper widths, and applied just tight enough to close the cracks and hopefully maintain the integrity of this insulator without losing its properties.....any other ideas?

IMG_5221.JPGIMG_5222.JPG

Looking pretty happy on there now:

IMG_5226.JPG
 
Last edited:
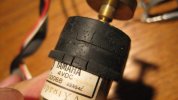
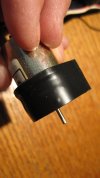
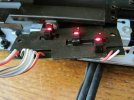
Here are a couple shots of the optical sensors, or is it photo interrupters (what is the proper term for these?) and I know it has been said that it doesn't always mean they're good if they're bright, but these are certainly bright to my eyes.....

IMG_5223.JPGIMG_5224.JPG

In any case, I'm still thinking there is something with the power. When I connect the motor power alone to the main board (#1 connector), the motor starts and the arm carriage begins to move in the direction of the record and if I leave it connected, it will go all the way to the end of the track with the motor still running. If, however, I do this with the #2 connector attached to the main board, the gray wires, it stops everything.

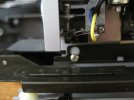
I also think I've found that "up" switch in the rear of the tone arm:

IMG_5225.JPG

That the one? In any case, the contacts are definitely touching, so would appear to be in the closed position. I do see that when I push the DOWN button, the contacts open. If I then push the CUT button, those same contacts will close again so it would appear I'm getting power to that part of the mechanism.
 
Last edited:
OK, making a little progress as I'm studying the schematic and now think I know enough to test the IC's.

IC 4 reads:
pin #1 = 27.4 (should be 27.2)
pin #2 = 11.93 (should be 11.7)
pin #3 = 0 (should be 0)

IC 5 reads:
pin #1 = 0 (should be 0)
pin #2 = -11.93 (should be -12.3)
pin #3 = -27.57 (should be -27.2)

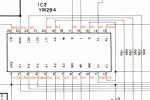
IC 2 reads: (here's where it gets wonky....)
pin #1 = 11.93 (should be 11.7)
pin #2 = .82 (should be 1.5)
pin #3 = 4.93 (should be 1.0)

pin #4 = .86 (should be .8)
pins #5-10 and 12 = 0 (should be 0)
pin #11 = 0 (should be 11.6)
pin # 13 = 11.27 (should be 11.0)
pin #14 - 17 = 0 (should be 0)
pin #18 = 11.92 (should be 0)
pin #19 = .053 (should be 0)
pin #20 = .093 (should be 0)

pin #21 = 0 (should be 0)
pin #22 = .25 (should be 0)
pin #23 = 0 (should be 0)
pin #24 = 6.82 (should be 6.5)

So IC 4&5 appear to be OK, right? However, IC 2 has at least 7 faults, the most glaring of which is #11, which should be 11.6 and is 0, and #18 which should be 0 but is 11.92. Any idea would be appreciated.....
 
Back
Top Bottom