• The move to the new server is done. There are some software and database maintenance updates in process. This has us passing the hat around to help out. We appreciate any donations. Seriously, even a dollar helps. The payment page may be found here - https://www.audiokarma.org/support.html

Yamaha YP-D10/D8 VTA Adjustment

Way to go Bimasta! I have been looking for the answer to this question for awhile now. I also have a mint condition YP-D8 that belonged to my best friend. I was with him the day he purchased it and he gave it to me last year after he lost interest in vinyl. I have it now and it needed a little work. The damping fluid had dried out but that was a pretty simple fix after removing the cueing mechanism, cleaning and lubricating with 500000 CST Silicone damping fluid. I read your instructions and will give it a try. I would love the VTA to adjust easily again. Right now mine is adjustable but you really have to apply a lot of pressure to move it up and down and it definitely isn't smooth enough to do while the stylus is engaged in a groove. Thanks for the information and I will give it a try one weekend when I can devote the time.
 
Older thread I realize, but Bimasta (or others) ... what did you use for lubrication of the VTA once the sleeve was removed?
 
Long time ago. IIRC — light grease. It should go/up down easily, and the lock-knob should immobilize it. Caution: Don't overtighten — I saw a photo: someone twisted too hard and broke the knob completely off, rendering the mechanism useless, frozen in position.
 
Hello, I have an YP D8 also and my doubt goes a bit earlier... I cant manage to move the retaining(lock) T piece on the back on the tonearm that releases the TA adjusting. I tried to move it but was a bit afraid of forcing it by turning it too hard on the wrong away. So my question is:
If you re facing the turntable, should de T lock be turned clockwise or counterclockwise to release the VTA?
Sorry for the newbie question! Would be thankful if someone would help ! :)
 
I offered to post a solution months ago (post #2) but never did. Apologies to all — and Hitachi, thanks for your patience. Ksteufert's recent post prompted me to get off my ass.

I have the D8 tonearm right in front of me. It's a very good arm. I've used it with both MM and MC with great results, so it matches a wide range of compliances. In fact, I got a second YP-D8 TT that was badly damaged in other ways, just so I could recycle the arm to use on another table. It's that good. It was designed by Micro Seiki, has extremely low bearing friction, and even provides VTA adjustment on-the-fly — at least it should. They sing its praises on the Vintage Knob...

http://www.thevintageknob.org/yamaha-YP-D10.html

Mine had the same problem you all describe — it took so much force just trying to turn that adjustment-ring at the bottom of the post, that the stylus skipped all over the record. Even when not playing a record, it was impossible to adjust VTA. Useless. So many of you have the same issue, it must be common. Here’s how I fixed mine...

The entire arm assembly slides up and down that thick, chromed post (at least it should). I took the tonearm off the turntable. Then I took the whole arm assembly off the post to see what’s inside. There’s a smooth white plastic sleeve wrapped around the post (with a slit down the side for removal). It was lubricated with brown grease which was old and clotted — more like glue than lubricant. The same grease fouled the adjustment ring and the fine thread on the post which it engages.

Problem solved! It seemed an obvious reason why it wouldn’t move up and down anymore. So I cleaned all that dried-up grease off, relubed it, and reassembled. Like new, should be perfect now. But guess what? No change! Still frozen in place.

I was baffled. As an experiment, I removed the plastic sleeve completely. Now it worked perfectly — the adjustment ring turned easily, the arm glided up and down smoothly. I could change VTA while the record played (no skipping) so I could hear the effect in real-time and “tune” VTA perfectly. And just as importantly, the arm locks in place with total rigidity once VTA is set.

To verify my results, I put the sleeve back in — and the mechanism was totally jammed again. I repeated this two or three times, trying every possible variable (there aren’t many). With the sleeve in, it jammed every time — without the sleeve, it worked perfectly every time.

So I just left the plastic sleeve out. I went through some head-trips about it — how could I be smarter than Yamaha? — it must have worked when new, and I saw nothing to show why it no longer worked. The dead old grease was a logical explanation — but wasn’t after all. And that sleeve was in perfect condition when I put it back in — smooth and shiny, no damage, no deformation, not even a scratch freshly lubed with high-grade aerospace stuff — and still didn’t work.

Every time the sleeve was in, it jammed. And every time it was out, it worked. That sleeve been out to this day, a dozen years later, and the VTA-adjustment is smooth and easy.

That’s the “fix”. It sounds odd, I know, but it works. I wish I could explain why, a solution is never totally satisfying if you don't know why. The only thing I can think of is maybe that plastic sleeve swells up over time — any thickening would jam the gap it needs for free movement.

I hope it works for you. If it doesn’t, it will only cost an hour of your time. You won’t damage or alter anything and can easily restore it to its original condition. If you try it, please let us know your results. And if you figure out the "why" please enlighten me.

Thanks for your post. Please hint some steps how to remove the whole tomearm unit. I don't know where to start. Thank you
 
Forget about you? Quite the opposite — I shudder with guilt daily that I haven't finished what I promised.

I won't bore you with the cataclysms of business, family and health matters that have consumed me 24/7. Suffice to say I will finish that damn VTA thing and I'll PM each of you so it doesn't escape your notice.
I have Yamaha yp d8 and it works like a champ. However I cannot turn the wheel to adjust the height of tonearm. It is hard a s seem not move when I try to turn. As now I have to use 6mm mat to fit the Denon DL103 (this cartridge is shorter in height compared with Audio Technica VM540ML). I am thinking about to disassemble the tonearm but I don't know where to start. Please help with some photo.
Thank you much

I realize this was almost a year ago but I just got one these arms myself and VTA adjuster was pretty well seized. There was only couple mm of smooth travel around the middle of the range and trying to go lower or higher than that it just seized.

The arm base seems to have 3 screw holes underneath, so you'd have to remove those. I don't know where the wires would terminate because I have only the arm, but you'd need to unsolder those, it's 4 colored wires and one thicker black ground wire that come from the arm.

Once the arm is removed from the turntable, at the bottom there are two screws that go into the height adjustment pillar, you need to unscrew those and the arm will come loose from the base plate. Then you need to rotate the VTA adjuster like you were lowering the arm, ie. so that the pillar raises up from the top. I had to squirt some penetrating oil around the pillar to get it moving beyond it's happy place and still it was pretty hard to turn the adjuster. Once it's moving, just keep turning until you run out of the marks that show your position, then keep turning some more and eventually the pillar will raise high up enough you'll start to see a white plastic collar around it. Keep rotating until that whole collar is in view and remove it, if it's already seizing it's probably broken already like mine was. Then just reverse the procedure, it should be turning smoothly now. Then when you are in range on the adjuster, screw the arm back into the base plate with those two screws you removed at the beginning. You'll need to rotate the pillar so that the holes in the pillar and the base align, it might be a bit fiddly but it's enough to get one screw started and then it's easy to get the 2nd one in.
 
Thanks for answering that muovimies. Esteemed member bimasta passed away in 2021.
 
Thanks for this thread, and for AK! I am going to meet a YP-D8 tomorrow, and remembered that the last D10 I met had a seized arm; along with that unit's busted-up plinth, I passed. But the D8 has been a long-wanted unit of mine. Glad I'll be able to work on it if the VTA mechanism is seized.
 
Came home with the D8. Tried to adjust the ring at seller's place, and wouldn't turn. Brought home, I let a few drops of 99% isopropyl fall into the seams, and the ring started to move! However, no observed change in VTA. Bringing to my tech, but wonder if there are any insights here re: that behavior. Thanks.
 
It IS very hard to turn, period. Oil helps, (I used penetrating oil, but I think any light oil would work) mainly because that damn plastic sleeve is simply binding it up. It was a chore to get mine out and you have to be very careful with the arm when it is removed to not damage anything. I wrapped a cloth and jar lid remover rubber around that adjusting ring, and resorted to large vice grips for a section. The threads are very fine. Once out, clean off the excess oil and it is easy and smooth to operate.
 
I found the pics I took when I did mine. It was certainly not as easy as @bimasta suggested, mainly because he only had the arm. When doing this with the whole YP-D8 it becomes more involved as the auto shutoff has to be readjusted when that part is removed. Removal is as he said.

Access the arm underneath as shown,(obviously remove the platter & dust cover. Dustcover slides to the right when up, then pull off) remove the protective cover over the solder locations. I upgraded the RCA cables on mine so yours will look different. Desolder the phono arm wires. I HATE working with wires this fine. (First 3 photos)

The 3 large shiny philips screws hold the entire arm to the plinth. Leave them for last. The two smaller philips screws towards the center are partially blocked by the cue lift assembly and auto shutoff assembly. Loosen the 2 black 3mm allen set screws. It helps to have the type with the ball end, as that allows the allen to gonin and turn at an angle, like a swivel. That assembly slides off, allowing access to the screws that also hold down the other half of the auto shut off trigger. Then remove the brass spacer underneath it.

Needless to say, take plenty of pics of your own, for reassembly.

Now you can unscrew the arm base from the plinth.

Removing the stuck chrome shaft adjuster is a royal PITA. The plastic part that has been mentioned has swelled from the grease it has been in for 50 years, so it is too thick and is partially the caust for the binding. The grease has also turned to glue, and has to be removed with alcohol, swabs and a toothbrush from it and inside the arm, once the chrome shaft is removed There was lots of green corrosion that is the copper from the coated brass arm base under the plating leaching through as well.

I had to remove the shaft by holding the adjusting knob with padded channel locks. You want the chrome to unscrew and eject from the top. Inhad to reinstall the two small screws to the base of the chrome shaft and use a scredriver shaft to turn it, while holding the knurled nut in okace. It is very awkward and tou have to be very careful not to damage the antiskate assembly. VERY careful.

Like @bimasta, I tried it again with the cleaned and lubricated parts with the plastic sleeve, back together, but no go. Too tight.

Besides the plastic sleeve swelling, the entire assembly, having been clamped together for 50 years now has a slightly smaller ID. If there was a non damaging way to expand it, I bet it would work with the plastic “slider” which is all that the clamped arm base is supposed to use to hold the arm assembly to the base. We remove the plastic sleeve which makes the chromed part quite loose within the clamping section, then clamp it further to lock it in place. Be careful to not over tighten when clamping. Just enough to hold it in place. My T handle tightening screw needed hardened grease removed as well and to be relubricated to prevent seizing in the future.


Once all cleaned up and greased, reassembly is the reverse.

The location of the auto lift part on the shaft determines when it will lift at the end of the record. It is shown in the service manual where to set it. That is the coarse adjust. There is also a fine adjust screw as well as the VR on the electronic board. That took me quite a bit of fiddling and following the directions to get it right.
 

Attachments

  • IMG_2768.jpeg
    IMG_2768.jpeg
    337.4 KB · Views: 9
  • IMG_2767.jpeg
    IMG_2767.jpeg
    309.3 KB · Views: 6
  • IMG_2766.jpeg
    IMG_2766.jpeg
    324.3 KB · Views: 6
Last edited:
More pics as described above.
 

Attachments

  • IMG_2779.jpeg
    IMG_2779.jpeg
    201.7 KB · Views: 12
  • IMG_2778.jpeg
    IMG_2778.jpeg
    193.1 KB · Views: 11
  • IMG_2777.jpeg
    IMG_2777.jpeg
    170.1 KB · Views: 11
  • IMG_2776.jpeg
    IMG_2776.jpeg
    157.1 KB · Views: 15
  • IMG_2775.jpeg
    IMG_2775.jpeg
    181.7 KB · Views: 11
  • IMG_2773.jpeg
    IMG_2773.jpeg
    274.5 KB · Views: 10
  • IMG_2771.jpeg
    IMG_2771.jpeg
    235.5 KB · Views: 12
  • IMG_2770.jpeg
    IMG_2770.jpeg
    240.8 KB · Views: 12
  • IMG_2769.jpeg
    IMG_2769.jpeg
    234.9 KB · Views: 12
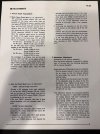
The relevant sections from the Service Manual

I rate this as difficult. It took me about 4 hours to get it done and right.
 

Attachments

  • IMG_2782.jpeg
    IMG_2782.jpeg
    258.4 KB · Views: 3
  • IMG_2783.jpeg
    IMG_2783.jpeg
    235.7 KB · Views: 6
  • IMG_2781.jpeg
    IMG_2781.jpeg
    291.9 KB · Views: 3
Back
Top Bottom