• The move to the new server is done. There are some software and database maintenance updates in process. This has us passing the hat around to help out. We appreciate any donations. Seriously, even a dollar helps. The payment page may be found here - https://www.audiokarma.org/support.html

Magnapan Hardwood frame upgrade begins - MGIIIa

ehoove

Old & New - Carpe Diem
Staff member
Admin
Super Mod
Moderator
Subscriber
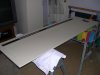
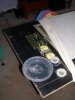
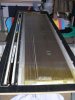
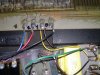
I have been thinking about this move, and have talked about it enough, so here we go. I included some pics of the tear down, and in them you can see just how many staples I put in the bottom of each speaker, what a PITA to remove. I must say that the nice set of folding pliers I got from my AK Secret Santa worked perfectly. Thanks Santa! You will also see were I previously repaired the voice coils using peter Gunns DAP method. Almost two years of mucho play time and they are holding up nicely. The Ribbons new at the time of repair show no signs of wear either. I plan on replacing all the wiring with silver stranded 22 ga, altough I might use OFC Copper on the base panels. Any thoughts? The Midrange/Ribbon Crossover will go outboard, and the input plate will be set up with upgraded 5 way connectors for tri-amping. I will also do away with the staple panel attachment method and use a more solid method to hold them in place. It looks like maple will be the wood used, mainly due to availability at a very reasonable cost. A friend is helping me with the frames, and we hope to have them done by next weekend so I need to get some parts ordered asap!
Regards,
Jim
DSCN2864.jpg DSCN2865.jpg DSCN2866.jpg DSCN2867.jpg DSCN2868.jpg
 
Register to hide this ad
Here are some more pics of the MGIIIa's minus the frames. They take up less room, but dont sound very good!:D
Regards,
Jim
DSCN2869.jpg DSCN2870.jpg DSCN2871.jpg DSCN2872.jpg DSCN2873.jpg
 
I agree, but I still have not decided on whether to finish them natural or cover them with no side styles.
Regards,
Jim
 
After some thought, I might have to go natural. It might improve the WAF!
Regards,
Jim
 
Just picked up another Acurus A200 Power Amp

My friend and I had a planing meeting on the hardwood frames for the MGIIIa last night and reviewed our approach to several issues. I still plan on duplicating the standard frame and covering them with the stock Magnapan socks to create a white monolith with no side rails. I will be able to install the side rails should I decide to sell them at some point in the future. My hope is that this upgrade will take the MGIIIa's to a level that will make them keepers for a very long time.
I also picked up another Acurus A200 for the ribbon tweeters which will allow me to Tri-amp the MGIIIa's when the frames are complete. I need to decide between an Behringer CX3400, the Behringer DCX2496 processor, or the Ashley 3 way crossover. I like the simplicity of the 3400, but the DCX2496 sure offers a lot more flexibility. Decisions, Decisions .....
Regards,
Jim
 
Real cute Jim. I was really trying to not let that Magnestand page and pictures force me to make a new frame. Now here you go being an enabler. :D It's funny you picked now to do it as I've been looking around in just the last few days myself.

So tell me, it the mylar attached to a sub frame stapled into the MDF frame? I've never had the socks off of my 2.5Rs.

Keep up the good pictures so we can learn from you!
 
Real cute Jim. I was really trying to not let that Magnestand page and pictures force me to make a new frame. Now here you go being an enabler. :D It's funny you picked now to do it as I've been looking around in just the last few days myself.

So tell me, it the mylar attached to a sub frame stapled into the MDF frame? I've never had the socks off of my 2.5Rs.

Keep up the good pictures so we can learn from you!

If you look at the right side opening of the empty frame you can see the staples that the frame fits under. Also the metal frame the mylar is attached to is visible in the picture of the frame with the mylar assembly still installed. I only removed the left side staples and slid the mylar frame out from under the staples on that side. The metal frame the mylar is mounted to is maybe 1 1/2 inch wide. It is installed like a picture in a picture frame, and it was amazing that it was still tight after 22 years. The mylar frames have a 1987 quality control Number on them.
Regards,
Jim
 
Last edited:
Excellent. I have to rip one of mine apart. Now I have someone to bug with questions....b:thmbsp: :D

:lurk:
 
If you look at the right side opening of the empty frame you can see the staples that the frame fits under. Also the metal frame the mylar is attached to is visible in the picture of the frame with the mylar assembly still installed. I only removed the left side staples and slid the mylar frame out from under the staples on that side. The metal frame the mylar is mounted to is maybe 1 1/2 inch wide. It is installed like a picture in a picture frame, and it was amazing that it was still tight after 22 years. The mylar frames have a 1987 quality control Number on them.
Regards,
Jim

That makes sense. Is the mylar glued to the metal subframe?

It is hard to believe it'd still be tight with only staples holding it, that whole piece of MDF vibrates pretty well with some louder tunes playing.
 
That makes sense. Is the mylar glued to the metal subframe?

It is hard to believe it'd still be tight with only staples holding it, that whole piece of MDF vibrates pretty well with some louder tunes playing.

Yes, the mylar is glued to the metal frame. I was amazed how tight the panels remained, they were played at some rather high volumes being bi-amped and all.:D

My friend who does sound reinforcement, and runs 3 Behringer DCX2496 crossovers just called and picked me one up at a hell of a deal. So the parts are in place, I just need to wire them up Tri-amped direct to each section of the panel and ribbon and off we go!!:banana::banana: This is gonna be a lot of fun!
Regards,
Jim
 
Last edited:
Here is what has taken place. The maple frames are roughed up and will be planed then routed to match the originals, I have acquired another Acurus A200 for the Ribbons, and both a Behringer CX3400 analogue 3 way crossover, and a Behringer DCX2496 digital crossover. I thought I would give both a try, and sell the loser. Bought gold plated binding posts to install in the new connector plates, and bought 4 more Balanced to RCA connectors for the crossovers. I also picked up a new ZU Birth + power cord for the A200 to match the other 2. I also have constructed new runs of silver speaker cables for the ribbons, and silver interconnects for the ribbon output of the crossover as well, so I'm good to go on the supplies.
Now I just need to get the frames squared away, and put everything back together, I have also treated the voice coil side of the panels with Touch n, Go per Peter Gunn's recommendation. This is getting interesting guys!:banana::banana:
Regards,
Jim
 
:lurk:

enjoying this one.

I told my buddy that he needs to keep all the measurements etc. Because I had a friend in the shadows that might want a set of hardwood frames as well.:D
Regards,
Jim
 
Very Nice Jim!! Sorry I missed the start of your thread on this. The Maple will look Great and sound just as good too! I think of the three modded pairs I have heard the best were done in Maple and Sapele. I Just purchased all the Maple to do mine so I will be watching with intrest!! :thmbsp:
 
Maple will look good. As long a you picked some with good grain. I made a handrail for a church out of maple. it was absolutely stunning..
 
I have also treated the voice coil side of the panels with Touch n, Go per Peter Gunn's recommendation.

I'm following this thread with great interest. Can you elaborate on the "Touch n' Go" product? I've never heard of that before. Thanks.
 
Back
Top Bottom