• The move to the new server is done. There are some software and database maintenance updates in process. This has us passing the hat around to help out. We appreciate any donations. Seriously, even a dollar helps. The payment page may be found here - https://www.audiokarma.org/support.html

Magnapan Hardwood frame upgrade begins - MGIIIa

I'm following this thread with great interest. Can you elaborate on the "Touch n' Go" product? I've never heard of that before. Thanks.

Sure, It is a type of elastic paint that is also a DAP product that Peter uses in his Magnestand product over the Magnapan Miloxothene after the voice coils are repaired using Dap cement on the voicecoils. It stops any delamination of the voice coils. It is called Touch n' Tone BTW My bad.

http://www.indiespinzone.com/magnestand.html

Regards,
Jim
 
Last edited:
The 2nd Acurus A200 arrived today! Checked the DC offset and am listening to it now powering the Infinity Primus 360's. I'm also using the Zu Birth II power cord that came as well. (might as well match all 3 amps and burn it in as I finish the frames) Also the spikes for the frame stands arrived as well. Things are coming together!
Regards,
Jim
 
Mission Control all set

Well, all items are in place and working! I just need to finish the MGIIIa's and get every thing in place. I need a stand for the Thorens, and a stand for the amps as well, but everything is coming together nicely. The pic is a temporary setup to check everything out
Regards,
Jim
 

Attachments

  • DSCN2880.jpg
    DSCN2880.jpg
    61.6 KB · Views: 123
Looking Good so far! Now where`s the pic`s of the progress on those stands :scratch2: :D?
 
Man, am I missing my Maggie MGIIIa's!

Terrible weather here in Maryland (almost 50" of snow in one week, 31" + 18" with high winds) has halted progress on the frames and my components are siting in the corner staring at me pathetically. Im using a pair of Infinity Primus 360's and my subwoofer setup, but it sure isn't the MGIIIa's. Damn all this power and no where to use it! oh well at least I'm ready. They hope to get the 6 ft drift away from the shop holding my frames hostage tomorrow or Wednsday. :sigh::sigh:
Regards,
Jim
 
Update! Update!

Talked to my friend last night, and he is finished with the framing and milling, and has moved on to the routing. We plan on working on the frames and stands on Friday, and hope to have them finished this weekend to the point of moving them back to the house so they can be reassembled and finished off. I will post pics on Friday evening of the progress. This is great news as I am on Vacation from work next week and will have time to play!:banana::banana:
Regards,
Jim
 
You lucky dog! I've noticed that all the good toys arrive at my house the Monday after vacation is over. :D
 
You lucky dog! I've noticed that all the good toys arrive at my house the Monday after vacation is over. :D

That's been my experience as well, but it looks like I got lucky this time.
Regards,
Jim
 
I have to get a new table saw so I can do my second pair of SMGa's. But first, I may have to do some restoration work on the wires as I think they may be lifting but wont know till I remove the socks.

Can't wait to see your new frames, Jim.
 
Frames are done! Pics!!

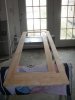
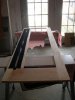
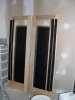
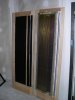
OK, we finished the frames today, and they are in da house! Some final routing, and everything fits fine. The frames are maple and in the last few pics you can see I fit the panels and ribbons to check the fit and plan a stratagy for mounting the mid/bass panel. I have decided to use the stock covers but not the side rails or stands. The frames are 4 inches shorter than the stock frames. The frames will raise them 4 inches off the ground, and be behind the frames so the panels will appear to float in space. I will install bracing in the rear to help stabilize the frames, and also to set the frames back a bit to help with the floating illusion. I plan on using the stock off white socks with side pieces of 1/4 thick stock to match the width of the frame to set them off and match what every decor we decide on for the basement sound room. I will use ofc 12Ga. stranded copper for the internal wiring of the bass and mid panels, and 18Ga. Silver plated OCF stranded for the ribbon tweeter. I am using gold plated binding posts on all three panels, and will fuse the Ribbon, and install the choke in line with the positive lead on the ribbon. I will provide more pics as I move forward. It should prove to be an amazing week of vacation, and will help me to get my butt in gear and finish the basement.:yes:
Regards,
Jim
DSCN2899.jpg DSCN2902.jpg DSCN2901.jpg DSCN2905.jpg DSCN2906.jpg
 
more pics!

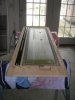
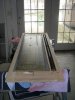
Here are a few more showing the felt for the ribbon tweeter installed.
Regards,
Jim
DSCN2907.jpg DSCN2909.jpg DSCN2910.jpg DSCN2911.jpg DSCN2912.jpg
 
Those look great. I think my brother may need a woodworking project. He bought a fancy saw last year but I haven't seen much from that, yet.
 
Man those are looking Great Jim!! That Maple is going to look really nice once you finish it! Nice Router work BTW.
 
I made an early morning run to Walmart (5:30AM and picked up the Krylon Acrylic paint to cover the voice coils and sprayed them this morning. I also found some two sided tape with foam in the middle to mount the Ribbon Tweeter with. (Hoping for some Isolation here) Wife just called and the silver wire for the internal wiring of the tweeters came today. I also found some storm door tabs that should work nicely to hold the bass/mid panel snugly in place. Things are coming together very nicely, and I will provide pics as I continue to move forward.
Regards,
Jim
 
Last edited:
Walmart parts, stuff from storm doors...painted voice coils...taped in place tweeters. This is getting good!!
 
they will be screwed

Walmart parts, stuff from storm doors...painted voice coils...taped in place tweeters. This is getting good!!

The two sided tape is to attach the sock to then you drop in the tweeter and SCREW IT IN!!
Regards,
Rube Goldberg
 
I'm starting to get somewhere. The screen door clips are working out very well. I cut 1/4" rubber fuel line to width then slit it to fit over the end of the clip and the main panel is extremely tight in the frame. I also installed the Bulldog brand two sided tape to the inset for the ribbon tweeter. I cut off the front part of the stock stands, and plan to use 3/4" X 3" oak for the frames, attaching an 18" piece to the remaining part of the stands as the base. The stand will protrude 3" in the front. with a brace coming off the back of the bottom plate.
Regards,
Jim
DSCN2932.jpg DSCN2933.jpg DSCN0002.jpg DSCN0001.jpg DSCN0003.jpg
 
Back
Top Bottom