• The move to the new server is done. There are some software and database maintenance updates in process. This has us passing the hat around to help out. We appreciate any donations. Seriously, even a dollar helps. The payment page may be found here - https://www.audiokarma.org/support.html

Advent--Broken box repair help

waggs098

Super Member
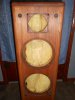
Found these advent heritage speakers at goodwill (they lady at goodwill said they found them on the curb, go figure). Of course they need refoamed but that's easy.

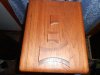
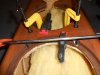
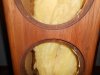
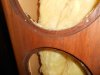
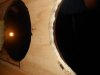
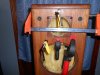
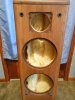
Here is the big issue. One box has some broken pieces (not sure how it happened, maybe just a weak piece of wood and Nebraska humidity) and I think I can fix them but looking for anyone else who has some advice.

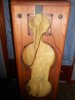
In the pictures you can see the broken pieces. The best thing I can come up with is to cut some plywood that I can use to brace the pieces. Put wood glue at the original "seams" where they are broke and use original Gorilla glue to glue the braces on the inside of the box to keep the pieces in place. Also I would clamp the box so the gaps close completely up and clamp the brace piece on tightly while the glue dries. There are no pieces missing so if I can do it properly it should be hard to notice. Of course with the grill on it wont be seen at all except the top piece.

Anyone have any other ideas?
 

Attachments

  • DSCN1542.JPG
    DSCN1542.JPG
    45.8 KB · Views: 82
  • DSCN1543.JPG
    DSCN1543.JPG
    79.1 KB · Views: 81
Register to hide this ad
If you're planning to keep these. I'd build them up from the behind. Take out all the foam so you've the empty box. When you place the bits you have back into place you can see what needs to be built back up. Use the pits as templates. Cut all the pieces and glue them in rplace. When they are done and in place you should be able to be able to glue in the veneer pieces to match the original. Pop the foam back in and the drivers and you should be golden...

Thanks for the reply but I'm not sure what your saying here. The pieces and the veneer are fully intact (the second picture shows the pieces), nothing is missing (just the pieces are broken out) and if I do it correctly and get them inline I shouldn't need to build anything back up. Just need to get the pieces back into place securely.

Edit: Actually there isn't veneer on the front panel on these speakers, its solid wood. Forgot that when I was replying.
 
Last edited:
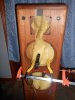
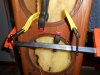
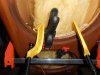
Well here are pics of the first repair. Pretty much just like your explaining, you can see the piece on the inside of the box.

My dad is a fan of gorilla glue so we will see how it works. You can see in the pics the glue is starting to expand from the seams. I will let it set overnight then move on to the top two pieces and do them at the same time. Hopefully they all hold over an extended period of time.
 

Attachments

  • DSCN1544.JPG
    DSCN1544.JPG
    52.7 KB · Views: 48
  • DSCN1545.JPG
    DSCN1545.JPG
    84.4 KB · Views: 50
  • DSCN1546.JPG
    DSCN1546.JPG
    80.6 KB · Views: 46
  • DSCN1547.JPG
    DSCN1547.JPG
    79.6 KB · Views: 44
Last edited:
First repair done. If the other two end up looking like this one I will be perfectly happy.
 

Attachments

  • DSCN1548.JPG
    DSCN1548.JPG
    63 KB · Views: 23
  • DSCN1550.JPG
    DSCN1550.JPG
    61.9 KB · Views: 23
You might want to firm up the front baffles repair with a strip of wood behind those pieces horizontally just to be sure they stay in place. Nicely done repair.
 
Looks good. Did you use a piece of lauan or something behind the repair to strengthen it?

You might want to firm up the front baffles repair with a strip of wood behind those pieces horizontally just to be sure they stay in place. Nicely done repair.

I used 1/2 inch plywood to brace the back. You can see it in the pics with the clamps in place. Made the brace piece as big as I could.
 
Heres some pics of the inside the best I could get.
 

Attachments

  • DSCN1551.JPG
    DSCN1551.JPG
    45.1 KB · Views: 32
  • DSCN1552.JPG
    DSCN1552.JPG
    45 KB · Views: 32
Ah... probably overkill, but that works.

Better to overkill then not have enough. That's my motto.

Actually though I had to clamp pretty tight to get the gaps to close on the original pieces so I wanted to use something strong so it didn't try to spread and break again and the plywood is the best I had.
 
It was difficult to see the damage or fracture from the first pictures... but the ones that followed showed the pieces not joined. So I agree with another poster that a little cleanup and glue would reattach them as original.

The brace is a good idea once you get to the inards.. but be selective in the material and nature of the reinforcement. You dont want to change the acousitic structure as the designer did have his intentions. Also, when in doubt.. insulate out, I say! Good damping material or renewed material can really influence the final sound of the structure.

It looks like you made a great find.. and leave it to our Goodwill friends to comment on "halllmarks of history" as something left on the curb... : ) Gotta love em!
 
It was difficult to see the damage or fracture from the first pictures... but the ones that followed showed the pieces not joined. So I agree with another poster that a little cleanup and glue would reattach them as original.

The brace is a good idea once you get to the inards.. but be selective in the material and nature of the reinforcement. You dont want to change the acousitic structure as the designer did have his intentions. Also, when in doubt.. insulate out, I say! Good damping material or renewed material can really influence the final sound of the structure.

It looks like you made a great find.. and leave it to our Goodwill friends to comment on "halllmarks of history" as something left on the curb... : ) Gotta love em!

I don't think I'm adding enough material to the inside that I would ever notice a difference in sound. Somebody might be able to but not me. I did think of that though and if for some reason it becomes an issue I figured I could remove a little damping material to get the box volume back. (maybe it isn't that easy though)
 
I don't think I'm adding enough material to the inside that I would ever notice a difference in sound. Somebody might be able to but not me. I did think of that though and if for some reason it becomes an issue I figured I could remove a little damping material to get the box volume back. (maybe it isn't that easy though)

Well.... you right on track! It does depend on how you hear it and not others... as you ARE the most important listening audience!
 
I don't think I'm adding enough material to the inside that I would ever notice a difference in sound. Somebody might be able to but not me. I did think of that though and if for some reason it becomes an issue I figured I could remove a little damping material to get the box volume back. (maybe it isn't that easy though)

Actually the damping material makes the box effectively bigger.

If you ever find that the speakers don't sound the same side to side I would try "grinding" down the plywood with a big ol' belt sander. I think I would have used thinner ply myself because I doubt you actually need that much reinforcement once the glue has set, but then again we're talking about fine details here - it's possible you will never notice any difference at all.
 
Actually the damping material makes the box effectively bigger.

Guess I was thinking completely bass akwards. Can someone explain how that works? I always thought the damping material was to help stop sound waves from coming back and hitting the drivers from the back. I also thought it was a way to change the cubic volume of the box (adding more makes it smaller).

If it does sound different to me I will take it back apart and grind the wood down. I didn't really think that small amount of wood could make a difference. Guess I shouldn't be so impatient and wait for some responses before I start.

But at least it came out looking pretty good. The repairs are actually more noticeable in the pictures then looking at them in person.
 

Attachments

  • DSCN1554.JPG
    DSCN1554.JPG
    47.3 KB · Views: 16
  • DSCN1555.JPG
    DSCN1555.JPG
    51.9 KB · Views: 16
Last edited:
Woo hoo, got the speaker foam kit ordered today. :banana: Ill get them done and find out how they sound this weekend.:music:
 
Last edited:
Well they are refoamed and back together tested on an MCS 3249 and they play ok. Ill hook them up in my main system and see how they sound. :rockon:
 
Well first impressions aren't good. I got these because the reviews were pretty good and bass response is supposed to be very good but these seem overly bright and not much bass response unless I crank the bass pot clear up.

Do you guys think a recap is in in order here. I've recapped a few speakers and it seemed to make them brighter but who knows here. Could a recap help the bass in these. (Maybe I just need to hook them up to a more powerful amp and play a 50 Hz tone for about 6 hours to loosen up the foam. I don't know)

Something just doesn't seem right based on the reviews I read. I did check and make sure I hooked wires back up properly also so polarity isn't an issue.

I've refoamed quite a few speakers and have never been this disappointed.

Running them on a Quadraflex Reference 450 if anyone is curious.
 
Last edited:
Something is very wrong.
Both speakers? No Bass?

Both pairs of my Heritage are part of my favorites because of the rich full bass.

Are they Advent woofers?

In all the 100s of speakers I've had, there was only one set of old H H Scott that had bad caps in the first order x-over and the bass sucked.

But, who knows where yours have been.

I have seen x-over caps that were literally exploded.
But the tweeters were fried too.
I'd look to the x-over for problems.

Just hard to believe both are bad.
 
Back
Top Bottom