• The move to the new server is done. There are some software and database maintenance updates in process. This has us passing the hat around to help out. We appreciate any donations. Seriously, even a dollar helps. The payment page may be found here - https://www.audiokarma.org/support.html

Advice on restoring AU-D11/II

tonythetech

New Member
Hello all!

I was advised to post here by other members to grab some advice and maybe a walkthrough on my newly acquired AU-D11/II. With that being said, I am new to the Sansui family!

About my AU-D11/II. I found it at a estate sell in good condition. The only thing I saw was that the right side wood piece was badly scratched up. No dents or water marks on the unit. Brought it home and let it warm up for a couple of hours to get room temp. I then hooked up some speakers and my phone to it. Powered it on and it works! All the LEDs work after cycling through all the modes. The volume works (I did not push it). The balance is very scratchy. Lastly, I turned on the tune function and tried to mess with the bass and treble, but they both did not increase or decrease really much. but overall, the majority of this unit works.

After reading some threads here and seeing what people had to say about this unit. I am definitely keeping it! Since I am keeping it, I want to do a full restore of it. I am definitely going to recap it and then, I know I need to use the trimmers to adjust everything according to the service manual. Someone mentioned I should replace all the trimmers too, incase they are on the verge of going. Do you all recommend this?
Of course, I will deox the pots and controls and buttons.
Also, I know with other units I have restored, it is recommended to replace known troubled transistors with newer one. What are your thoughts on this? Every post on this unit, no one really mentions its transistors.
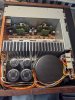
When it comes to recapping this unit, I see there are 4 massive caps in the power supply section (I think they are 10000uf). Should I leave those be or replace?

Everyone says this is a tough unit to service and takes a lot of time. I am totally up for it! Just need to figure out where to start and what not to touch. I also attached photos just incase!
 

Attachments

  • PXL_20201102_115107073.MP.jpg
    PXL_20201102_115107073.MP.jpg
    149.2 KB · Views: 137
  • PXL_20201102_115121390.MP.jpg
    PXL_20201102_115121390.MP.jpg
    91.2 KB · Views: 129
Register to hide this ad
As you may have guessed with my remarks in your other thread I have fully reconditioned my AU-D11 II, but unfortunately I didn't document the process, and have no 'BOM' to offer you. :( There are many threads where this amplifier is the subject of the thread, and they contain much valuable information. I'll have a dig around on AK and see what I can find.

Just some comments on your pictures
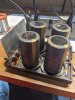
I notice you have 2 pairs of main filter capacitors i.e. the upper ones are smaller than the lower ones (as viewed in the picture), I have never see this before in all the AU-D11 II pictures I have seen. It's fine because the pairs of 'large & small' will be connected in parallel with each other - one pair per channel in a somewhat unusual 'split rail' arrangement. Your unit has bare metal internal screens, where all the others I have seen have copper plated internal screens, fine too, as they will work just as well. Your main heatsink doesn't have the sometimes seen (and present in my unit) additional finned section above the output transistors. You'll be pleased to know that everything else I can see in your picture is the same as in my unit originally - thanks for posting. ;)

Some light reading for you. :)
https://audiokarma.org/forums/index.php?threads/refurbishing-and-upgrading-the-au-d11-ii.789344/
https://audiokarma.org/forums/index.php?threads/sansui-au-d11-ii-restoration.834363/
https://audiokarma.org/forums/index...r-replacement-with-pics.380171/#post-11183979
https://audiokarma.org/forums/index...-upgrade-au-d11-ii.566144/page-2#post-9877529
 
Last edited:
Welcome to the 11-2 club! An excellent, underrated amp. I have two of them that I've refurbished and upgraded in leapfrog fashion in order to distinguish the results of my work. Your power supply caps, as Hyperion has noted, are unusual, haven't seen a staggered set like that before, are they, all four, each 10,000uF?

Perhaps the biggest challenge of refurbishing the AU-D11II is that its lightweight chassis-less construction makes it prohibitive to rework one board, put it back in and check your work for functionality. Once this thing is apart, it's APART. So do be especially careful in your work. As my carpenter father-in-law would say, "measure twice, cut once".

My suggestions:
Search AK for all the AU-D11II threads, there are quite a few. Copy what you need to remember, as you read thru the various threads, into a master document that you can then print and have as a guide while you go thru the amp.
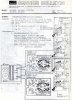
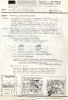
Get the Service Manual and the Service Bulletins.
I'm not aware of any particularly problematic transistors in the 11II, but I did try replacing al the transistors on the amp boards in one unit to see if that had any impact on sound or adjustability, and observed no changes. I did replace the relay transistors, too.
Be aware that Sansui made many running changes in manufacture AFTER the service manual was written. One of the boards has at least three revisions. Components on the boards do not always match what the SM says should be there. Go by what's in the unit, not the service manual.
Recapping is only half the job. Replace the old carbon comp resistors with metal film. The reward in sound quality - precision, stereo imaging, dynamics, lower noise floor - is well worth the effort. These AU-D11II amps will really sing.

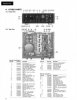
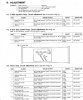
And lastly, you DO have a dim bulb tester and know how to use it, right? The service manual is too large a file to upload here. There is one out there, easy to find, but it is missing the adjustment pages, so I attach them here.
Sansui AU-II adj. page11.jpgSansui AU-II adj page12.jpg

change.AU-D11_II_Service_Bulletin_10181.jpgAU-D11_II_Service_Bulletin_20012.jpgAU-D11IIServiceBulletin2002.jpg
 
Last edited:
A couple more things that may be handy. The 11II was the first amp I rebuilt. I took it all apart, measured everything, selected audiophile caps to replace what was there, recapped it, put it all back together plugged it in and powered it up. I did not, then, yet have a Dim Bulb Tester, though I did have a good multimeter. I had been careful - and very lucky. It clicked out of protection, then I adjusted it and thought about what to do next. I attach my old lists. The resistor list I created from the service manual, there are some variances between SM and reality as you will see.
 

Attachments

This is a huge help everyone!
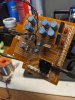
So after digging around the AU-D11II and taking the face plate and shields out, most of my capacitors have started to leak onto the boards. So after seeing that, I just went for it! I took a lot of pictures and its honestly going to be a real treat to put back together...
Anyways, I took note of every cap on each board. My list is very similar to your list @LWB. The real major difference is the 4 main filter caps @Hyperion mentioned. I have two 12000 uf and two 10000 uf. Should I replace these ones?
So I will start off replacing the caps with audio grade ones and deoxing the buttons and pots. I will also replace the older resistors with metal film ones and I will use your list @LWB to get me started.
There is no way to double check my work besides a multimeter, which will make a lot of things harder. So here goes nothing!
 
If your capacitors were leaking, you would probably have had an ugly surprise when you first powered it up. The capacitors are glued in place from the factory and the glue has to be removed because it turns corrosive with age - its corrosive now. This is but one of the reasons for suggesting you read through the AU-D11II threads on AK. There is much to learn about what you'll be seeing, and there are reasons why this amp is not much liked for repairability. It's never a good idea to write the exam without studying the material.
 
Last edited:
Okay all, after not being able to sleep because my mind is racing with "what did I just do to my amp". And after reading through all the forums you all provided. I have come to the realization of I have a ton of work to do and a formulation of a game plan.
1. Go through each board. Replace all electrolytic caps and carbon resistors (found a good website on this - http://carlscustomamps.com/do-carbon-composition-and-carbon-film-resistors-sound-better). Caps will be replaced with nichicon KA series or similar. I will use 1/4 & 1/2 watt metal resistors and replace according. Last, I will use nichicon LKG1K103MKZ x4 for the large filters with 2.2uf film caps at their base. Also clean off glue I thought was cap juice.
2. Replace the trimmer pots. You guys have any suggestions here besides use multi point ones? If not, I will get a multi pack and replace accordingly. As I take off the trimmers, I will measure them and match to the new ones to give me a baseline.
3. Double check all solder joints. Doesn't hurt to add fresh solder to where the boards attach.
4. Add ground wire to back base plate. At this time I will start to reassemble the amp.
5. Use dim light tester and tune amp.

Here are some points I'm still debating to do:
1. Do an update on eq and controls op amps using brown dog adapters.
2. Replace current regulating diodes in power amp section.
3. Replace speaker relays.

So, important lesson learned, do not jump in to a sophisticated amp without doing alot of reading and having a game plan. It's amazing I made it through college because of the way I do things. Thanks all for keeping me inline!
 
Correct me if I am wrong, but as you are new to this, maybe leave the resistor replacement for a 'phase 2' ? - when you are more familiar and comfortable about everything with the amplifier. Re-resistoring an amplifier is an extremely arduous task, especially one like the AU-D11 II. ;)
 
Correct me if I am wrong, but as you are new to this, maybe leave the resistor replacement for a 'phase 2' ? - when you are more familiar and comfortable about everything with the amplifier. Re-resistoring an amplifier is an extremely arduous task, especially one like the AU-D11 II. ;)
I am new to vintage audio! But I've been soldiering since I was a kid with model electric planes. I am coming from car audio, I was a MECP certificate autotech at best buy where the one tech introduced me to vintage electronics, tho I never became really interested till now, many years later when my father handed me down his turntable! I am decent and have the patience/skills for soldiering (of course, I'm still always learning).
I know the resistor are going to be a very long procedure! Thanks for the heads up tho!
 
I would go board by board, and verifying each step that nothing is busted. As a relative newbie myself, when I worked in this amp, I took the whole things apart and worked on several boards at a time, and then had trouble putting it back together. Also if something goes wrong I wouldn't know what it was. Start from a working amp and go section by section. I would start with the phono amp first, then control amp, the power supply boards and finally the power amp and speaker protection boards... If the amp is still working after all these phases, I would finally swap the PS caps.

As Hyperion suggested, I would skip the resistor upgrade. It's tedious as hell!
 
The resistor upgrade is, indeed, tedious. But it is where the greatest sonic benefits are to be had. One cannot know this until it's been experienced. And if you have it all apart, well, why not do it?
 
Soo, I went with the full cap and resistor upgrade. All my parts came in this morning.
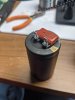
I started with the main 4 large filters and power supply board. Those 4 caps were a total b*?#h to get off... They were glued on to the plastic try very well!
Below are some pictures of my progress.
I do have a question tho, what does the small 2.2uf cap provide to the 10000uf cap do? Some sort of bypass, correct? @Hyperion did this in one of his threads.PXL_20201106_163221933.MP.jpg PXL_20201106_170052017.MP.jpg PXL_20201106_171741726.MP.jpg
 
I do have a question tho, what does the small 2.2uf cap provide to the 10000uf cap do? Some sort of bypass, correct?
Yes, correct - it is supposed to cancel out any undesirable (inductance) effects of what is a relatively large capacitor. However those red film capacitors are supposed to be mounted on the associated PCB, not directly on the capacitor terminals as in your picture. It doesn't really matter, but if positioned there you may have trouble with the capacitor lugs not being long enough to reach through the PCB. ;)

(you won't have seen them mounted like that on any picture of my AU-D11 II ;))
 
Yes, correct - it is supposed to cancel out any undesirable (inductance) effects of what is a relatively large capacitor. However those red film capacitors are supposed to be mounted on the associated PCB, not directly on the capacitor terminals as in your picture. It doesn't really matter, but if positioned there you may have trouble with the capacitor lugs not being long enough to reach through the PCB. ;)

(you won't have seen them mounted like that on any picture of my AU-D11 II ;))

Well you did say as close to the filter cap terminals as possible! Lol they did fit well tho! Enough of the lead came through to grab.
 
Agree - getting those old Pure Focus out are challenging to remove - I see you went with the drop-in 40mm diameter Gold Tune's (LKG1K103MKNF ?) - (instead of the 50mm dia LKG1K103MKZ you stated above)
 
I think the reason these were glued into the carrier so well is to avoid the possibility of damage in shipping. These big caps have enough weight and leverage to tear themselves out if the amp were given a sharp shock in transit. Manufacturers (Sansui included) used to clamp these big caps to a heavy chassis. The AUD-11II's plastic carrier is quite flimsy in comparison. Just something to be aware of.
 
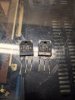
Okay every one, I need some help... I was so close from finishing my amp. I was in the process of adjusting all the trimmers til I dropped my multimeter lead into one of the power transistors and then the unit started to smoke. I caught the one 820 ohm resistor that I put in from the service update on fire (left chanel protect, r4). The unit went into safe made untill I removed the transistor that I think I blow up. Shown in the picture below. The unit does not go into safe mode anymore untill I hook up speakers to it, then it does. What do I do?PXL_20201109_215502365.MP.jpg PXL_20201109_214215158.MP.jpg
 
Back
Top Bottom