• The move to the new server is done. There are some software and database maintenance updates in process. This has us passing the hat around to help out. We appreciate any donations. Seriously, even a dollar helps. The payment page may be found here - https://www.audiokarma.org/support.html

Advice to choose first vintage SS

Frequently the HK units can lose a channel to the switches. Ecercise them between now and when you get a chance to clean them per the above link.

Check speaker circuit breaker and fuses as mentioned above.

Verify you have both jumpers on the rear panel, then pull them and replace with RCA cable and verify issuing channel. Then swap one side (in or out) and verify missing channel. If the channel changes it is missing in the preamp section. If the bad channel remains the same it is in the power amp.

Did you test b4 purchase? Missing channel, oh well, maybe some work to do.

I just bought another HK330b and the left channel is not working at all. Will this only work for the larger model? (it's all pre-amp I assume?)
 
That advice applies to pretty much all of the HK x30 series.

There will only be Two fuses by the power supply caps as the 330 is a single transformer unit, The 4/7/930 are all "Twin Power" with two transformers.

I also do not believe there are Pre Out/Main In jumpers on the 3/430 units.
 
there are pre mains on the 330 a and b, but not on the 430 or 330C

The switches in the 330 can steal a channel give it a cleaning and hope for the best. you could use an RCA cable to swap channels with the pre/main to verify it is the preamp.
 
I just bought another HK330b and the left channel is not working at all. Will this only work for the larger model? (it's all pre-amp I assume?)
Working the tape monitor button helped and at least pointed me in one direction. I still plan on opening her up this weekend. I called the repair shop that supposedly did the work on this unit and the tech told me, “if we worked on it, you can be sure we recapped it....” Supposedly about five years or so. However, the fact remains, all the dial lights, pointer, and VU meter lights went out. All around the same time???? But it’s cool, I ordered LED’s from dowojo. He was helpful.
 
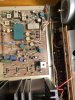
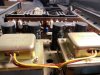
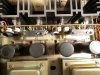
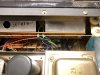
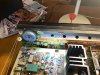
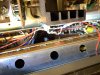
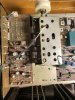
First chance I’ve had to open this puppy up. Here are the money shots.

unless there’s anything else I need to do, I’ll move to trying to figure out how to change the bulbs.
 

Attachments

  • F4E8332B-999A-413F-A1B5-00668F5838A8.jpeg
    F4E8332B-999A-413F-A1B5-00668F5838A8.jpeg
    82.5 KB · Views: 26
  • 4FCE1F2F-DB85-4C63-BD5B-A8593427446C.jpeg
    4FCE1F2F-DB85-4C63-BD5B-A8593427446C.jpeg
    93 KB · Views: 25
  • 07BF6277-5681-4106-AC26-0B52A2AD802E.jpeg
    07BF6277-5681-4106-AC26-0B52A2AD802E.jpeg
    120 KB · Views: 24
  • DA6EDB9A-9B5F-49A9-83A6-DEF32CED8A48.jpeg
    DA6EDB9A-9B5F-49A9-83A6-DEF32CED8A48.jpeg
    95.9 KB · Views: 24
  • 4951C27D-B749-410F-A4B8-3F39DDD91938.jpeg
    4951C27D-B749-410F-A4B8-3F39DDD91938.jpeg
    125.2 KB · Views: 25
  • C705B36B-432E-42CB-B747-2F2DE0F8CBAB.jpeg
    C705B36B-432E-42CB-B747-2F2DE0F8CBAB.jpeg
    107.6 KB · Views: 24
  • 227D6369-9674-40FD-BD9E-C88783740BD3.jpeg
    227D6369-9674-40FD-BD9E-C88783740BD3.jpeg
    82.1 KB · Views: 24
  • 62A17EB6-42E5-47FF-9BF4-7EB6EADC767D.jpeg
    62A17EB6-42E5-47FF-9BF4-7EB6EADC767D.jpeg
    76.2 KB · Views: 24
The dial bulbs are fairly easy IIRC....

There is a silver metal plate with round holes between the tuning string and the front glass.

On the back of that plate, underneath the tuning string is light board a brown/copper colored board with one Phillips head screw near each end. Remove the screws and the light board can be removed.
 
The dial bulbs are fairly easy IIRC....

There is a silver metal plate with round holes between the tuning string and the front glass.

On the back of that plate, underneath the tuning string is light board a brown/copper colored board with one Phillips head screw near each end. Remove the screws and the light board can be removed.

two of the screws are difficult to get to. I’d need an L-shaped Phillips to get in there. Is there anything I need to do to be wary, bleeding off any potential charge? Doesn’t look like I need to go near the capacitors. But we’ll see.
 

Attachments

  • 54C8A5ED-453F-4AE3-878E-17931100C888.jpeg
    54C8A5ED-453F-4AE3-878E-17931100C888.jpeg
    79.1 KB · Views: 9
The one blocked by the transformer needs a short bit which can be turned with a wrench. The other two aren't hard to get to.

The phono board tuner and the preamp/tone board have newer audio caps in em by the color of the parts. Main caps appear to be stock as built. There is another board associated with the power supply underneath with stock gray caps not pictured, but you seem to have a recapped unit.
 
The one blocked by the transformer needs a short bit which can be turned with a wrench. The other two aren't hard to get to.

The phono board tuner and the preamp/tone board have newer audio caps in em by the color of the parts. Main caps appear to be stock as built. There is another board associated with the power supply underneath with stock gray caps not pictured, but you seem to have a recapped unit.

that’s what it seemed to me. :banana: Any advice for changing the pointer light? The bulb seems to be wedged into the top portion. I didn’t want to go popping it out until I spoke with you folks. Also the connection point is secured to a binding, using some black adhesive (?) along with another wire. How do I remove it safely? Do I solder it back in place?
 
Update: bottom removed. Pots cleaned and lightly lubed. Contract switches: same.
Went out and bought a micro set of wrench/tips and long nose locking pliers that helped remove those really hard-to-reach screws.
Dial lights and VU meter lights changed to cool white LEDs. Haven’t plugged it in to see if they worked yet, though.
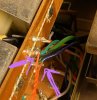
Next step is to change the pointer bulb. Picture one shows a clip of some sort that holds the middle of the wire. It does not seem to serve any electrical need other than keeping the wire safe from flopping around inside. Please correct me if I’m wrong.
The second photo shows the end contact point. In guessing in just going to have flush snip the wires and just solder the new wires right over the old ones since it appears like attempting to un-solder that point would also release a few other separate wires.
Again, lemme know if I’m wrong or if you have any suggestions.
Also, does it matter which point goes where so long as one wires goes there and the other goes there. ?
 

Attachments

  • E6E2DD8A-DB1E-4591-B492-2B7E636F4918.jpeg
    E6E2DD8A-DB1E-4591-B492-2B7E636F4918.jpeg
    45 KB · Views: 10
  • 724914D4-0EE6-4669-A9BC-774A3A16F0C8.jpeg
    724914D4-0EE6-4669-A9BC-774A3A16F0C8.jpeg
    66.3 KB · Views: 10
I connected new bulb wires to the old wire after the arm that controls wire position. You can do it however you want verifying the indicator can move full scale without issues.
 
Having done a few pointer bulbs, a new LED in an SX-1500TD a week ago you have to get access to the pointer and look at it and figure out how it went together. You have to figure out how to get the pointer loose to work on. There is usually a way, may required some disassembly removing dial face or metal section behind dial. Hopefully dial face does not need to come out. With the Pioneer there was a metal box at the bottom, bend back two small tabs and them fold the box open. Others do it differently. It is doable, proceed carefully.

As I found with the SX-535 what I gather is acrylic can snap like a dry twig. Fun to glue one back together used some black RTV to cover the glue joint so the glow at the bond joint could not be seen.

One of these days hope to get my hands on one of those. It is like my great white whale. Have had two reasonably priced ones get away. Curious how they sound and like the look of them. Have two dual mono after the power transformer, a Sansui 3000A and Tandberg TR-1055 and they definitely have a different sound to them.
 
Having done a few pointer bulbs, a new LED in an SX-1500TD a week ago you have to get access to the pointer and look at it and figure out how it went together. You have to figure out how to get the pointer loose to work on.

I removed the faceplate. Even though, in the end, probably wasn’t necessary. So, now I am at the point of replacing the pointer bulb. But I’m wondering if there is a specific need to match up polarity. Using blue shadows recommendation for joining the wires seems to be an easy fix. However, I’m wondering if the wires need to go in a specific Way. The leads off the new are both the same color. Same goes for the previous wire. My question is; do they need to be connected in a specific way?
 
LEDs like polarized installation, light bulbs do not. A volt meter will show which is positive if it is a DC circuit. Maybe the polarity could be determined from the schematic. The 730 I did is back with the owner now so I can't check it.
 
LEDs like polarized installation, light bulbs do not. A volt meter will show which is positive if it is a DC circuit. Maybe the polarity could be determined from the schematic. The 730 I did is back with the owner now so I can't check it.
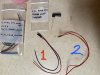
Looking at the packaging from dowojo it states it’s “3 mm DC, white pointer” the current wires are both red. I wasSent 2 3 mm bulbs, one with two red wires and another with one red and one blue wire. As I said before , the current pointer light Also has two red wires. When I poured them out of the bag, i failedTo take note of which 3 mm bulb was the pointer bulb. So, I’m assuming since it’s DC, polarity will not matter? Now it’s just a matter of figuring out which bulb goes there. #1 or #2
 

Attachments

  • EAA777A9-FF0B-4E66-9A76-2886D76F0A47.jpeg
    EAA777A9-FF0B-4E66-9A76-2886D76F0A47.jpeg
    94.8 KB · Views: 9
Last edited:
You can try the lamp both ways. Just tin the wires and then touch the connection with the soldering iron and release, should be enough of a joint to handle an evaluation. Repeat for the other wire and give it a try, being sure neither open connection touches anything. I don't think I evaluated ± on this lamp install
 
Back
Top Bottom