• The move to the new server is done. There are some software and database maintenance updates in process. This has us passing the hat around to help out. We appreciate any donations. Seriously, even a dollar helps. The payment page may be found here - https://www.audiokarma.org/support.html

AKAI GX F90 Cassette Deck - Function Button Issues

JB8

Well-Known Member
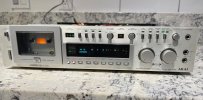
Estate Sale gold! Well, that's what I was hoping for, and maybe there's still some gold in them there hills, but I have no idea.

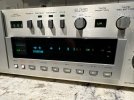
Powers up great but none of the function buttons work along that bottom row, so everything from switching from VU to Peak on the far left to the FFW on the far right do not respond to touching them. This soft touch is really throwing me off too, essentially no tactile feedback to touching the switches and none light up when touched. All of the other buttons above are more traditional and all seem to function. I've read other threads noting the function buttons can be an issue but didn't see any with clear paths to a solution.

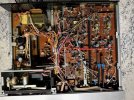
I pulled the case/cover, very clean inside, pulled the face plate then switch array to inspect it, came away with zero revelations. While powered up the capstan is spinning nicely and it looks like the belts are miraculously still intact.

At this point I'm just looking for some advice on next steps. I've been working on receivers, R2R's and a few cassette decks for while now and feel comfortable "poking around", safely, of course.

Hoping someone has some wise words for me so fire away!
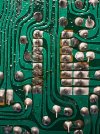
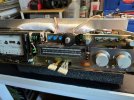
IMG_2408.jpg
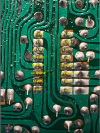
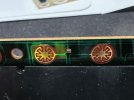
IMG_2409.jpgIMG_2410.jpg
 
Register to hide this ad
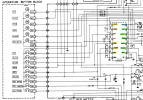
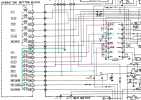
Hi. If non of the transport buttons do anything, the first thing to do is to check IC13 to make sure it has Vcc (DC power) on pin 16. Next, you can put a meter on the input function pins for Play, Stop, FF, RWD, Pause, and Rec. It looks like they should be 5V and when you press a button it should drop to 0V. Try that for all of the transport buttons. Next, check the output pins 10-15 which should be low (0.3V) when not active and probably pulse to 5V when a button is pressed.

1731816355122.png

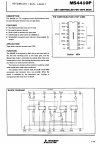
Here is the datasheet for the M54410P chip:
1731816647762.png
 
The voltages checked out, just under 5V and .2V respectively. Had power (4.9V) on pin 16.

None, however, responded to pushing buttons - no pulse or drop in voltage.

IMG_2458.jpg
 
None, however, responded to pushing buttons - no pulse or drop in voltage.
Something doesn't sound right???
You measured the voltages to the input of IC13 (pins 1, 3, 5, 6, 7) and it was 5V. Then when you pressed the buttons you saw no voltage drop and it remained at 5V?
That means that either the ground connection to the "Operation Button Block" is open, or the buttons are bad.
Please verify that the ground connection on the board (pin 31) measures 0Ohms to chassis ground and also that it gets to the button block switch commons.
Even with power off and checking Ohms between the button connector and the IC pins should see 0 Ohms when you hold the button down.
Also, check to make sure that the STOP button is not stuck in the depressed position. What is the voltage on pin 2 (with power on)? Looks like that could cause the other functions to not work and all lights to be off.
Is there a wire harness to the Button Block that is disconnected?

1731870014024.png

1731872899999.png
 
Last edited:
Correct, pressing the buttons produced no voltage drop, the pins remained at 5V.

Pin 31 to chassis ground measures .2 Ohms. 0 Ohms from PLAY pin #1 on IC and pin 42.

Wire harness to button block is intact and properly connected.
 
Saw your edits, getting 5V (4.9) at pin 2, no change when pressing it or giggling any of the other buttons on the function row.

As I mentioned earlier the buttons on these tend to be problematic, just shocked that the entire array could be faulty.
 
I found a thread on TapeHeads, this may be the issue...

"I went through this with a F95 I owned. You would have to keep pressing before they finally work. I determined it was the buttons. I also had a GX-F90 so I looked and the keypad was the same. I removed the pad and put it into the F95 and it got that deck working. After studying it more I found that the rubber had hardened on the F95 keypad so when you pushed the button the center would make contact but the outer circle could not contact the other tab in the switch because it would not flex in. Since this is such a small distance that the outer edge has to move I tried cutting off just the smallest amount of material on the center point so that when you pushed the button, both the inner and outer points would hit at the same time. This worked. Try it on just one or two of the switches to see if it works first. The center is molded to stick out more than the edge and needs to compress in when pushed to work. With it hard it cannot compress in. This is why shaving the center point gets it onto a more even line to hit at the same time. Remember, don't take off too much as you can always go back and get a little more off if the first time didn't do it."
 
I also tried the hack of powering up in the Play Timer setting, so put the knob (upper row, three position toggle) in Play position, then turn on the deck and how bout that, the Play button light lit up and the cassette played great, sounded amazing! Tape counter worked as well. The only way to get it to stop is just to turn it off, but, we know it works, belts are fine, sound is excellent, its just those hardened buttons that need some attention. Good stuff!
 
Yep, saw that as well. I'll work on it and update this thread with my progress.

Thank you @dankik , I know you've helped me in the past with other units, really appreciate you jumping in to coach me through the troubleshooting!
 
Nice! I placed an order with Buttonworx and its already on it's way, excited to bring this guy back to life. I'm glad you posted the update about the snap dome buttons as well, great to have a real life comparison between the membrane and the buttons. I'll post some pics once I get the repair going, should be a pretty straight forward process now that I've already taken the assembly apart once. Thanks again for all the assistance, updates soon.
 
Only the 2 pictures above are mine.

You will probably have to cut the small pin on the black part of the button itself, to shorten it a bit.
 
Got it, I may reach out to you if I have any questions, I'd love to be able to get it right the first time, ha!
 
Well this took far too long to get back to but, here we go!

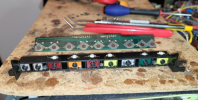
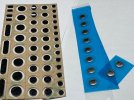
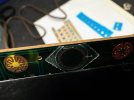
The Buttonworx parts arrived but I'm not sure which would be best. I'd just pop a few on but based on your comment about cutting part of the pad I thought I'd check in before moving forward, obviously I'm in no hurry, ha! In the third picture you'll see the black pads/buttons, the middle two rows of circular pads are roughly the same size as the "snap dome buttons" in the blue wrapper and they're the closest size to the existing pad in the unit, but, none of this looks quite like the pictures you posted on the Buttonworx page, so any advice would be awesome.

IMG_3435.jpgIMG_3437.jpgIMG_3438.jpgIMG_3439.jpg
 
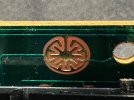
I decided to move forward and try one of the black pads on just the Stop button since I knew I could get the deck to play by using the timer mode. I started with the small pad size, it didn't work so I went to the larger round pad (shown installed in picture) and it didn't work either. In the play timer mode, you power up the deck and within a couple seconds it starts playing, the light on the play button is illuminated as well, and it was then that I would start to push the Stop button, which feels just like it did with no pad and was not impacted by the addition of the pad.

Since the contact points on the circuit board are now essentially connected by the pad I'm not sure how pushing the button/plunger into it would do anything but I was certainly worth a shot. I also think the "snap dome" version I have is too small but I'll likely give that a shot next. I'll provide an update when I have more results.

IMG_3540.jpg
 
Looks like those pesky switches in an Xbox Controller, they get loaded with dirt and junk and quit working. Check out some YouTube Videos on how they clean and fix those with similar approaches. Good luck!
 
Back
Top Bottom