

You are using an out of date browser. It may not display this or other websites correctly.
You should upgrade or use an alternative browser.
You should upgrade or use an alternative browser.
Altec 606-Inspired Build Using A-7 Components
- Thread starter gdmoore28
- Start date
bowtie427ss
Lunatic Member
Love the Mahogany! How ironic, i'm healing a little wound on my forehead from running it into the end of a very similar looking piece stacked on top of some Altecs.
Be careful as you start laying it. Work with your cabinets on a soft/padded surface and keep it free of chips, crumbs, and boogers. As hardwoods go, Mahogany is fairly soft in the raw, and it's easy to put dents and lines in it just through casual handling. Once you get it stained and finished it will be a much more durable surface.
Be careful as you start laying it. Work with your cabinets on a soft/padded surface and keep it free of chips, crumbs, and boogers. As hardwoods go, Mahogany is fairly soft in the raw, and it's easy to put dents and lines in it just through casual handling. Once you get it stained and finished it will be a much more durable surface.
bowtie427ss
Lunatic Member
Use a high quality contact cement, and don't hesitate to call their 800 line and ask them if there are any stains that you should avoid using. I've never had a bad experience myself, but have heard the horror stories about glue that reacts or dissolves when some petroleum based stains are used over them.
I really like aniline dye on Mahogany, that's where that deep red hue on vintage Mahogany usually comes from, petroleum stains just don't do it.
I really like aniline dye on Mahogany, that's where that deep red hue on vintage Mahogany usually comes from, petroleum stains just don't do it.

gdmoore28
Super Member
Ok. Aniline dye. Any particular shade of dye I should use? What do you think of the "Rich Mahogany" from Old Masters?
http://myoldmasters.com/colors/swatch-gallery/
Also, I'm thinking that using a grain filler will be essential for mahogany?
http://myoldmasters.com/product/woodgrain-filler/
And I'm wondering if I can follow this stuff with an oiled top coat rather than poly or varnish? I've never tried an oiled finish before. Need to research that some.
GeeDeeEmm
http://myoldmasters.com/colors/swatch-gallery/
Also, I'm thinking that using a grain filler will be essential for mahogany?
http://myoldmasters.com/product/woodgrain-filler/
And I'm wondering if I can follow this stuff with an oiled top coat rather than poly or varnish? I've never tried an oiled finish before. Need to research that some.
GeeDeeEmm


silver faced
Active Member
I am excited for you ill be keeping tabs. Yea Buddy
gdmoore28
Super Member
OK. Grabbed some more birch plywood yesterday after having a CT scan run on my lungs. This is 1/2" birch ply that will be used primarily for thickening the main panels to 1".
Yesterday it dawned on me that if I apply this extra thickness to the outside of the structure as planned, I will exceed 25" in width. That's going to create a LOT of wastage when I start cutting my motor boards and back panels, requiring a couple sheets of plywood per cabinet. Too rich. So, I've decided to remove the minimal bracing placed inside so far and double the panel thickness from the inside. Then I'll replace the braces.
A few quick calculations show that I'll still be over the 5.5 cu. ft. of interior volume that I'm shooting for, so no harm done - thus far. I'll think of something to really screw up the works, I'm sure. Pics to follow.
GeeDeeEmm
Yesterday it dawned on me that if I apply this extra thickness to the outside of the structure as planned, I will exceed 25" in width. That's going to create a LOT of wastage when I start cutting my motor boards and back panels, requiring a couple sheets of plywood per cabinet. Too rich. So, I've decided to remove the minimal bracing placed inside so far and double the panel thickness from the inside. Then I'll replace the braces.
A few quick calculations show that I'll still be over the 5.5 cu. ft. of interior volume that I'm shooting for, so no harm done - thus far. I'll think of something to really screw up the works, I'm sure. Pics to follow.
GeeDeeEmm
gdmoore28
Super Member
Speaker project went slow this week because of other work I had to do. Did manage to stumble across a couple of mahogany floor trim pieces that I think should look great as top and bottom trim on the grills. Imagine a classic grill cloth on either a curved or mildly V-shaped frame, and the wide piece of mahogany trim running horizontally across the top of the panel, and the narrower piece horizontally along the bottom. Centered on the top piece, of course, will be the golden "Altec" decal.
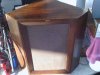
Also obtained a piece of birch plywood, 1/2". Plans are to rear-mount the woofers with hidden mounting screws. So, I plan to cut the motorboard from the birch ply, install the anchor-style screw inserts, then glue over that with 1/2" HDF for a seamless look. So, motor boards (like the remainder of the cabinets) will be a minimum 1" thick with significant additional bracing inside.
Need opinions on the motorboard color. I think I'd like to construct the motor board as described above and paint it Altec hammertone green to match the horns. Of course, it will be covered by the grill most of the time, but when the grill is removed, I think the contrasting black woofer cones against the hammertone green would simply pop visually. What do you guys think?
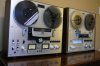
I'd hoped to work on the cabs all day today, but FedEx delivered my buddy's "new" Akai GX-265D reel-to-reel to me and I needed to set it up before delivering it to him. This is a gorgeous original-owner deck in pristine cosmetic and mechanical condition other than the typical light scratches on the head cover. This little deck really delivers sonically. And, it's packed with all the features he wants: auto-reverse; two-way recording; those great glass heads; original smoked plexi cover; etc, etc. I still have to check record function, but after a head cleaning and demagging, this little rascal is so far without a single glitsch.
Assorted pics attached.
GeeDeeEmm

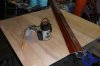
Also obtained a piece of birch plywood, 1/2". Plans are to rear-mount the woofers with hidden mounting screws. So, I plan to cut the motorboard from the birch ply, install the anchor-style screw inserts, then glue over that with 1/2" HDF for a seamless look. So, motor boards (like the remainder of the cabinets) will be a minimum 1" thick with significant additional bracing inside.
Need opinions on the motorboard color. I think I'd like to construct the motor board as described above and paint it Altec hammertone green to match the horns. Of course, it will be covered by the grill most of the time, but when the grill is removed, I think the contrasting black woofer cones against the hammertone green would simply pop visually. What do you guys think?
I'd hoped to work on the cabs all day today, but FedEx delivered my buddy's "new" Akai GX-265D reel-to-reel to me and I needed to set it up before delivering it to him. This is a gorgeous original-owner deck in pristine cosmetic and mechanical condition other than the typical light scratches on the head cover. This little deck really delivers sonically. And, it's packed with all the features he wants: auto-reverse; two-way recording; those great glass heads; original smoked plexi cover; etc, etc. I still have to check record function, but after a head cleaning and demagging, this little rascal is so far without a single glitsch.
Assorted pics attached.
GeeDeeEmm
gdmoore28
Super Member
Last night was night # two in one of my semi-regular zero-sleep nights, so I decided to spend the entire day working on the cabinets, and hoping that the activity would keep me awake so I might sleep tonight. At six am, work began. As usual, entering my shop meant spending as much time working on and searching for tools as actually working on the cabinets!
The laser guide on my new Ryobi circular saw refused to zero out, forcing me to work solely with a clamping straight edge without the very reassuring laser light illustrating the line for me. OK. Pulled out the table saw and commenced with the usual cleaning and aligning. While I had the tools out I decided to finally install the optional Craftsman kick-down castors on the hind legs.
First order of business was to cut and install the second layer of 1/2" birch plywood to the "featured" side panels, yielding a total thickness of 1." That will be the minimum panel thickness throughout the cabinets.

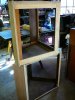
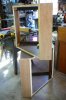
Next up will be the front extensions and motor boards, as shown in an earlier post. The "motor board" - or the front baffle - will bring me really close to seeing the final shape of the cabinet.
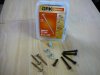
I think all of us who enjoy "rolling our own" are constantly exploring new ways of doing things with new fixtures, tools, and hardware. For attaching the drivers, I'll be installing barbed inserts on the motor board to allow for frequent attachment/removal of the components . Shown are 10-32 barbs and some hex-head screws.
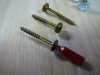
Finally, our local Home Depot has finally begun stocking some really cool cabinet screws. Available in various lengths, these are much harder than sheet rock screws, have hex heads, and built-in washers under the heads. Haven't quite decided where to use these, yet, but I love the appearance. Box of 100: about $6, including the bit.
GeeDeeEmm
The laser guide on my new Ryobi circular saw refused to zero out, forcing me to work solely with a clamping straight edge without the very reassuring laser light illustrating the line for me. OK. Pulled out the table saw and commenced with the usual cleaning and aligning. While I had the tools out I decided to finally install the optional Craftsman kick-down castors on the hind legs.
First order of business was to cut and install the second layer of 1/2" birch plywood to the "featured" side panels, yielding a total thickness of 1." That will be the minimum panel thickness throughout the cabinets.
Next up will be the front extensions and motor boards, as shown in an earlier post. The "motor board" - or the front baffle - will bring me really close to seeing the final shape of the cabinet.
I think all of us who enjoy "rolling our own" are constantly exploring new ways of doing things with new fixtures, tools, and hardware. For attaching the drivers, I'll be installing barbed inserts on the motor board to allow for frequent attachment/removal of the components . Shown are 10-32 barbs and some hex-head screws.
Finally, our local Home Depot has finally begun stocking some really cool cabinet screws. Available in various lengths, these are much harder than sheet rock screws, have hex heads, and built-in washers under the heads. Haven't quite decided where to use these, yet, but I love the appearance. Box of 100: about $6, including the bit.
GeeDeeEmm
Last edited:
gdmoore28
Super Member
Did a bit of work today on the cabs. Initial plans were to extend the front of the cabinets 3.5," but I didn't like the look at all. So I cut the extensions back to 1.5." I still like the looks better without any extension, but the mods I've made so far make it necessary to have some in order to mount the motor board.
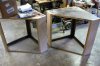
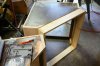
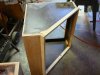
Because this build is based around modifying already-existing cabinets, I've had to make some compromises that I don't like. Depending on how these turn out, I've been tossing around the idea of using these as test cabinets. If the internal volume and tuning turn out to produce the sound I want from my components, I may bite the bullet, buy a load of 13 ply baltic birch, and start from scratch.
I think there is a cabinet shop in Little Rock that does custom manufacturing from CAD files. If I decide to start over on these, I want to look into how much they would charge me to use their CNC machine to cut all my basic panels for me. Then I would have precise cuts that I could assemble. We'll see. They may prefer working with MDF.
To throw another wrench into the works, I'm considering mounting the 511 horns in the cabinets rather than on top. This is because these will be installed on either side of my bed and will serve double duty as night stands. (That's also going to require having glass tops cut for them.) So many choices, so many options.
I'll have to make up for the volume used up by the horns, so I'm going to build sealed risers that will make up for volume lost. So I'm tossing about ideas on how I want to do those.
Finally, some time ago I bought a Kreg pocket screw kit and used it to attach the cabinet extensions. What a cool tool! After seeing what could be done with the Kreg jig, I've found numerous repairs around the house that pocket screws will make very easy to do.
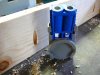
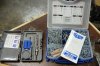
That's all for tonight. I'm hoping to devote the day tomorrow to working on these some more.
GeeDeeEmm
Because this build is based around modifying already-existing cabinets, I've had to make some compromises that I don't like. Depending on how these turn out, I've been tossing around the idea of using these as test cabinets. If the internal volume and tuning turn out to produce the sound I want from my components, I may bite the bullet, buy a load of 13 ply baltic birch, and start from scratch.
I think there is a cabinet shop in Little Rock that does custom manufacturing from CAD files. If I decide to start over on these, I want to look into how much they would charge me to use their CNC machine to cut all my basic panels for me. Then I would have precise cuts that I could assemble. We'll see. They may prefer working with MDF.
To throw another wrench into the works, I'm considering mounting the 511 horns in the cabinets rather than on top. This is because these will be installed on either side of my bed and will serve double duty as night stands. (That's also going to require having glass tops cut for them.) So many choices, so many options.
I'll have to make up for the volume used up by the horns, so I'm going to build sealed risers that will make up for volume lost. So I'm tossing about ideas on how I want to do those.
Finally, some time ago I bought a Kreg pocket screw kit and used it to attach the cabinet extensions. What a cool tool! After seeing what could be done with the Kreg jig, I've found numerous repairs around the house that pocket screws will make very easy to do.
That's all for tonight. I'm hoping to devote the day tomorrow to working on these some more.
GeeDeeEmm

westend
Audiopile
GD,
Before you spend beaucoup money on getting everything cut for assembly, let me pass on a few tips.
As you may have found, cutting and assembling large panels for bigger speakers can be daunting. Trying to align panels into a butted panel usually doesn't leave a perfect fitment. Two tools that make this easier are a quality clamping straight edge and a flush cut router bit with bottom bearing. Assuming that the builder can cut a panel to dimension with reasonably accurate square relationship, when assembled, any small overhanging edge of panels can be removed with the flush cut bit.
FWIW, I have an older Rockwell-Delta table saw with 60" of outfeed table/72" fence rail but I'd rather cut with a clamping straightedge and a circular saw. I find it easier to cut straight with a circular saw than trying to feed larger panels through the table saw. Enlisting help for feeding wood through the table saw only leads to frustration as I haven't found a helper yet that feeds at the same rate.
Before you spend beaucoup money on getting everything cut for assembly, let me pass on a few tips.
As you may have found, cutting and assembling large panels for bigger speakers can be daunting. Trying to align panels into a butted panel usually doesn't leave a perfect fitment. Two tools that make this easier are a quality clamping straight edge and a flush cut router bit with bottom bearing. Assuming that the builder can cut a panel to dimension with reasonably accurate square relationship, when assembled, any small overhanging edge of panels can be removed with the flush cut bit.
FWIW, I have an older Rockwell-Delta table saw with 60" of outfeed table/72" fence rail but I'd rather cut with a clamping straightedge and a circular saw. I find it easier to cut straight with a circular saw than trying to feed larger panels through the table saw. Enlisting help for feeding wood through the table saw only leads to frustration as I haven't found a helper yet that feeds at the same rate.
gdmoore28
Super Member
GD,
Before you spend beaucoup money on getting everything cut for assembly, let me pass on a few tips.
As you may have found, cutting and assembling large panels for bigger speakers can be daunting. Trying to align panels into a butted panel usually doesn't leave a perfect fitment. Two tools that make this easier are a quality clamping straight edge and a flush cut router bit with bottom bearing. Assuming that the builder can cut a panel to dimension with reasonably accurate square relationship, when assembled, any small overhanging edge of panels can be removed with the flush cut bit.
FWIW, I have an older Rockwell-Delta table saw with 60" of outfeed table/72" fence rail but I'd rather cut with a clamping straightedge and a circular saw. I find it easier to cut straight with a circular saw than trying to feed larger panels through the table saw. Enlisting help for feeding wood through the table saw only leads to frustration as I haven't found a helper yet that feeds at the same rate.
You are so right on all accounts. I have both a clamping straight edge and a flush cut router bit. The former has been a time-saving tool, except when the clamping surfaces are diagonal. In that case, I have to use a true 6' 1X4 that I've saved just for that purpose. I clamp it down with C-clamps, then use the circular saw just as you've described.
For smaller pieces, I still use my table saw and miter saw.
Thanks for the tips. They are right on!
GeeDeeEmm
gdmoore28
Super Member
Changed my mind about not using these as the final cabinets. After a couple of days work on them, things have finally begun to take shape and come together nicely.
I've run out of wood, but during some scavenging around the shop this morning I remembered an old drawer section that I'd removed from an old desk. I found that it was constructed of mahogany mdf and that the inside panels were still unfinished. Great. And there was just enough of it to construct my riser bases.
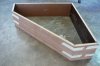
You will remember that I thought that I might have to use the riser volume to bring my overall volume up to the requisite 5 cu. ft.. Well, I finally found a way to measure the interior volume of the main enclosures, and they come up to 5.4 cu. ft.! Now, not needing the riser volume, I can shorten them as much as I want. They are currently at 6" tall. I'm thinking 4" will look a lot better. We'll see.
I used the top boards from the old desk to cut out the potential tops of the cabinets. These things are 1 1/2" thick mdf and as heavy as manhole lids. If I decide I like these and decide to keep them, the edges will be treated to solid mahogany trim. The tops themselves will be veneered in the previously-pictured mahogany, as well.
Here's how they look with the tops and the bases temporarily in place. Try to imagine every visible surface veneered in mahogany the same shade as the bases.
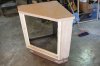
Since there is not enough room to install the 511 horns in the cabinet, I'm going back to my original plan of the 416s and super tweeter in the cabs and the 511s mounted on top. As noted before, I've also located a local source for lots of different styles of used mahogany trim pieces, so there is some ornamentation to be done, as well.
That's it for today. Time to rustle up some more wood.
GeeDeeEmm
I've run out of wood, but during some scavenging around the shop this morning I remembered an old drawer section that I'd removed from an old desk. I found that it was constructed of mahogany mdf and that the inside panels were still unfinished. Great. And there was just enough of it to construct my riser bases.
You will remember that I thought that I might have to use the riser volume to bring my overall volume up to the requisite 5 cu. ft.. Well, I finally found a way to measure the interior volume of the main enclosures, and they come up to 5.4 cu. ft.! Now, not needing the riser volume, I can shorten them as much as I want. They are currently at 6" tall. I'm thinking 4" will look a lot better. We'll see.
I used the top boards from the old desk to cut out the potential tops of the cabinets. These things are 1 1/2" thick mdf and as heavy as manhole lids. If I decide I like these and decide to keep them, the edges will be treated to solid mahogany trim. The tops themselves will be veneered in the previously-pictured mahogany, as well.
Here's how they look with the tops and the bases temporarily in place. Try to imagine every visible surface veneered in mahogany the same shade as the bases.
Since there is not enough room to install the 511 horns in the cabinet, I'm going back to my original plan of the 416s and super tweeter in the cabs and the 511s mounted on top. As noted before, I've also located a local source for lots of different styles of used mahogany trim pieces, so there is some ornamentation to be done, as well.
That's it for today. Time to rustle up some more wood.
GeeDeeEmm
gdmoore28
Super Member
Finally got to the big city and picked up a couple more sheets of mdf. Man, that stuff is so heavy and unwieldy.
Yesterday was spent cutting out the back panels and routing the base panels to accept their filler boards. Today it was time for the motor boards. The plan for those is to use 3/4" mdf for the main motor boards, then, after installing the barbed mounting bolt nuts for the drivers, covering the front of the motor board with another 1/2" sheet of hdf (high density fiberboard) to hide the mounting hardware. I hope that is understandable.
Here are pictures of the motor boards and the front "covering" sheet of hdf.
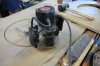
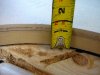
Picture #1 shows the routing of the motor board. I'd forgotten just how incredibly messy using a router is. After cutting the four holes, I swept up 2 1/2 gallons of sawdust from that project and the last four days activities. Picture #2 simply shows the final thickness of the sandwiched motor boards - main board and "cover" board. Pic #3 shows the motor board and sized pattern to represent the 60 sq. inch vent, the size having been obtained from an old Altec document. ( http://www.lansingheritage.org/images/altec/plans/1960's-lf-design/page03.jpg )
I'm undecided whether to use the rectangular vent cutout, or use the less-intrusive and more visually-pleasing vent tube. A few weeks ago I picked up a cardboard fabric tube that has a 3" id, and I'm leaning toward using that. Much easier adjusting the port with a tube than with a cutout. (Intended to insert a picture of the tube here, but for some reason that one picture will not load. So, use your imagination.)
More to follow.
GeeDeeEmm
Yesterday was spent cutting out the back panels and routing the base panels to accept their filler boards. Today it was time for the motor boards. The plan for those is to use 3/4" mdf for the main motor boards, then, after installing the barbed mounting bolt nuts for the drivers, covering the front of the motor board with another 1/2" sheet of hdf (high density fiberboard) to hide the mounting hardware. I hope that is understandable.
Here are pictures of the motor boards and the front "covering" sheet of hdf.
Picture #1 shows the routing of the motor board. I'd forgotten just how incredibly messy using a router is. After cutting the four holes, I swept up 2 1/2 gallons of sawdust from that project and the last four days activities. Picture #2 simply shows the final thickness of the sandwiched motor boards - main board and "cover" board. Pic #3 shows the motor board and sized pattern to represent the 60 sq. inch vent, the size having been obtained from an old Altec document. ( http://www.lansingheritage.org/images/altec/plans/1960's-lf-design/page03.jpg )
I'm undecided whether to use the rectangular vent cutout, or use the less-intrusive and more visually-pleasing vent tube. A few weeks ago I picked up a cardboard fabric tube that has a 3" id, and I'm leaning toward using that. Much easier adjusting the port with a tube than with a cutout. (Intended to insert a picture of the tube here, but for some reason that one picture will not load. So, use your imagination.)
More to follow.
GeeDeeEmm

GDM, your comments about the router made me chuckle. I just had to re-baffle four speaker cabinets for my favorite volunteer organization (they were absolutely ghastly ugly, due to a lot of mods and patches done to the original baffles, so I laid new wood over the old and routed out the speaker holes I wanted to keep), and boy, it confirmed the following that I have found to be true:
DEFINITION: "Router (n)- Device for converting wood into sawdust in the most prodigious, voluminous and noisiest way possible."
Man, they are effective- sometimes it seems TOO effective...
Regards,
Gordon.
DEFINITION: "Router (n)- Device for converting wood into sawdust in the most prodigious, voluminous and noisiest way possible."
Man, they are effective- sometimes it seems TOO effective...
Regards,
Gordon.
gdmoore28
Super Member
That definition is right on the mark, Gordon!
I was telling my wife tonight that my little chihuahua spent the entire day with me in the shop. She likes to stay very close to me, so I sat her on a chair immediately behind me. Once I'd routed the first hole, I turned around to see if she'd stayed in the chair with all the noise going on. She was there, alright, but the router had covered her in so much wood that she looked like a sawdust pile with eyes sticking out! I was laughing so hard that she stared at me as if I'd gone stark-raving mad!
GeeDeeEmm
I was telling my wife tonight that my little chihuahua spent the entire day with me in the shop. She likes to stay very close to me, so I sat her on a chair immediately behind me. Once I'd routed the first hole, I turned around to see if she'd stayed in the chair with all the noise going on. She was there, alright, but the router had covered her in so much wood that she looked like a sawdust pile with eyes sticking out! I was laughing so hard that she stared at me as if I'd gone stark-raving mad!
GeeDeeEmm
gdmoore28
Super Member
SCREWUP!
I've been working on these cabs for a few hours each day, mostly doing the leisurely little things like installing braces and the like, so I haven't posted any pics of those boring details.
But I've somehow made an error on my motorboards. I routered the speaker cutouts according to Altec's published document - 14 1/8" diameter. (I have the later 416Zs with the heavy frames, as shown above.) Today, I pulled out one of my woofers to mark the mounting bolt locations - the cutouts barely allowed the bolts to kiss the inside diameter of the cutouts. What? Measured across my woofer cone: 13 1/4."
Grabbed my Altec literature for driver cutouts. "Late Cutout-Front or Rear Mount: 14 1/8."
"Early Rear Mount Cutout: 13 1/4."
Why did I grab the wrong measurements? Dang. One sheet of 1/2" and one sheet of 3/4" mdf wasted. Well, not totally wasted. I still have enough of each to recut one panel. All I'll need is a half sheet. I can use most of the remaining sheets for projects to come. But the hours invested won't return. Drat.
So, in the next day or so it'll be back to Lowes for more mdf. Thank goodness that stuff is not too expensive.
GeeDeeEmm (Hides head under arm. )
)

I've been working on these cabs for a few hours each day, mostly doing the leisurely little things like installing braces and the like, so I haven't posted any pics of those boring details.
But I've somehow made an error on my motorboards. I routered the speaker cutouts according to Altec's published document - 14 1/8" diameter. (I have the later 416Zs with the heavy frames, as shown above.) Today, I pulled out one of my woofers to mark the mounting bolt locations - the cutouts barely allowed the bolts to kiss the inside diameter of the cutouts. What? Measured across my woofer cone: 13 1/4."
Grabbed my Altec literature for driver cutouts. "Late Cutout-Front or Rear Mount: 14 1/8."
"Early Rear Mount Cutout: 13 1/4."
Why did I grab the wrong measurements? Dang. One sheet of 1/2" and one sheet of 3/4" mdf wasted. Well, not totally wasted. I still have enough of each to recut one panel. All I'll need is a half sheet. I can use most of the remaining sheets for projects to come. But the hours invested won't return. Drat.
So, in the next day or so it'll be back to Lowes for more mdf. Thank goodness that stuff is not too expensive.
GeeDeeEmm (Hides head under arm.
)
Last edited:
Just don't let yourself get into a hurry. I have burned up more router bits in MDF, than any other wood. It's just so dense and holds heat so well (it's a much better insulator than any other sort of wood, AFAICT), that it's easy to get 'em smoking if you're not patient...
Regards,
Gordon.
Regards,
Gordon.
gdmoore28
Super Member
Well, "hurry" is not exactly how I would describe my demeanor on this build, Gordon. In fact, I've been pretty leisurely about it, checking and rechecking before cutting, yadda, yadda, yadda. This was just a DUMB mistake, made with a great deal of faulty forethought and violating a rule I learned over thirty years ago in building speakers: always measure the speaker before making cutouts! And until this time, I've always ignored the data sheets and depended instead on my own measurements. And I can't even blame the data sheets. I just grabbed the wrong one!
And you are absolutely right about working with mdf. I have a small jar full of blued router bits coated in burned-on resin binder. Not to mention a handful of bearings that seized up and turned blue, too. I have to say, though, that almost all of those were destroyed years ago when I first started using a router with mdf. Nowadays, especially when cutting out driver holes, I work my way down about 1/8" at a time. As you can see from the above pic, the results have been some very nice cutouts.
I used to have the same problem with saw blades years ago. But something has changed. I don't know if it's because of better carbide blade designs, or a change in mdf composition, but I have blades I've been using for years that still cut great and are accumulating almost no resin. Have you noticed this?
GeeDeeEmm
And you are absolutely right about working with mdf. I have a small jar full of blued router bits coated in burned-on resin binder. Not to mention a handful of bearings that seized up and turned blue, too. I have to say, though, that almost all of those were destroyed years ago when I first started using a router with mdf. Nowadays, especially when cutting out driver holes, I work my way down about 1/8" at a time. As you can see from the above pic, the results have been some very nice cutouts.
I used to have the same problem with saw blades years ago. But something has changed. I don't know if it's because of better carbide blade designs, or a change in mdf composition, but I have blades I've been using for years that still cut great and are accumulating almost no resin. Have you noticed this?
GeeDeeEmm