• The move to the new server is done. There are some software and database maintenance updates in process. This has us passing the hat around to help out. We appreciate any donations. Seriously, even a dollar helps. The payment page may be found here - https://www.audiokarma.org/support.html

Altec 606-Inspired Build Using A-7 Components

Lookin good!

Yes I agree the iron on veneer is nice! With the contact cement method, there is no going back if you make a mistake.
Also its easier to get bubbles out with the iron on variety.

Keep up the good work:thumbsup:

Thanks, my friend. I was down to my last three sheets of mahogany, and aligning my last large panel when I lost my grip and it went down about two inches to the side of my line. Too late. I tried my best to carefully remove it, but the more I wrestled with it, the more it stuck. Eventually, I had to crack off what I could save, and the rest was removed with scrapers, with most of it coming off in 1/2" by 1" chunks. I should have taken pictures of the fiasco, but I was so angry that all I could think of was stripping it off and starting over.

Today I picked up a can of WatcoTeak Oil (which is made specifically for finishing "dense" woods, specifically teak and mahogany). I've saved a rather large piece of veneer on which to test my finish. This is the first time I haven't used polyurethane as the finish. I want to see if I can achieve that neat rubbed finish that one hears about all the time. Testing it will tell me whether I want to return to 'thane or go with the oil.

GeeDeeEmm
 
Last edited:
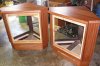
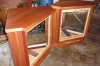
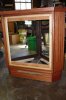
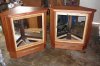
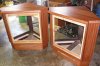
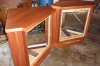
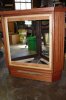
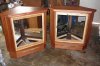
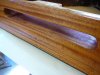
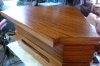
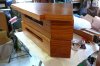
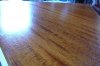
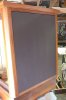
The veneering is finished! I have one sheet of veneer remaining, hopefully just enough to do the stands I'll be building to cradle the horns. In the pics below you can see that I decided to not stain the mahogany as I fell in love with the way it looked with only the Teak Oil, which darkened the veneer exactly where I wanted it. So, what you see are the first two coats of Teak Oil.

Altec Cabs w Veneer and Oil 001.JPG Altec Cabs w Veneer and Oil 002.JPG Altec Cabs w Veneer and Oil 003.JPG Altec Cabs w Veneer and Oil 004.JPG

At the time these photos were taken, the oil still had a nice semi gloss sheen to it. Since then, the oil has soaked in more and the finish is flat. I want a semi gloss finish, so if more applications of oil don't produce that, I'll likely look into another product for the topcoat. What that product will be, I don't know.

Still to come:
- figure out a way to apply veneer to the inside of the vents
- veneer the edges of the motor board, and then paint the front in ??????? color.
- stain the back boards after installing the input and output boxes and terminals
- install the threaded inserts for the woofers and the back panels
- paint black or dark stain the insides of the bases (which can be seen thru the vents)
- seal and permanently install the motor boards and the bases
- install the hard fiberglass boards I found recently
- build a "dolly" for the top horn and super tweeter
- build the speaker grills (need to find some solid mahogany sticks)
- perform at least a dozen other projects that I haven't thought about yet

GeeDeeEmm
 
Thanks so much! I appreciate it!

Yesterday I ordered the little golden-colored "Altec Lansing" decal that will go in the middle of the top front edge. Can't help myself on those little details. :)

GeeDeeEmm
s-l500.jpg
 
GeeDeeEmm, I just got a phone call from that "Restore" store in your town. They need your cabinets back...........LOL.
All I can say is WOW! They look beautiful, can't wait to see them with the horns on top. Those decals will look right at home on there. Little details like that really make them stand out.

BillWojo
 
Ha! Thanks, Bill. I was in there the other day and noticed that the other two cabinets had finally been sold. I guess those are now residing in somebody's kitchen. I think the two I bought are going to have much more fun in their lives! It's all about 'dat bass.

GeeDeeEmm
 
Well, my good lawnmower customer now has all three of his big zero-turn mowers torn up, so tomorrow will begin several days of repairs. That's going to put a big hitch in my cabinet progress.

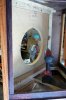
I still had a chance to veneer the insides of one of the vents, and, as suspected, this is the most frustrating part of the process so far. The vents are rounded on the ends, so I had to bend the veneer in advance. I soaked the veneer in a tub of water for a day before I wrapped the sheets around a form I'd made for the purpose. That went well, but as it dried the veneer cracked. So, I had to depend on the contact cement to pull it back into shape.

Installing the rounded veneer into the vents turned out to be the big problem. The contact cement kept trying to grab the veneer before it was properly into place. The first attempt was a complete disaster. I had to resort to slicing the sheets into smaller pieces and installing them a section at a time.

Vent veneering 001.JPG Vent veneering 002.JPG

That's not what I wanted, but it'll be fine once it is sanded and filled and finished. Besides, it's an area that only I will know about - and it'll aggravate me every time I see it!

So, that's where I am with several days of lawnmower repairs crashing down around me. I feel like it's time for a break anyway. Time for some fresh air.

GeeDeeEmm
 
Waiting for lawnmower parts to arrive, so I ventured into my sweltering (96 degrees and humidity thru the roof) shop and decided to do the first coat of satin polyurethane. I think these have turned out great. I suspect that I may do one more coat on the tops for extra protection, but one coat will do it on the cabinets. These pics were taken several hours after they were dry to the touch.

polyeurathane application 002.JPG polyeurathane application 003.JPG polyeurathane application 005.JPG polyeurathane application 006.JPG

I hate working with poly. It stinks, it's sticky, it runs, and it's a bear to clean up. But, it lasts and looks great. I was tempted to leave them in oil alone, but the thought of errant drinks being left on them made me think otherwise.

This has been great experience for me, though, with the oils. I currently have a friend's ragged Heresies sitting here waiting for the same treatment, but in walnut veneer. Oh, boy!

Edit: I forgot that I still have to apply the Altec decals once they arrive, so I will be forced to apply one more coat to the tops in order to properly seal the decal under the poly. More waiting.

GeeDeeEmm
 
Wow, they are looking great! If any visitor gets down low enough to peer into those ports and makes a comment, you do know where to stick your foot. I have never done vernier before but when you said you were going to do that, I figured it would be tough. I'm sure that by the time they are finished, even the ports will look great.
I can't wait till there loaded with drivers and we can get a full report. I bet your going to love them.
I know I'll never look at a kitchen corner cabinet's the same way again, they will always have Altec drivers super imposed on them. LOL

BillWojo
 
Thanks Bill and Holepunch! The Altec 620/820 is where I got the idea of extending the front of the cabinet on the 606 design. In essence, what I've done is break up the 606 w/extended fronts into two separate pieces, cabinet and base, with the base providing the last cubic foot of volume. I'd be lying to say that all of this was planned. It's just the way it all came together as I tossed ideas around my alleged mind.

The decals are coming from a supplier on ebay. Just look up "Altec decal" on ebay search and it'll bring up a dozen iterations.

Checked the cabinets this morning after drying them overnight. The tops are perfect, but the cabs have some grain nubs that have raised like Lazarus from the dead. If I get time today, I'll be sanding them down smooth again and applying what I hope is the last coat of poly.

I appreciate you guys' comments. Thanks so much for watching.

GeeDeeEmm
 
Today I was able to completely sand down the cabs with the recommended 220 grit dry sandpaper. I sanded them so smooth that I was holding my breath expecting to go thru the first coat and into the veneer. Luckily, I didn't. The second coat came out baby's butt smooth. Excellent.

The only thing that bothers me is that every time I apply a nice, smooth coat, that wet, shiny finish makes me wish I'd gone with a high gloss finish rather than satin. Then it dawns on me that using a glossy finish will result in extended drying time, dying bugs in the coat, errant pieces of dust, cats seeking refuge from my son's dogs, and friends poking the finish and then asking, "Is it still wet?" - practically anything that can ruin a beautiful glossy finish will happen. But, man, when the finish is this nice and smooth, the temptation is great. Must . . . fight . . . the . . . temptation!

Didn't take any pics this time, as the nubs didn't show up in the last pics, anyway.

I wish my doggone decals would arrive so I could finish with the finish and get to work on the motorboards and the back panels. They are already cut out, but need to decide exactly how to finish them. If I only had some more veneer . . . arghh!

GeeDeeEmm
 
@gdmoore28 : Wow, Those are Just Beautiful.......Very Nice Indeed.

Thanks for Sharing.

,Mike.

Thanks, Mike!

I love that collection of receivers you have listed: SX780, SX1080, SX1280! That's a cool collection. Right now I'm down to a nice SX980 and a SX-D7000. But I really love the SX__80 series receivers. I think they were the ultimate development in the SX series receivers when it comes to lovely presentation. If money was not so tight, I'd like to fill out a collection of all the '80 series receivers and display them in a rack.

th


GeeDeeEmm
 
Last edited:
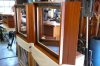
Man, has it been hot here in central Arkansas. My shop is so hot inside that within seconds of walking inside I'm drenched in sweat. Hovering around 100F with almost zero air flow.

Motor boards 005.JPG

Nonetheless, I have been working on the cabs as much as possible. Yesterday I got the rear panels cut out and glued up to double thickness so they are now 1" thick. I have some more mahogany veneer on order because I'm thinking of veneering them and the motorboards instead of painting them.

I'm STILL waiting for my Altec Lansing decals to arrive (coming from Brazil) so I can put the final coat on the tops.

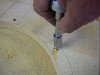
Yesterday I also started installing the threaded inserts on the back of the motorboards. I'm using the screw-in type. They will not be visible from the front of the motor boards. I tested these by screwing one into a scrap of motorboard material, screwing in a 1/4" bolt, and securing the bolt in a vice. No matter how I pulled and twisted on the insert, it would not budge. I don't think they will have any problem holding a woofer on!

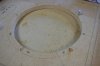
Motor boards 002.JPG Motor boards 001.JPG Motor boards 003.JPG Motor boards 004.JPG

GeeDeeEmm
 
Change of plans: If you've been following along as I stumble and bumble through this build, you know that my plans were to mount the 511b horns on top of the cabinets, as naked as the day they were born. I've changed my mind. After several days of pondering this idea, I've decided to build cabinets for the horns that will exactly match the existing cabs. I intend to build the horn cabs, veneer them in matching mahogany, attach them to the tops of the basic cabinets, separated from them by a 3/4" black spacer set back about 1/2" from the front of the cabinets (sort of like the Model 19 arrangement), then top those off with the tops I've already made. I will either mount the super tweeter beside the 511s in the sub-cabinet, or mount them on top, in-line with the 802d drivers for time-alignment purposes.

Your comments and suggestions, as usual, are appreciated.

OK. I finally got the back panels doubled up to 1" thickness, stained them (decided not to veneer them), and ready for the brass control panels. I'm planning to cut rounded rectangular cutouts favoring the front ports, and back that cutout up with a brass panel. It will be something like 4" wide and 12" tall and contain the inputs, outputs, and two L pads. I'm hoping to find somebody who will engrave the necessary lettering, as needed.

I'm quite happy with the way the back panels look so far. I think the control cutouts will really make them pop.

Backs and New Veneer 001.JPG Backs and New Veneer 002.JPG

I also received another batch of really nice mahogany veneer for the motor boards (yep, decided to veneer them instead of paint them. As always, subject to change!)
Backs and New Veneer 003.JPG

Temperature in the shop today: 102 degrees - in the shade. Breeze: Zero. Sweat: LOTS!!!

GeeDeeEmm
 
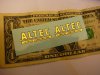
FINALLY! The long, long-awaited Altec decals that will adorn the tops have been delivered to my mailbox. Despite their rather diminutive dimensions, the gold color will, I think, really make the front of the boxes pop. It's always amazing to me how tiny little adornments like a decal can really deliver on cabinet appeal.

GeeDeeEmm


Decals 001.JPG
 
Back
Top Bottom