

You are using an out of date browser. It may not display this or other websites correctly.
You should upgrade or use an alternative browser.
You should upgrade or use an alternative browser.
Altec 606-Inspired Build Using A-7 Components
- Thread starter gdmoore28
- Start date

gdmoore28
Super Member
Temperatures have been hovering around the mid 90s, but the humidity here is killer. I've been working only in the morning hours.
I have the top hats finished and am starting to veneer them.

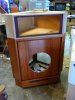
Honestly, I don't know if I'm going to like the top hats. I think they make the cabinets look out of proportion, so after all this work, I may go back to mounting the 511s naked on top of the cabs. We'll see.
I still have to build the 3/4" spacer between the cabinets and the hats; the spacers will either be veneered or painted black. (Somewhat like the black spacer between the two boxes on a Model 19.)

Finally, I affixed the 1/4" control panels behind the cutouts on the back panels. I'll probably just dark stain the control panels and the cutout area.

GeeDeeEmm
I have the top hats finished and am starting to veneer them.
Honestly, I don't know if I'm going to like the top hats. I think they make the cabinets look out of proportion, so after all this work, I may go back to mounting the 511s naked on top of the cabs. We'll see.
I still have to build the 3/4" spacer between the cabinets and the hats; the spacers will either be veneered or painted black. (Somewhat like the black spacer between the two boxes on a Model 19.)
Finally, I affixed the 1/4" control panels behind the cutouts on the back panels. I'll probably just dark stain the control panels and the cutout area.
GeeDeeEmm
gdmoore28
Super Member
Please excuse the foggy pics. I took my camera outside from an air conditioned house into the sweltering humidity and I couldn't wipe the fog off fast enough to take clear pics.
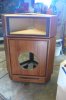
The top hats are nearing completion. In the last couple of days they've been veneered and two coats of Teak Oil applied. Now, I have to wait until Monday to apply the first of three coats of polyurethane, with sanding between coats, of course.
Plenty else to do in the meantime.
GeeDeeEmm
Edit: That pic from the back makes the top hat look as though it doesn't extend back to match the cabinet, but it does. Both tops are exactly the same perimeter as the main cabs, separated by a 3/4" spacer. I guess it's the camera angle that makes them look different in size.
Remember that the top panel now goes on top of the top hats. I'm referring to the tops with the "Altec" decal on them. So, total height will increase by another 1.25." These will be about 6-8" taller than I'd initially planned, and I don't like that. But, the horn will now be at seated ear level. Plus, if I want to change the cabinet tuning, I can open up the main cabs to the top hats and gain another cubic foot of interior volume. But that would require altering the port. We'll see.

The top hats are nearing completion. In the last couple of days they've been veneered and two coats of Teak Oil applied. Now, I have to wait until Monday to apply the first of three coats of polyurethane, with sanding between coats, of course.
Plenty else to do in the meantime.
GeeDeeEmm
Edit: That pic from the back makes the top hat look as though it doesn't extend back to match the cabinet, but it does. Both tops are exactly the same perimeter as the main cabs, separated by a 3/4" spacer. I guess it's the camera angle that makes them look different in size.
Remember that the top panel now goes on top of the top hats. I'm referring to the tops with the "Altec" decal on them. So, total height will increase by another 1.25." These will be about 6-8" taller than I'd initially planned, and I don't like that. But, the horn will now be at seated ear level. Plus, if I want to change the cabinet tuning, I can open up the main cabs to the top hats and gain another cubic foot of interior volume. But that would require altering the port. We'll see.
Last edited:
gdmoore28
Super Member
Cool GDM,
Are you still able to flip those baffle boards 180deg, > top to bottom. ?
You might want to try each setup either way to see which one works best ( as far as room/floor loading and horn/woofer combining at crossover ).

Yes, I am. And I hadn't thought about that, but getting the woofer further from the bottom and closer to the horn might make a significant difference. The woofer is offset because I'd originally intended to install a super-tweeter horn above it, but decided not to. Good idea, Earl. Thanks!
GeeDeeEmm
gdmoore28
Super Member
gdmoore28
Super Member
I use an electric palm sander with automotive (3M) 220 grit sandpaper discs.
I did a pair of 12" tower speakers for a friend who wanted them birch on the side panels with red center panels. I did both the poly and the paint with multiple coats hand-sanded with water for a piano gloss finish. The water would inevitably find it's way onto a bit of exposed MDF, swell it, and cause me no end to headaches and cursing fits (sorry, Lord!). I'm not going for anything close to a piano finish here, and the palm sander/220 is working perfectly.
And, each succeeding coat makes the finish smoother and smoother. You just have to find a place to stop, 'cause you could go on forever. I want some grain showing thru this time.
But, now you've got me thinking . . . . drats!
GeeDeeEmm
I did a pair of 12" tower speakers for a friend who wanted them birch on the side panels with red center panels. I did both the poly and the paint with multiple coats hand-sanded with water for a piano gloss finish. The water would inevitably find it's way onto a bit of exposed MDF, swell it, and cause me no end to headaches and cursing fits (sorry, Lord!). I'm not going for anything close to a piano finish here, and the palm sander/220 is working perfectly.
And, each succeeding coat makes the finish smoother and smoother. You just have to find a place to stop, 'cause you could go on forever. I want some grain showing thru this time.
But, now you've got me thinking . . . . drats!
GeeDeeEmm
Last edited:

macaltec
Metal Master
Don't change course on my account. I was merely asking as I have used poly on my first, and last, set of speakers. What a PITA, light wet sanding was the only thing that seemed to result in a smooth application of the follow up coat. Polishing compound worked well to finish it off.

bowtie427ss
Lunatic Member
Quoted for truth.Man, you are talented and these are going to be awesome speakers!
Inspiring and beautiful work GDM.

gdmoore28
Super Member
This has been a really cool thread so far.
Man, you are talented and these are going to be awesome speakers!
I'm so happy for you GDM!
Goodness - I'm humbled by your remarks, and they are much appreciated. Honestly, not much talent is required for these kind of projects if you have well-functioning tools and lots of time and patience. Nonetheless, John, your comments are humbly and graciously received.
GeeDeeEmm
gdmoore28
Super Member
Quoted for truth.
Inspiring and beautiful work GDM.
Thank you, my friend. Your comments are greatly appreciated!
GeeDeeEmm
gdmoore28
Super Member
I've been a little lazy and not feeling well for the last couple of weeks, so speaker progress has been slowed. I fooled around and got dehydrated and had to be hospitalized for a while. I knew I was overdoing it in that hot shop, but tried drinking more to compensate. Not enough, I guess. Got disoriented and started actually hallucinating. It's a weird experience talking to people that you know are not really there! Good Mrs. GDM immediately recognized what was happening and zipped me up to the hospital where they installed a catheter on one end to catch the fluids they were pumping into the other! I hate drinking water, but I'm now forcing myself to consume as much as I can bear. Probably still not enough.
Anyway . . .
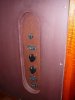
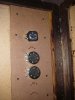
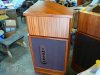
Today I installed the controls on the back of the main cabinets. In this picture, from top to bottom, the L-pads are: 1) super tweeter level; 2) mid range (horn) level; and 3) horn equalization. Remember that on this crossover I took Zilch's advice to replace one of the Altec 30923 eq resistors with an L-pad. This will allow me to control the depth of the 30923's mid range cut. Haven't tried the circuit with the L-pad in place yet, so we'll see how this works out.
The barrier strips, from top to bottom, are: 1) super tweeter output; 2) horn output; 3) 8-ohm main input. Chose to use barrier strips purely for the looks. They seem to blend best with the styling.

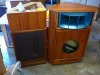
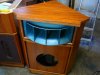
I had to install the horns temporarily in order to position the rear horn mount bracket, so decided while I was at it I would install one of the tops and get a look at how these are going to shape up. Since deciding to build and add the horn enclosure "top hats," these things have become outrageously tall. Once the tops are installed, they will stand 4' 1 1/2" tall!!!!!!!!!!!!! This has gotten out of hand, and I'm not sure if I like it.
Once option I've considered is discarding the bases that have the vents in them, which would lower them 6" and improve the appearances, I think. Of course, to make up for the volume loss I will need to open the cabinets into the horn enclosures and move the vents into rectangular slots on either side of the horn.
What do you guys think? Are they looking too tall, now? At the current height, when seated I'm looking directly into the mouth of the horns.
GeeDeeEmm

Anyway . . .
Today I installed the controls on the back of the main cabinets. In this picture, from top to bottom, the L-pads are: 1) super tweeter level; 2) mid range (horn) level; and 3) horn equalization. Remember that on this crossover I took Zilch's advice to replace one of the Altec 30923 eq resistors with an L-pad. This will allow me to control the depth of the 30923's mid range cut. Haven't tried the circuit with the L-pad in place yet, so we'll see how this works out.
The barrier strips, from top to bottom, are: 1) super tweeter output; 2) horn output; 3) 8-ohm main input. Chose to use barrier strips purely for the looks. They seem to blend best with the styling.
I had to install the horns temporarily in order to position the rear horn mount bracket, so decided while I was at it I would install one of the tops and get a look at how these are going to shape up. Since deciding to build and add the horn enclosure "top hats," these things have become outrageously tall. Once the tops are installed, they will stand 4' 1 1/2" tall!!!!!!!!!!!!! This has gotten out of hand, and I'm not sure if I like it.
Once option I've considered is discarding the bases that have the vents in them, which would lower them 6" and improve the appearances, I think. Of course, to make up for the volume loss I will need to open the cabinets into the horn enclosures and move the vents into rectangular slots on either side of the horn.
What do you guys think? Are they looking too tall, now? At the current height, when seated I'm looking directly into the mouth of the horns.
GeeDeeEmm
gdmoore28
Super Member
Forgot to mention that I'll be labeling the various L-pads and inputs and outputs with gold-lettered decals. I'll have to do some severe learning on how to design and print decals, but I think they will look much better than those plastic faceplates that came with the L-pads.
I also want to design a decal badge that will affix to the top area of the control board. I'd like it to have an Altec name similar to the one on the tops, and follow that with the model number I've made up for these - Model 619. Which is denoting the 606 style cabinet that the shape came from, plus the Model 19 cabs that they now resemble.
Any other suggestions? Any experience making decals that you can pass along?
GeeDeeEmm
I also want to design a decal badge that will affix to the top area of the control board. I'd like it to have an Altec name similar to the one on the tops, and follow that with the model number I've made up for these - Model 619. Which is denoting the 606 style cabinet that the shape came from, plus the Model 19 cabs that they now resemble.
Any other suggestions? Any experience making decals that you can pass along?
GeeDeeEmm
macaltec
Metal Master
Here ya go:
http://bmxmuseum.com/forums/viewtopic.php?id=174238
Of course you will have to create your graphics. Inkscape or Adobe Illustrater works well. I think they can be had as free downloads.
http://bmxmuseum.com/forums/viewtopic.php?id=174238
Of course you will have to create your graphics. Inkscape or Adobe Illustrater works well. I think they can be had as free downloads.