• The move to the new server is done. There are some software and database maintenance updates in process. This has us passing the hat around to help out. We appreciate any donations. Seriously, even a dollar helps. The payment page may be found here - https://www.audiokarma.org/support.html

Altec 606-Inspired Build Using A-7 Components

OK, I'm impatient sometimes. You know what that means, eh? Just had to install the new Altec decals. I'll let them dry overnight, and maybe tomorrow I'll have enough time to brush on the last coat of clear. Besides being the finishing touch on the tops, that last coat will also seal the decals in permanently.

Yes, I wish they were a bit larger, but according to the pics I could find, this is the correct size for period cabinets. I'm biased, of course, but I think they look nice.

GeeDeeEmm
Decals Installed 001.JPG

Decals Installed 002.JPG
 
Time is being taken up now with the typical boring application of poly, followed by sanding almost all of it away, followed by another coat, and on and on. Doesn't make for interesting pictures.

I did run into a problem that forced me to make a finish decision, though. After applying the first coat after I affixed the decals, the poly began to pool in spots that could not absorb any more oil. So I ended up with areas that still showed lots of grain (which is what I wanted) alongside areas that were smooth and silky. Since I could not restore the grainy look, I was forced to move ahead with a smooth finish.

Long story short, as noted above, I'm now about six thin coats into the process with intensive sanding between each coat. Almost enough sanding to completely remove the last application. Of course, this is nothing more than the process of filling the grain. The tops are now completed, and are super deep and smooth. They are quite good looking, just not grainy as I had initially intended.

I'll pop up some pics soon.

Now, it's on to finishing the motor boards and installing recessed control panels on the backs.

GeeDeeEmm
 
Hi Bill,

Those emblems are so cool. I bought this version, but I'm not sure exactly what I want to do with them since I already have the decals in place:

p.jpg

I'm thinking maybe attaching them to the lower right hand corner of the to-be-built grills. I have some cane-colored grill cloth (pictured somewhere, above) that I think will set these off. I want the grills to have a protruding upper and lower section in mahogany, with three panels separated by mahogany stiles with the grill cloth behind the wooden portions. (No, it couldn't be something simple and easy to make. I just have to take whatever direction that will increase the time, money, and labor invested in these so far. There must be something screwy in my head. :crazy:)

I also like the other version of the badge, the really old style one:

s-l225.jpg


Now I have myself thinking that if I'm going to use a badge on the grills, these might be more appropriate to the look I'm seeking. Dang it.

GeeDeeEmm
 
Here we go with the 511 top hat cabinets. After laying up one of the skeletons, I just had to sit down and shake my head. It's like starting over again. The top hats are going to add substantially to the time, expense, and materials involved in this build.

But, there are pluses, of course, WAF one of them. Plus overall prettiness (or pettiness, I don't know.). They will provide good horn damping (or dampening if a large drink is spilled on them.). And, they will make mounting and aiming the super tweeter a breeze. But, twelve more inches of height. Wow.

This is taking much longer than I'd planned. I'd hoped to be listening to them by now. Instead, all I have is project, after project, after project to go.

Oh, well. Once they are done, the listening will be worth the effort. I hope.

GeeDeeEmm

Altec Top hats 002.JPG
 
You could always just set the 511's on top for now, and listen to them while you build the horn enclosures. :)

Personally, I like the look of the naked horn sitting on top. But.... the horn top hat will add a bit to the WAF.

Keep up the good work
 
You could just build a matching picture frame flat front panel to recess the horn into and leave the rest exposed. Frame it out fully later if that doesn't work for you.
 
You could always do it K-Horn style, with a partial frame simply covered in grille cloth.
 
Oh, man, these are all great ideas! I could be enjoying the cake while fixing the topping! I especially like the frame idea with grill cloth. Hmm. What to do. I'll have to do what I always do - sit in front of the thing and let my imagination flow for an hour or so while enjoying an iced coca-cola.

I got most of one cabinet done this morning before being called out on a lawnmower repair.

So many ideas now. Thanks, guys!

GeeDeeemm

Altec Top Hat 2 001.JPG Altec Top Hat 2 002.JPG
 
Having given ya'lls suggestions a good five minutes to sink in, tomorrow I will assemble the top hat parts I have allready cut, and then put them aside temporarily. New direction will be: finish veneering the motor boards; complete the back boards by installing the control/input into their recesses; I ordered enough thread inserts that I can now use them on every major board - even to retain the front motorboards to the cabinets. In the end, every motorboard, back panel, kick panel, top hat, and the top will be secured by 10/32" mechanical screws with some sort of stylish head on them. And, yes, there is a fine line between fashion and gaudy. I'm trying to stay away from that line as solidly as possible.
 
Overslept and didn't get up until about 5:30 this morning, and later on decided to work on the speakers while it was a nice 70-something degrees in the shop. Since these top hats are so close to being completed, I started in on them and got both boxes glued up, the front frame extensions cut, and the frame for the horns cut out. Waiting for a few glued-up items to cure. I don't know about you guys, but once the glue has cured in something like this I always remove the screws and fill the holes. Seems a waste of good-quality screws, and eliminates the possibility of them loosening and rattling - under the veneer. Maybe I'm just frugal (read: cheap) and paranoid. Am I the only one?

Altec Top Hats 3 001.JPG

While I had time after gluing up the top hat enclosures, I pulled one of the still-naked motor boards and veneered it. Turned out ok. These panels used to be the top on a nice, super-heavy office desk, and are fronted (topped?) with plastic/acrylic laminate. Boy, that stuff is hard as a rock. I had to use 80 grit paper on my palm sander to even make a dent in the stuff, and I'm still not quite happy with the result. I like to give contact cement something substantial to grip, and the scratches this paper put in it is not quite up to my liking. We'll see if it holds over time.

Altec Top Hats 3 002.JPG

If the Lord lets me live to see tomorrow, I plan to veneer the other motor board, prep them both for poly, and lay on the first coat. While that's drying I'll work some more on the top hats.

GeeDeeEmm
 

Attachments

  • Altec Top Hats 3 003.JPG
    Altec Top Hats 3 003.JPG
    70.8 KB · Views: 3
Oh, man! We had a wonderful thunder storm here about an hour ago, and the rush of cold air coming through the shop was invigorating. Temperature must have dropped 10-15 degrees in an instant, and the clouds left behind a much-needed 1/4 - 1/2" of rain.

Altec Top Hats 4 001.JPG

Got both motor boards sanded down and ready for the first coat of poly. Hope to get that on later this afternoon.
Altec Top Hats 4 002.JPG

I made my first "major" mistake with the veneering on the second top. I poured out too much adhesive, and it dried so fast in the heat that I didn't have time to remove the thick parts. Once the veneer was laid on, I ended up with two lumps in the veneer. I had to slit the veneer and use the roller to move the excess adhesive to the hole and squeeze it out like a pimple. Managed to save the application, though. Lesson learned.

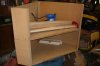
The top hats are near completion and ready for veneering. I mis-measured the front boards and had to make modifications to make them fit the frame extensions. In the end, I have less than 1/16" to spare in height on each horn. Almost wrecked the entire effort.
Altec Top Hats 4 007.JPG

Say hello to my beloved "little" chihuahua, "TACO." This little girl, about 12-13 years old, is my constant companion. She's asleep on my lap right now as I type. We've had dogs since the 1960s, but none has captured my heart like this one. I used to always smile about the older folks I knew who were crazy about their dogs - and now I understand.


GeeDeeEmm
 
Other stuff to do. As noted, I applied the first (and only coat this time) of Teak Oil so I could get a color match on the motor boards. The oil has to dry for 72 hrs before the poly can be applied, so looks like Monday will be Poly day if nothing else intrudes.

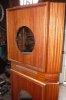
Here's a pic of the still-damp motor boards installed in the cabinets.

Altec Control Panel Cutout 001.JPG
Altec Control Panel Cutout 003.JPG

You can see my kitten in the lower cab staring out the door and keeping an eye on the two monster Rottweilers standing outside.

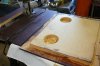
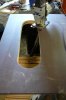
Also this morning, I pulled out the cabinet backs and started the process of cutting out the recesses for the control boards, which will house the mid and super tweeter level controls, and the input and output barrier strips.

Altec Control Panel Cutout 004.JPG
Altec Control Panel Cutout 005.JPG

Hope to do more today, but it's getting hot in the shop as yesterday's thunder storm has left the humidity quite high.

GeeDeeEmm
 
Thanks, Denton. It is rewarding.

Funny, though, a friend was just over here and said, "You know that one day somebody will think these are junk and will throw them out to the curve?" He's right. Look at all the stuff that's thrown away that had so much labor and love invested in it. Fortunately, my oldest son and grandson are into audio, and they've already claimed these as part of their meager inheritance. Hope they enjoy them for many, many years after I kick the bucket.

Thanks again for you comments. Much Appreciated!

GeeDeeEmm
 
Back
Top Bottom