• The move to the new server is done. There are some software and database maintenance updates in process. This has us passing the hat around to help out. We appreciate any donations. Seriously, even a dollar helps. The payment page may be found here - https://www.audiokarma.org/support.html

Another Stromberg Carlson Perfectempo Restoration...

I don't see how powder coating could work on this arm as it would fill the gram scale on the wand. Also the counterweight is a precision fit over the wand. Plating is the way to go but pricey. Another alternative may be Cerakote.
Good point. Thanks. I'm not familiar with Cerakote.
 
Well, after some delay I've started the restoration. I've started to dismantle. Taking lot's of photos to supplement my not-so-good memory.

It becomes apparent that the idler should be resurfaced or replaced. I have written to Terry's Rollers to see if he will do the rebuild. Any other sources for rebuild or replacement idlers will be appreciated.

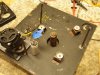
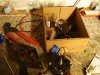
Here are a few photos. It needs to be completely disassembled. Cleaned, top plate refinished. etc...
P3190008.JPG P3190011.JPG
 
I am in the process of building a plinth. Originally I was going to use Jatoba - a very dense wood that takes a very smooth finish. However I came across a piece of walnut with good grain and a nice color (a bit less red than typical). Walnut is typical of the mid-century woods.

I'm going with a simple design, but it won't have the lip that John demonstrated on the original S-C plinths. Inside the plinth will be a 5/4 Oak liner. This will add weight a structural stiffness. I don't believe a heavy, solid core plinth will be advantageous for this table, given that it is suspended. the plinth will probably be about 10-15 pounds when complete.

Here is the rough version:
P3220013.JPG

Notice the offset liner at the front left corner is needed to clear motor and its suspension.

The top plate will sit in a slight rabbet so it is approximately flush. The rabbet will be stained dark to make it disappear.

P3220017.JPG

The edges will be treated with a round-over bit in a router. It's hard to see in the photo, but there is an offset base, and it will ultimately have some small feet. At this point, I don't anticipate any other treatments or joinery. Weather permitting, I'll start the finishing process tomorrow. I'm going to use a couple coats of oil/poly by Sam Maloof followed by a couple coats of his wax/poly.

 
A quick update. In the time it took for me to post the last couple items, I heard back from Terry Witt! He will rebuild the idler. He's rebuilt a few pinch rollers for me in the past and I know his work is good. So off it goes tomorrow...

maybe gaining some momentum
 
A quick update. In the time it took for me to post the last couple items, I heard back from Terry Witt! He will rebuild the idler. He's rebuilt a few pinch rollers for me in the past and I know his work is good. So off it goes tomorrow...

maybe gaining some momentum
Super cool. Is Terry building it from scratch and including the pressed on shaft? I might want one also along with other members.
 
I don't see how powder coating could work on this arm as it would fill the gram scale on the wand. Also the counterweight is a precision fit over the wand. Plating is the way to go but pricey. Another alternative may be Cerakote.
I looked up Cerakote. It would be a perfect coating. I'm not sure I have the right spray gear to apply it, but might give it a shot (no pun intended).
 
I am in the process of building a plinth. Originally I was going to use Jatoba - a very dense wood that takes a very smooth finish. However I came across a piece of walnut with good grain and a nice color (a bit less red than typical). Walnut is typical of the mid-century woods.

I'm going with a simple design, but it won't have the lip that John demonstrated on the original S-C plinths. Inside the plinth will be a 5/4 Oak liner. This will add weight a structural stiffness. I don't believe a heavy, solid core plinth will be advantageous for this table, given that it is suspended. the plinth will probably be about 10-15 pounds when complete.

Here is the rough version:
View attachment 1802927

Notice the offset liner at the front left corner is needed to clear motor and its suspension.

The top plate will sit in a slight rabbet so it is approximately flush. The rabbet will be stained dark to make it disappear.

View attachment 1802928

The edges will be treated with a round-over bit in a router. It's hard to see in the photo, but there is an offset base, and it will ultimately have some small feet. At this point, I don't anticipate any other treatments or joinery. Weather permitting, I'll start the finishing process tomorrow. I'm going to use a couple coats of oil/poly by Sam Maloof followed by a couple coats of his wax/poly.

The plinth looks great! IMO, the Walnut was the right choice. I love that you used oak as the liner instead of MDF. That follows the MCM tradition.

What’s in your mind for the color of metal base? Do you have a sand-blasting cabinet?
 
The plinth looks great! IMO, the Walnut was the right choice. I love that you used oak as the liner instead of MDF. That follows the MCM tradition.

What’s in your mind for the color of metal base? Do you have a sand-blasting cabinet?
Thanks for the kind words. I felt the weight added by the oak was valuable. I don't believe a core of MDF and plywood would offer value to this suspended table. But I wanted some heft. The oak provides that and increased structure.

Currently thinking a hammered black finish will be close to the original crinkle finish. It hides a multitude of sins. I believe John used a silver finish and that looks cool also. I like the maroon color of the originals but can't duplicate that without lots of expense. Still deciding. Rattle can will be satisfactory for this size project. Unfortunately I don't have a sand-blasting cabinet. I'll see how the finish prep goes before deciding if it needs commercial blasting. Or maybe I need to buy a cabinet for myself...
 
Bill - continuing to follow with interest. Terry has done a number of idlers and rollers for me in the past. I have never been disappointed. His turn around time has always been outstanding.
I'm glad to know about the quality and turnaround. At one point I had heard he shut down his business but was pleased to find he is still in operation.
 
Thanks for the kind words. I felt the weight added by the oak was valuable. I don't believe a core of MDF and plywood would offer value to this suspended table. But I wanted some heft. The oak provides that and increased structure.

Currently thinking a hammered black finish will be close to the original crinkle finish. It hides a multitude of sins. I believe John used a silver finish and that looks cool also. I like the maroon color of the originals but can't duplicate that without lots of expense. Still deciding. Rattle can will be satisfactory for this size project. Unfortunately I don't have a sand-blasting cabinet. I'll see how the finish prep goes before deciding if it needs commercial blasting. Or maybe I need to buy a cabinet for myself...

Not sure how far 3oz would go...
80F50A31-CE56-4D68-9541-25B80382D916.jpeg
??
Hammered black would look great too!
 
Here is what the S-C looks like at this point:
P3240024.JPG

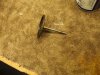
Of course I documented most every disassembly step with a photo. Here is the idler wheel and its pressed-on shaft. It's been mailed to Terry Witt for repair.
P3230019.JPG
 
Next step will be to refinish the top plate and bearing/arm plate. That will be in a few days as I have a couple other projects that need to be completed for other people.
 
Interesting to note that the tapered shaft on the motor (that drives the idler) has noticeable wear where the idler rides at the 33 RPM speed. I doubt it can be repaired but the simple solution is to use a motor controller to spin the motor at a slightly different RPM than stock and use a different part of the tapered spindle. More on that later during assembly...
 
Interesting to note that the tapered shaft on the motor (that drives the idler) has noticeable wear where the idler rides at the 33 RPM speed. I doubt it can be repaired but the simple solution is to use a motor controller to spin the motor at a slightly different RPM than stock and use a different part of the tapered spindle. More on that later during assembly...

No need for a controller. It is already variable speed. I would clean up the drive cone using emery cloth while the motor is spinning. If it is a really deep groove, then fill it with JB Weld first then smooth with the emery.
 
Back
Top Bottom