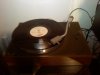
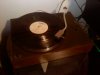
I have been going through my audio collection and I came across this AR Model XA turntable. It is as basic and simple as they get, no automatic anything here. To go from 33 to 45rpm you have to physically move the belt to another pully. I was just listening to this tonight and it really sounds excellent to me. I have a Shure M97xE on it currently. Does anyone know what year this may have been made? Any opinions on these turntable? I have the original dust cover for it and the turntable is in excellent condition.


You are using an out of date browser. It may not display this or other websites correctly.
You should upgrade or use an alternative browser.
You should upgrade or use an alternative browser.
AR Model XA Turntable
- Thread starter jaykoly
- Start date


Register to hide this ad


If memory serves, the original AR turntable entered production in 1962 and ended its production run in 1979. The earliest ones off the line had two motors, one to provide most of the platter torque and the other to make sure the main motor started spinning in the right direction. Later production used a single shaded-pole synchronous motor that only rotated in the proper direction.
I have three of these -- two from around 1970, with tan headshells like yours, and a third from 1974 that has a black headshell -- and I agree 100% with your opinion about the sound. They played way above their price point and served as the design inspiration for the Linn, Ariston and Systemdek high-end turntables, among others. The 0.03% wow and flutter spec is still outstanding by today's standards and the spring suspension does a great job of isolating the record and stylus from acoustic feedback and structure-borne vibration. If the motor didn't induce a small amount of hum in a Grado cartridge, I'd still be using one as my main turntable.
I have three of these -- two from around 1970, with tan headshells like yours, and a third from 1974 that has a black headshell -- and I agree 100% with your opinion about the sound. They played way above their price point and served as the design inspiration for the Linn, Ariston and Systemdek high-end turntables, among others. The 0.03% wow and flutter spec is still outstanding by today's standards and the spring suspension does a great job of isolating the record and stylus from acoustic feedback and structure-borne vibration. If the motor didn't induce a small amount of hum in a Grado cartridge, I'd still be using one as my main turntable.


clydeselsor
Lunatic Member
I love mine! I modded this one but would like to find another and keep it original.


zenith2134
Lunatic Member
First order of business for me would be to change out the arm. It's a great table but the arm is its shortcoming IMHO.
First order of business for me would be to change out the arm. It's a great table but the arm is its shortcoming IMHO.
The stock AR arm isn't state of the art by any means, but it can be made to perform very well with a few minor mods. Frank Van Alstine wrote an Audio Basics article years ago on setting up the AR arm for peak performance. It's available for free at his Web site, though you'll have to do a bit of searching through the index or the back issue .pdfs to find it. It's well worth the trouble. Here's the link: http://avahifi.com/index.php?option=com_content&view=article&id=85&Itemid=181.

Omegaspeedy
Vinyl and FM lover:)
These TT's are considered classics and are well respected. I think they look cool. There was a write-up in HiFi News last year on these from memory.

michaelhigh
mind's eye music
I love mine, paid $100 for it. Most people I know of here either got them cheap or free. I didn't mind paying for mine, they're really that good. Mine has a new Hurst motor because I dropped my beautiful TT off a shelf and broke the motor spindle! Horrors! I'm all thumbs, but I replaced the motor myself. Mine's a single motor job. Someday there will be a dating method in place, the serial numbers will be the key to knowing your table's age. I have to physically spin the platter before switching on the motor, even with a brand-new one! It sounds incredible with any receiver I own, especially with Klipsch speakers!

rhing
Active Member
The stock AR arm isn't state of the art by any means, but it can be made to perform very well with a few minor mods. Frank Van Alstine wrote an Audio Basics article years ago on setting up the AR arm for peak performance. It's available for free at his Web site, though you'll have to do a bit of searching through the index or the back issue .pdfs to find it. It's well worth the trouble. Here's the link: http://avahifi.com/index.php?option=com_content&view=article&id=85&Itemid=181.
Dr Tinear,
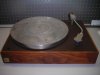
Thanks for the link to the Frank Van Alstine Audio Basics article on revamping the AR XA turntable. The article can be found on page 4, VOLUME THREE NUMBER THREE, MARCH, 1984. I bought my unit from a friend for $50. I still need to go through it, but aside from the cracked dustcover the unit is in great shape. I also bought a mint-condition Grace 707 tonearm for $75 for it, but I think I'm going to try the stock tonearm for starters.


beatcomber
AK Member
Most people I know of here either got them cheap or free.
I bought mine last summer for $45 on Craig's List, but had to invest another $50 in a replacement headshell, which are fairly rare. (It did come with a nice vintage Shure M44-7 cartridge, so it all equals out.)
I run my AR-XA with a Shure M91ED w/Jico SAS stylus, and that combination is OUTSTANDING. The AR-XA is more akin to a musical instrument than a piece of electronic equipment.
beatcomber
AK Member
Dr Tinear,
Thanks for the link to the Frank Van Alstine Audio Basics article on revamping the AR XA turntable. The article can be found on page 4, VOLUME THREE NUMBER THREE, MARCH, 1984.
Here it is:
We have finally had the opportunity to evaluate
the new AR turntable in house (no thanks to
AR who’s President reneged on his promise to
get me an evaluation sample) and the result is
no-go – not recommended. The unit has an
unshielded AC motor and a large AC hum field
which inducts annoying amounts of hum into
phono cartridges (just like the Linn Sondek).
The original AR used a similar motor, but had
a complete metal plate separating the motor
from the platter and arm mount, the new AR
has much prettier, but much less effective,
walnut shielding – i.e.: no shielding. Thus it
hums (doesn’t know the words?) and we revert
back to recommending the Harman-Kardon
turntables as the most cost effective now available.
In any event, the H-K T-60 has a better
platter (damped), no hum field, an equivalent
arm (the AR arm is just fine), variable speed
without fumbling with belt pulley changes, an end of record lift off, and a suspension just as
stable as the AR unit and at a lower price. The
choice is obvious – Harman-Kardon turntables.
Regarding the original AR turntable, now is a
good time to discuss how to make one work
better than new (better than almost anything
else you can buy new too).
The original AR turntable was a classic and a
winner. It had excellent isolation, a good bearing,
a stable platter, a quiet motor, and a tone
arm that got lots of gripes (but one that can be
made to work very well indeed as we shall
describe). AR turntables in working order (no
excess bearing wear) are still well worth owning
and using. The following is what we do to
overhaul and improve an original AR turntable
and arm. Note that most parts are still available
directly from AR Customer Service, 10 American
Drive, Norwood, MA 02062.
If you have the oldest AR with two motors (one
drive motor and a smaller “starter” motor, belt
coupled to it) you must first change motors as
belts are no longer available for this configuration.
AR makes a replacement kit for these
oldest units, retrofitting to the later single motor
and drive belt configuration, complete with
instructions and all necessary parts. Contact
them for details, the original two motor setup
is obsolete.
Assuming a current one motor configuration,
the first step is to remove the platter and drivebelt
and remove the tonearm. Caution! The
tone arm wires don’t remove and although you
have enough slack to remove the arm and place
it on the baseplate to work on it, trying to move
it further will break the wires and ruin it. The
arm removes by first removing the cartridge
shell and cartridge to a safe place and then
unscrewing the arm post so the arm, with cast
bearing assembly structure, lifts off. Remove
the arm post from its bearing well. Notice if a
small ball bearing comes out with the post. If it
does, pick it from the post end (its held there
only by “stale” lubrication) and put it where
you will not lose it. If the ball bearing didn’t
come out with the arm post, a “two man” job is
necessary. One person holds the tone arm and
turntable (so the arm wires cannot break) and
tips the table upside down. The other person
puts hand over arm bearing well and catches
the ball bearing (about 1/4" across) when it
falls out. Both people then crawl around on
hands and knees looking for ball bearing when
it bounces out of hand onto floor – hint – the cat
ate it. Anyway –
You will need the following supplies: Ronsonol
lighter fluid for degreasing bearings and pulleys,
Q-Tips for applying Ronsonol, new lubrication
– check with AR for their recommendation
(we use 1000 centistroke Dow Corning
200 fluid – a pure liquid silicon – sorry we
cannot supply you directly as we have only one
small sample can – it normally comes in 55
gallon drums for industrial purposes – if you
have a Dow Corning factory representative in
your area perhaps you can talk him out of a
sample – might also be available through medical
sources), and if the little foam plastic oil
retaining ring at the top of your platter bearing
well on the AR looks like something the monster
from the green latrine rejected, acquire a
new one from AR. You will also need a
jeweler’s screwdriver for adjusting the arm
bearings.
If the plastic foam oil retaining ring has degraded,
insert a few Q-Tips into the platter
bearing well to catch the debris and remove the
remains of the foam ring. Then pull out the QTips
with the remaining particles. Use Ronsonol
to thoroughly clean out the bearing well, the
arm bearing well, the platter bearing shaft, the
arm bearing shaft, the arm ball bearing, the
motor pulley, and the rim of the platter where
the belt goes around. Do not use Ronsonol on
the rubber belt – it will degrade it (again,
replacement belts are available from AR if
needed).
Now to “fix” the AR horizontal bearings and
turn the arm from sloppy, sticky, and ho-hum,
into smooth, precise, and clean. AR had all the
right parts there, they just used them improperly.
The problem is the attempt at “damping”
between the outer casting and the brass cylindrical
bearing holder. In essence, the outer
sleeve bearing is sticky and the inner cone
bearings are sloppy and this can be fixed.
Using a jeweler’s screwdriver, “back off” the
two cone pivot bearings on each side of the
outer casting until the chrome cylinder and
inner brass cylinder can be removed. (We will
be “locking up” this “damping” assembly completely
as it never worked well and screws up
the arm performance). The inner brass cylinder
will now slide out of the chrome cylinder.
The pin protruding from one side of the brass
cylinder can be removed by pulling firmly
with a pliers. Remove it. Now thoroughly
clean and degrease the two cylinders with
Ronsonol. Also clean the arm mounting post
and remove the plastic clip and remnants of a
foam pad from the arm end of this post.
Clean the plastic inserts in each end of the
brass cylinder. Note that these are the “real”
horizontal bearings, in which the cones on
each side of the casting ride, and properly
adjusted and lubricated, will provide excellent
arm stability and sonic quality.
After the arm post, arm bearing well, ball
bearing, brass cylinder, chrome cylinder, and
arm casting are completely cleaned it is time to
put the arm back together. The brass cylinder
goes back into the chrome cylinder with the
“flat” pointing down towards the arm post
mounting hole (it interfaces with the arm post
when the post is screwed back on). A drop of
1000 centistroke liquid silicon (or AR approved
lubricant) goes into each plastic bearing
insert in the brass cylinder. Locate the
chrome and brass cylinder assembly in the
outer arm casting and carefully screw in the
cones on each end of the casting, engaging the
plastic bearing inserts. Screw these cone bearings
in so that the cylinder assembly is centered
in the outer casting and located with only
a little “slop” in the bearings. Do not overtighten
or you will damage the plastic bearing
inserts in the brass cylinder.
Now lubricate the arm bearing well with 10-15
drops of silicon (or appropriate oil) letting the
lube run down the sides of the well, drop the
ball bearing back in, make sure the arm post
has a good film of lube on it, and install the arm
post in the bearing well. See that the ball
bearing is seated in the bottom of the arm post.
Lift the arm assembly back on top of the post
and screw the arm post back into the assembly,
making sure the projection on the end of the
post goes back into the center groove in the
brass cylinder. Tighten the post firmly, locking
the post to the brass cylinder and chrome
cylinder. The arm should now rotate very
smoothly both horizontally and vertically on
the cleaned, re-lubricated, and readjusted bearings,
with very little slop or play. (The final
cone bearing adjustment will be done by ear
after the setup is complete.)
Lubricate the platter bearing well with 10-15
drops of liquid silicon and coat the patter
bearing spindle too and reinstall the platter and
drive belt. If your foam mat is in bad shape we
would suggest it be replaced with a Tri-Pad
damped platter mat (available through Monster
Cable dealers or direct from Monster Cable,
101 Townsend St., San Francisco, CA 94107,
price $30-$40). Set up cartridge properly (that’s
another complete project to come), rebalance,
and reinstall table in your system.
Now comes the final bearing adjustment by ear
(one you will have to occasionally re-check as
the bearing adjustment will move with time
and use). Starting with a setup in which there is
only a small amount of play (slop) in the cone
pivot bearings (you can feel the play by gently
twisting the arm from the headshell end), play
a dynamic record containing detailed highs
and bass. If the arm bearings are adjusted too
tight, the arm will bind slightly, and the sonic
quality will be “stifled” – compressed with a
small, undynamic sound stage (sorry about
getting into “arm-waving” audiophile vocabulary
but there isn’t any other good way to
express these subjective perceptions). If the
arm bearings are too loose (too much slop) the
sound will get bright and “hashy” sounding
(from excess arm resonances and bearing rattle).
Making careful and small adjustments with
your jeweler’s screwdriver, either tighten or back off the cone bearings until the sound stage
is smooth, dynamic, and big. If the whole
works has been silicon lubricated, both the
platter and arm should have the feel of “greased
glass” and the overall sonic quality will not be
exceeded by any other table and arm, no matter
how expensive or exotic. In other words, if you
can find a good used original AR table at a
reasonable price, buy it, set it up as above, and
use it, you won’t do better.

xmas111
Well-Known Member
I rebuilt a AR XA just over a year ago and love it.
A couple of weeks ago a guy gave me one for free.....you can read about it here.
A real nice guy....
I plan on rebuilding that one some time this year.
To me they're simply elegant and a real nice sounding TT. :thmbsp:
John
A couple of weeks ago a guy gave me one for free.....you can read about it here.
A real nice guy....
I plan on rebuilding that one some time this year.
To me they're simply elegant and a real nice sounding TT. :thmbsp:
John

12ax7
Super Member
A couple of comments (minor quibbles) on that article. The article is 27 years old and has excellent, and still valid, advice on cleaning, lubing, disabling the damping and adjusting the tonearm. However, it repeatedly refers to the tonearm cone bearings plurally, when in fact the bearing is one plastic (Delrin?) rod with coned ends that is inserted into the brass cylinder. The difference is important because that rod can, and often does, slide side to side within the brass cylinder. Over time this can result in one end of the rod becoming mushroomed and/or frayed if misadjusted. The bearing rod can also be compressed/shortened by maladjustment. Either case may cause one or both of the needle screws to ride directly on the brass cylinder. Granted, these are extreme cases but I've seen them. Always check when reassembling. In one instance I glued a short rod into the cylinder and then recut the bearing into two appropriate length bearing"s".
The article also didn't mention the Delrin thrust washers in the platter and tonearm bearing wells. These should be removed when cleaning the wells. Perhaps the table in question was a Delrin sleeved version.
The article also didn't mention the Delrin thrust washers in the platter and tonearm bearing wells. These should be removed when cleaning the wells. Perhaps the table in question was a Delrin sleeved version.
rhing
Active Member
The article also didn't mention the Delrin thrust washers in the platter and tonearm bearing wells. These should be removed when cleaning the wells. Perhaps the table in question was a Delrin sleeved version.
My AR XA doesn't have the Delrin thrust washers in the platter bearing well. It doesn't have a Delrin sleeve either. Am I missing something here?

KrisM
Lunatic Member
I can add to the people who have heard an improvement when the damping system is removed. I pretty much had to, it was wonky and would sometimes kick in when a record was playing. I couldn't get the pin out so I had to use a bench grinder.
I also did the spindle polishing tweak and think it is worth the small amount of time/money it takes. A rock/gem store polished the arm spindle for me.
I also did the spindle polishing tweak and think it is worth the small amount of time/money it takes. A rock/gem store polished the arm spindle for me.