• The move to the new server is done. There are some software and database maintenance updates in process. This has us passing the hat around to help out. We appreciate any donations. Seriously, even a dollar helps. The payment page may be found here - https://www.audiokarma.org/support.html

B&K ST-140 RECAP BOM

ChrisP2

Member
Just finished updating an ST-140, thought the attached BOM would help others as this was a bit of a journey....

1988 Unit with TO-3 MOSFETs - Which were luckily in good shape

Unit had issues on left channel with Offset & BIAS - All Fuses Blown on that channel.
  • Full Recap including 22mF Filter Caps which fit the Original PCB OEM 2nd set of Mounting Holes
  • Replaced the 1st/2nd Stage Transistors with direct replacements and ZTX795A for PN4889 PNPs
  • New Multi-turn Trimmer Pots on the Component side of the board for P1 & P2
  • Re-soldered all connections - MOSFET Mounts were flaky/suspect as called out elsewhere.
  • New SilPads on the MOSFETs
  • Everything came back fairly painlessly ;)
  • Bias Stable at 200mA & DC Offset ~1mV and stable.
  • Use the B&K procedures for Bias/Off-Set posted elsewhere
Your VARIAC is your friend on these amps:
  • Triple check you don't have contact between the TO-3s and the heat sink before applying power with your meter's continuity checker (trust me it's a problem).
  • Fire up each channel separately and watch the current on -V per the Bias instructions - If the current ramps up over 200mA at low AC Voltage you have a problem.- Check the MOSFET Mounts.
The Trimmer POTS are a bit of challenge:
  • Used 3/8" 500 Ohm 1/2W Trimmer POTS for P1 (Offset) - Trim Screw Facing Up on Each respective Board - Leads are straight-line on these - No Problem making it work.
  • Used 6mm 500 Ohm 1/4W Trimmer POTS for P2 (BIAS) to Provide Clearance under the Heat Sink - These are Triangle Config Leads - Left Side Works Great No Mods - Right channel added a 4th hole for the Wiper Lead so the trim screw faces up - Wiper Lead Easily Reaches the common pad on the Q9 side of the Trimmer.
  • Deleted the 475 Ohm Parallel Resistor on P2 - Multi-turn POT worked fine standalone.
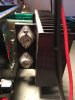
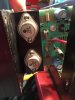
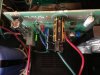
  • See Attached PIC
  • Trimmer POTs on the Attached BOM List - Huge Improvement over the OEM single turn POTs.

End product sounds pretty amazing, very nice AMP.
 

Attachments

  • IMG_0933.JPG
    IMG_0933.JPG
    75.4 KB · Views: 532
  • IMG_0937.JPG
    IMG_0937.JPG
    75.9 KB · Views: 521
  • B&K ST-140 BOM.pdf
    B&K ST-140 BOM.pdf
    357.1 KB · Views: 279
Register to hide this ad
Just finished updating an ST-140, thought the attached BOM would help others as this was a bit of a journey....

1988 Unit with TO-3 MOSFETs - Which were luckily in good shape

Unit had issues on left channel with Offset & BIAS - All Fuses Blown on that channel.
  • Full Recap including 22mF Filter Caps which fit the Original PCB OEM 2nd set of Mounting Holes
  • Replaced the 1st/2nd Stage Transistors with direct replacements and ZTX795A for PN4889 PNPs
  • New Multi-turn Trimmer Pots on the Component side of the board for P1 & P2
  • Re-soldered all connections - MOSFET Mounts were flaky/suspect as called out elsewhere.
  • New SilPads on the MOSFETs
  • Everything came back fairly painlessly ;)
  • Bias Stable at 200mA & DC Offset ~1mV and stable.
  • Use the B&K procedures for Bias/Off-Set posted elsewhere
Your VARIAC is your friend on these amps:
  • Triple check you don't have contact between the TO-3s and the heat sink before applying power with your meter's continuity checker (trust me it's a problem).
  • Fire up each channel separately and watch the current on -V per the Bias instructions - If the current ramps up over 200mA at low AC Voltage you have a problem.- Check the MOSFET Mounts.
The Trimmer POTS are a bit of challenge:
  • Used 3/8" 500 Ohm 1/2W Trimmer POTS for P1 (Offset) - Trim Screw Facing Up on Each respective Board - Leads are straight-line on these - No Problem making it work.
  • Used 6mm 500 Ohm 1/4W Trimmer POTS for P2 (BIAS) to Provide Clearance under the Heat Sink - These are Triangle Config Leads - Left Side Works Great No Mods - Right channel added a 4th hole for the Wiper Lead so the trim screw faces up - Wiper Lead Easily Reaches the common pad on the Q9 side of the Trimmer.
  • Deleted the 475 Ohm Parallel Resistor on P2 - Multi-turn POT worked fine standalone.
  • See Attached PIC
  • Trimmer POTs on the Attached BOM List - Huge Improvement over the OEM single turn POTs.

End product sounds pretty amazing, very nice AMP.
Hey Great post!, just found it. I'm still learning my way around.
Anyway I've done a re-build as well on an ST-140 and you mentioned something that caught my eye about making sure you're isolated from the heatsink. When I connect the output mosfets together with the screws, My dim bulb limiter indicates a short. This happens even when the heat sink is not sandwiched between the transistor and the sockets. What the heck is going on? I'm stumped, any ideas?
Thanks - jrharley
 
Sorry JR, did not check the post for a while. Did you sort it out ?
Hey Chris, Thanks a lot for responding. Don't I wish! Boy this thing has me banging my head against the wall. I've worked my way to the output MOSFETs but it's not making sense to me. Without the source lead (screws) connected, no short appears. The second I connect the TO-3 can into the circuit with the screws, the limiter lights up like a lighthouse. Must be a bad MOSFET right? Nix, they all test fine. There's no continuity between transistor body and the heatsink either. I attached a photo that I sent to a friend so you can see it. While I have no doubt "gone to school" on this unit, I can't find what I'm missing. It's probably something head slappin' simple. Thanks for weighing in. - JR Harley
 

Attachments

JR - Had the same issue several times, screws must be hitting.

Couple Of obvious items to check:

- MOSFETS in the right spots - Opposite side to side since the driver boards are flipped.

- Heat sink flipped ? I don’t think it matters but check it. Has to line up with the mounts side to side.

If that all checks out double check that the black plastic spacers on the MOSFET mounts fit perfectly into the heat sink holes as you are assembling.

I found it helped to leave all the screws loose until the bottom MOSFETS were perfectly aligned and the plastic mounts seated. If the spacers are not in the holes perfectly the screws will absolutely hit.

All of that happens with the driver boards hanging a couple of inches out of the rear of the unit, just enough to get the MOSFETS mounted.

Good luck !
 
JR - Had the same issue several times, screws must be hitting.

Couple Of obvious items to check:

- MOSFETS in the right spots - Opposite side to side since the driver boards are flipped.

- Heat sink flipped ? I don’t think it matters but check it. Has to line up with the mounts side to side.

If that all checks out double check that the black plastic spacers on the MOSFET mounts fit perfectly into the heat sink holes as you are assembling.

I found it helped to leave all the screws loose until the bottom MOSFETS were perfectly aligned and the plastic mounts seated. If the spacers are not in the holes perfectly the screws will absolutely hit.

All of that happens with the driver boards hanging a couple of inches out of the rear of the unit, just enough to get the MOSFETS mounted.

Good luck !
Thanks Chris! I really appreciate your time and thoughts. I could use some luck right about now. Touching the heatsink was top of mind of course, so I actually lifted both boards up and placed them on a towel to keep from shorting on something, then re-installed the MOSFETs with shorter screws - no heatsink in the equation. When I powered it up, I still got a short. Since I had replaced the drivers as well, and it's a little weird the way the pin-out is referenced to the little tab on the transistor body, I thought I might have gotten the pin-out wrong on those, but they they seem to be correct upon double checking. When I started this journey, I made a drawing of both boards and took photos for reference. I've got the k135 on top and the J50 on the bottom on the right board and the J50 on top and the K135 on the bottom on the left board.(Viewed from the front of the amp). Photos of the original build show the same placement.

For what it's worth, rail voltages are spot on, rectifier tests as it should, (in circuit), and biasing pots are all new and testing fine. I'm back to tracing electrons on the schematic trying to find where it could possibly be taking a shortcut to ground. Whatever it is, it's common to both boards. The unit shorts with either board, or both boards installed. I pulled the output wire(s) off the fuse terminal in case the fuse holder was shorted to the chassis, and fired it up. Still got the short.

So the head banging continues. Thanks again!

JR
 
JR, definitely odd...

Take a look at the attached pics, this was just before I pulled the MOSFETs......might help double check but your notes above sound right. Note the direction of the text is readable from the front of the amp.

From your notes, the Power Supply sounds fine, might be worth a double check without the driver boards installed just to rule that out.

Do you have a Variac ? I ended up watching the current across the V- fuse and slowly ramped up voltage, one channel at a time. When I had issues with the mounts, it was very clear watching the current across the fuse even at about 10% of line voltage. Once the mount issues were solved, the current came back into correct bias range.

Thx, Chris
 

Attachments

  • IMG-0878.JPG
    IMG-0878.JPG
    43.2 KB · Views: 234
  • IMG-0879.JPG
    IMG-0879.JPG
    50.1 KB · Views: 233
JR, definitely odd...

Take a look at the attached pics, this was just before I pulled the MOSFETs......might help double check but your notes above sound right. Note the direction of the text is readable from the front of the amp.

From your notes, the Power Supply sounds fine, might be worth a double check without the driver boards installed just to rule that out.

Do you have a Variac ? I ended up watching the current across the V- fuse and slowly ramped up voltage, one channel at a time. When I had issues with the mounts, it was very clear watching the current across the fuse even at about 10% of line voltage. Once the mount issues were solved, the current came back into correct bias range.

Thx, Chris
Hey Chris
Yep, you're right on. When I power the amp up with no boards, I get no issues with the "big light", and I've got the correct rail voltages on the connector plugs, so the power supply section is good to go.

I do have a Variac. Bench test power is currently as follows: Isolation transformer feeds a vintage "Varitran V-1M" . The current limiter is plugged in to the variac, and I usually run a 300 W Edison in it. Equipment under test is plugged into the limiter.

So I could do the procedure you describe. Thanks for that, it makes sense to start looking at current. That gives me a new way of thinking about this problem.
I am unfamiliar with the term V-fuse, but I assume you are referring to the speaker protection fuses tied to the positive speaker output jacks.

It's kind of embarrassing that this simple of an amp is kicking my..... but hey, I appreciate your comments.

JR
 
Hi JR, check the BIAS procedure posted above, it calls for measuring current across the negative rail (V-) 4A Fuse Holder (fuse removed of course) on each driver board.

That's where I watched current as I nudged up line voltage on the Variac......one board at a time.
 
Hi JR, check the BIAS procedure posted above, it calls for measuring current across the negative rail (V-) 4A Fuse Holder (fuse removed of course) on each driver board.

That's where I watched current as I nudged up line voltage on the Variac......one board at a time.
Aaaaaahhh..........."I see... said the blind man"

Thanks
JR
 
I have the torroidial transformer version of the 140 and the schematics out there do not correspond . For example, the available schematic calls for a resistor RF 17,4k and both current boards have 1k resistors that appear not have been replaced. One was charred but reading 400 ohms. There's no mention of R10 resistor. And there's a .1uf cap and no mention on the schematic. Thanks for the great post, by the way.
 
There are 3 versions and if you don't have the schematic, copy the other board's components. Also, "...Fire up each channel separately" if you intend on setting the bias. Unplug the board that's not being biased or you may get a hum. Follow the B&K procedure with a variac turning it up very slowly, or the OT's will be blown. Easy and affordable to repair. Great power and sound.
 
There are 3 versions and if you don't have the schematic, copy the other board's components. Also, "...Fire up each channel separately" if you intend on setting the bias. Unplug the board that's not being biased or you may get a hum. Follow the B&K procedure with a variac turning it up very slowly, or the OT's will be blown. Easy and affordable to repair. Great power and sound.

Hey raycarr,
Thanks for your follow-up. I'm just getting back to the ST-140 after a long stint with other projects, and noticed your comments as I refreshed my memory looking at previous threads. Mine has a toroidal transformer too. Haven't noticed the mystery cap you mentioned though. Interesting.

Boy, this one continues to be a head scratcher for me. I've ruled out the power supply, I've ruled out the output MOSFETS, I've ruled out basic shorts to the chassis, and I've ruled out the output transistors shorting to the heat sink. I keep coming back to something on the amp boards, and it keeps "smelling" like it's a poor choice in a transistor substitute that has a reversed pin-out perhaps. I'm focusing on Q2,Q3, and Q7. The substitutes I used don't match those used by someone else on the forums, who posted a Mouser parts list that they used. Even though I've studied data sheets and diagrammed things till my head split open, I can't find an obvious error in the re-build. Maybe I'll get some of the substitutes shown in that Mouser list and try them out. I've got no better options at this point.

Thanks for your interest and comments.

jrh
 
for the output transistors, I used the Thermo-pads.
I copied the parts from the working board as there are several different versions of the st 140.
I used the BOM and had to try several vendors to obtain working (and probably not fake) bipolar transistors.
I ended up replacing all board parts, except the large can caps and output transistors for reliability. Works just fine- plenty of power. Parts were obtained from mouser, digikey and the bay.

2N3440 Bipolar Transistor, 250V,1A, NPN, TO-39 Fairchild (FAKES)
2N3440 Motorola Transistor Audio Power Amp Amplifier Drivers
2N5416 MOTOROL
1000V 50A Metal Case Single Phase Diode Bridge Rectifier KBPC5010 USA
#: 610-2N5210
Desc.: Bipolar Transistors - BJT NPN
522-ZTX795A
Mfr. #: ZTX795A
Desc.: Bipolar Transistors - BJT PNP
#: 610-2N5551
Mfr. #: 2N5551 PBFREE
Desc.: Bipolar Transistors - BJT NPN
#: 81-PV37X501C01B00
Mfr. #: PV37X501C01B00
Desc.: Through Hole Trimmer Resistors 500ohms Sealed 6mm Square 12turn


Last edited:
Hey guys....the notes Ray pointed out are critical to troubleshooting the ST140s.

1) Definitely work one channel at a time - Easy enough to unplug the Molex connector

2) Use the Variac to Start Up - This is how I resolved the MOSFET mounting issues

3) Replace the Transistors and the caps on the driver boards. I recall having an issue with the 0.1uf bypass caps, I replaced the electrolytic and the poly caps C4-C7.

The one I worked on (which the BOM came from) was dead shorted. MOSFETs were OK, Power Supply was OK, problem was on the boards, which got the full refresh and eveything came back up pretty normally. MOSFET mounts were a huge PITA, bad design. Variac start up is hugely important, Dim Bulb tester will not get it done.

Great Amp, hope you get it back on line JR !

Thx, Chris
 
Back
Top Bottom