• The move to the new server is done. There are some software and database maintenance updates in process. This has us passing the hat around to help out. We appreciate any donations. Seriously, even a dollar helps. The payment page may be found here - https://www.audiokarma.org/support.html

Back Loaded Horn Speaker Build. No Happy Ending (Yet).

FireGuruMN

Active Member
[edit] Based on the first couple of comments these are back horns and not transmission line speakers. My bad. But I can't edit the title from what I can see. . .

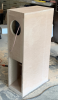
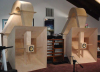
So I had a week without work and needed something to keep me from going nuts. So I did something nuts. Built these:

upload_2020-5-18_16-47-21.png
Hmmm, no sense of scale in that picture. They are 1.135 meters (42 inches) tall and weigh 135 pounds. Yes, full on nuts. But when you own 4435's "nuts" is a relative term.

They are still not quite done with the finishes. I ordered walnut veneer and I am working on the grills still. I will post a complete diary of the build process and such soon but my immediate concern is that they suck.:mad:

Well, that's a bit of an overstatement but I can't leave them the way they are. Here is the problem:
First, they have inadequate low end. I know, I know what did I expect from an 8 inch driver? I can apply an EQ curve and that will boost the low end up to a very acceptable level:

upload_2020-5-18_16-57-35.png
(Sorry, that is from a different computer so I did a camera picture. I dropped the mid-range (3k) a bit also but relevant.
I can deal with needing an EQ curve even though the reviews of this driver and enclosure indicated it would have really good bass. Maybe it's just a personal preference in the sound I like. I have many other speakers that I am happy with that do not need an EQ like that.
Second: Once I get the low end sounding good, the vocals and high frequencies drop out every time a bass note comes through. This is very evident on Ed Sheeran Afire Love. (sorry, it's just a good test song). As soon as the bass notes are gone everything sounds wonderful again. What's going on there? Is the driver not capable of generating bass and mid-range at the same time? Is some sort of back pressure building up that is muffling the mid-range? I don't think it is anything to do with room acoustics or external influences like that. I have had them in two different rooms.
Other details:
  • I have no crossover installed. I hope to not need one but might add one is it can be designed to compensate for the lack of bass. Probably a notch filter around 3k also.
  • There is poly fill behind the driver. The problem happens with or with out the fill.
  • This is driven with a CX-A5000/MX-A5000 but I also tried several other amps.
I've got no problem adding a separate woofer and crossover if that is what it takes. I just need these to sound good. I'd wanted them to be a demonstration piece for how impressive an 8" driver could sound but maybe I need to get past that.

Help.:dunno:

I'll post this and maybe by the time I get through the build steps I will have an answer.
 

Attachments

Last edited:
Register to hide this ad
You haven't built a transmission line. TLs have damping in most of the line, and the mouth is relatively close to the size of the driver, rather than dramatically larger. I think you may have built a quarter wave tapered pipe speaker (TQWP) but I'm not sure - that design is more complicated than normal for them, and has many bends which make the wave path full of reflections which you would not want in such a design. But the narrow extension of the chamber right behind the driver looks like the 1/3 of the pipe that is beyond the driver, and the folded pipe does get larger as it gets longer. So maybe it is. But I don't get why you would make it so complex and have so many abrupt transitions in direction and size (both of which cause reflections).
I'm no expert, but if the design is, in fact, a version of TQWP, I am not surprised that the bass is very badly behaved.
 
So here is the rest of the story (so far).
I was planning on building these:
Which I will probably still do but they are also nuts IMHO.
While researching the drivers I saw that PE had the SUG1-19 plans posted on their web page. I had recently watched this video:
About building a small set of back horn speakers that looked like the SUG1-19 design from Tang Band. So I was intrigued.
So I went ahead and built the little speakers. Here are some pictures:
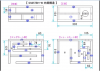
Plans captured from the video:
upload_2020-5-18_17-28-4.png
Everything is metric and Japanese, headache number one.
I started building them and discovered they would end up being bigger than the original dimensions because I was apparently using thicker wood. My wood was 3/4" (19mm) and the plans looked to be about that thickness but apparently not. So plan B:
Layout one half of the pathway and leave the lines extending off the side, layout the other pathway and leave the lines extending off the bottom and trim the sides such that both would fit on the wood. The width of the audio path seem to be the critical issue more than the length. Regardless I drew it all out and it fits. Let the sawdust fly:
upload_2020-5-18_17-42-2.png
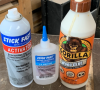
This superglue with instant activator is great for impatient people:
upload_2020-5-18_17-43-5.png
You put wood glue for the main bonding then run a strip of this stuff down the seam and spray the activator on and it sets up instantly. Then move to the next one board. Wonderful.
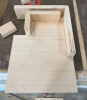
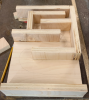
One side glued up:
upload_2020-5-18_17-44-42.png
Otherside glued up:
upload_2020-5-18_17-45-13.png
I used just one center board whereas the video used two separate boards. This seemed logical but different.
Cut a notch for speaker terminals and ran a wire.
upload_2020-5-18_17-47-0.png
Glued the sides on:
upload_2020-5-18_17-47-37.png
Made the top and face with a miter so they might look nice. If these don't end up in the bonfire I think I will end up putting veneer on the whole thing as an experiment in how to apply veneer before doing the big ones.
upload_2020-5-18_17-49-37.png
Glued it all up and put the drivers in. Little tiny drivers (2 inch") from digi-key. That is what fascinated me about this design. That and the fact there are two pathways for the audio to travel out the back of the driver.
So how do they sound? Impressive. The coolest thing was trying it out with the driver mounted to the face but not attached to the main box. Tinny icky transistor radio sound. Then I move it to the back box and a surprising amount of mid-range comes out. Not really any bass but really good sounding mid-range.
upload_2020-5-18_17-55-41.png
Those are really nice strap clamps. Menards I think. Xmas gift so I can't say for sure.

Success! Time to build the big boys.

Continued. . .
 
Last edited:

It's a back loaded horn isn't it?
Yes it is a back loaded horn from the title on the second video I posted. In Japanese and English!. I'm really not and sort of expert on speaker design (obviously). The transmission line idea came from a separate conversation that I had.
[place long details conversation about different speaker designs here].


bends which make the wave path full of reflections
You might be on to something very distressing here. One of the plans calls for "hybrid cotton" on most of the surfaces in the wave path. I suspect that hybrid cotton is a poor translation from Chinese or Japanese. The substance is pictured in one of the PDF's that I attached. It looks like carpet pad. I asked the PE folks about it and they were not much help. They tried to sell me some foam padding at great expense. I looked around and found some carpet padding that looked similar but what I found was only 1/4" thick. Another build I found of these speakers had some hybrid cotton that looked to be 1/2 thick. Could that cause issues with bass knocking out mid-range? Hard to imagine. Seriously if I pull the bass frequencies (below 200hz) down 15db I can play these as loud as I want and they sound great except for the lack of bass.

Onward through the fog:
 
But when you own 4435's "nuts" is a relative term.

If you are used to hearing those JBL's that may be part of the problem, the saying chalk and cheese applies here, you probably couldn't get a more different pair of speakers. A lot of people love back loaded horns with single ended tube amps, I also notice a lot say they need some form of crossover to sound their best. Hopefully others with more knowledge about them will chime in.
 
Have you considered the possibility that your eq curve/desire for bass is making the amp run out of power and this is ruining the midrange? Maybe try a more powerful amp.
 
I know, I know what did I expect from an 8 inch driver?
What makes you think an 8" driver is incapable of producing bass? There's no reason why you can't get low frequencies from an 8" driver.

For me, there's a problem with horns. What's the point of a horn? It's to increase the efficiency. However, to operate at low frequencies the horn has to be very large. If the horn isn't large enough it will only increase the efficiency for the mid range and upwards. That means the bass will sound deficient.
Anyway, others may disagree with me about that.
 
Let me get a few thoughts out of the way:
  • Do not assume I know what I am doing.
  • Do not assume that a Chinese speaker driver manufacturer cares about a middle age American building speakers in his garage. They just want to sell more speaker drivers.
  • Do not assume this story ends well. I still have hopes but you have read the above posts I assume.
  • Do not assume that dust masks are available yet. Seriously? It's been 2 months since this was a full on pandemic and now I have to breath MDF dust because our government couldn't organize a silverware drawer if their lives depended on it? Arg.
  • Do not assume you can move these once they are built. They are top heavy and weigh 135 pounds if you make them out of the 1 inch MDF recommended on the plans.
  • Do not assume that metric measuring tools are readily available in the USA. I found one tape measure after checking 3 local hardware stores and it was the last one in stock and had dust on it. Converting the measurements to English units gives all sorts of nuts numbers so building with metric units seemed the best approach.
  • Do not assume that 1 inch MDF is readily available. I found it at one wholesale house and had to go through a lumber yard to order it. But really, if you are using 1" MDF you are as nuts as I am. Get some nice core plywood (the good stuff without gaps in the matrix) and move on. There is so much structure inside this speaker it can't flex much anyway. MDF dust is not good for you and the glue they use stinks for years. Google Formaldehyde.
  • Do not assume you have enough glue. MDF sucks up glue.
  • Don't assume that a millimeter here and there will not matter. Engineered wood is very unforgiving. Not like plywood or hardwood. You cannot just push harder and make it fit together. Measure twice and absolutely account for blade thickness.
  • Do not assume that the neighbors will be happy that the old coot at the end of the cul-de-sac is working in the garage again playing his loud 70's music and running power tools all day.
  • Do not assume it will be warm in May in Minnesota.
  • Do not assume all glue is water soluble.
  • Do not assume your wife will be any happier to have another set of speakers in the house just because you built them yourself.
I also found this link from another person building these speakers:
https://www.diy-hifi-forum.eu/forum...Backloaded-Horn-SUG1-19-mit-Tang-Band-W8-1772
It's in German but Google Translate does a fine job of translating it. He seems to be more of a carpenter. I have serious CLAMP ENVY.

I laid the pieces I had to cut out in AutoCAD just to determine how many sheets it would take to make 2 speakers. I think it could be done with 2 sheets but I could not fit all the pieces out to make it work and I knew I would mess up something somewhere so I got 3 sheets. I built these entirely without help with is also nuts for a 55 year old coot.
Don't try to run these through a table saw yourself unless you have a full table setup. I did this:
upload_2020-5-18_19-2-25.png
If needed you can make rough cuts and clean it up in a table saw. I'm really good with a circular saw so I pretty much nailed it. Layout every board on one of the sides:
upload_2020-5-18_19-4-6.png
The plans do not really show how the overlaps work. The other builder made miters. Too much effort for me. He also used an entirely different process to build the interiors. feel free to stop reading now and follow his steps. But my process worked fine for me. All of the interior wave guides are the same width (250mm) so I ripped a bunch of that width. I chose to have my top and bottom be the entire width of the speaker (300mm) which was a good choice for me. Since it will all end up with a veneer it really does not matter. Dry fit everything:
upload_2020-5-18_19-9-22.png
Maybe a little tape is in order to hold things up. Mine "dominoed" a couple of times. I chose to fill in the back of the speaker under the wedge. The plans show it open. Looks like a good place for spider webs and I don't see how it could affect the sound. The other guy put his crossover in there. I don't have a crossover (yet). I also saw no reason to cut the steep angle in the bottom board in the picture. No one will see it because there is another board that goes under it in the end.

Then glue all of the wave guides together BUT DO NOT GLUE IT TO THE SIDE of the speaker yet. As on the little speakers I applied lots of wood glue then froze everything place with superglue and activator. I do like that stuff. It is ok (and actually good) if a little glue leaks down to the side of the speaker. That will hold the wave guides in place for the next step. I chose to use dowels to hold my wave guides to the sides. I saw that in the build video of the small speakers and wanted to give it a try. The German builder used biscuits which I have never enjoyed using. Now that I am done I have a feeling that just using glue would be entirely adequate but here is the process for using dowels: Buy them:
upload_2020-5-18_19-20-44.png
Got these at Harbor Freight. I used 1/4 inch dowels but really that is undersized for any real structural support now that I think it through. 3/8 might be a better choice or just use glue and nothing else. Heck, you could drive screws through the side if you are using veneer. I wanted the learning experience so off I go. The thing you need mostly is a pile of the dowel centers:
upload_2020-5-18_19-21-41.png
I think I ended up buying 8 sets to get a total of 32 center pins. Had to drive to 4 different stores to get all I needed. Plan ahead.
The drill bit with the stop is included also. I now have 7 extras. . .
upload_2020-5-18_19-25-30.png
Now I have to admit that I will show you the SECOND speaker I assembled. My first one was a train wreck. I tried to flip the wave guides over and start the dowel process but the glue was not setup and 10 other problems a 1000 curse words. The answer is to leave everything sitting on the one side and apply the dowels to the second side first:
upload_2020-5-18_19-29-18.png
I was able to get by with 4 bar clamps, 2 wood clamps and 2 strap clamps. But more would help. It is nice to have a the pieces sticking to the first side with the little bit of glue that dripped down. DO NOT assume that you can get these to stand up exactly vertically. Use a square to make sure they are perpendicular with the side. The 3 layer angle board a the bottom was not vertical and caused problems putting the bottom board on. I caught it before the glue dried. Whew.
The plans call for several filler boards that are parallel with the sides. Originally I was thinking these were some super geeky wave guide thing that I had no hope of understanding.
upload_2020-5-18_19-34-39.png
As I now understand it they are simply supports that allow you to build the internal wave guides without the whole thing falling apart. So with the process I used they are entirely unnecessary. But don't assume I know what I am doing. . .
So once the glue has setup enough you can remove the clamps. At this point grab the other side and make sure it fits solidly and perfectly flat with no wobbles at all. If there are any high points or glue globs sand them down. Be sure to wear a mask when sanding. Oh, sorry, maybe they are available by now. . .

Drill 32 holes in well chosen locations. Go a little deeper than half the length of your dowels to allow for dust and glue. Here were my choices for locations. Mostly two on every board:
upload_2020-5-18_19-37-5.png
The put the center pins in each hole. Put the top carefully over the wave guides. Line it up as best as you can. Then get your favorite hammer and wood block and relieve some frustration. Personally I used a "slow hammer". A plastic hammer filled with metal balls. It makes for a more meaningful impact. Be sure to hit on top of every center pin. You may have to hit some areas harder if the boards are not entirely even. Then top the side up and MAKE SURE YOU HAVE A POINT EVERYWHERE. Mark each one with an X. Count them. Double check. Your life will be shortened if you missed even one.
Then bring the side over to a bench and drill out all the holes the same depth as before. Try to keep the holes square.

Put dowel pins in each hole on the wave guides. Now in a perfect world you will bring your side back and line it up and it would fall right in place. That happened exactly once in the four times I have tried this in my life (so far). Regardless make sure you dry fit each time and do not use any glue until the side falls nicely into place without any hammering or swearing.

Then get your clamps ready. You will need all of them unless you are a certain German speaker builder.
Remove the dry fit side and all the dowels. Put a lot of glue on all of the edges of the wave guides. Smooth it out with your finger or a roller if you are luck enough to find your roller. Put glue on your dowel pins and insert them. AS SOON AS THEY HAVE GLUE ON THEM THEY START EXPANDING SO MOVE QUICKLY. Drop the side back on and clamp clamp clamp. Glue will spill out. If it does not you did not use enough glue. Use a wet towel to wipe up whatever is visible. Some areas of the inside may be visible depending on the grill you decide to make so clean up the insides as necessary.


Continued. . .
 

Attachments

  • upload_2020-5-18_19-56-19.png
    upload_2020-5-18_19-56-19.png
    749.4 KB · Views: 18
Last edited:
desire for bass is making the amp run out of power
The MX-A5000 is 150wpc and can drive any speaker I own to punishing levels of volume with none of these problems. It's not the amp. These drivers are very efficient and I am only turning the volume up to -35db to make them loud. That's probably only a couple watts of output. And if an amp is going to give out it will give out on the low end where the energy is, not the high frequencies. I am not loosing low end (once I have it), I am loosing high end.

There's no reason why you can't get low frequencies from an 8" driver.
I know that very well. I was just trying to prevent any replies that were telling me to get a bigger driver. I guess it had the opposite effect.
 
Last edited:
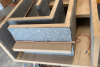
Let that all setup for a while with the clamps in place. Personally I went back after 30 minutes and moved a couple of clamps to different locations because I was seeing some gaps. If you put a clamp in place and glue squirts out then it was not clamped well enough in that location. More clamps are a good thing. Eventually the glue will dry. Probably over night if you are smart.
Then flip it over and remove the unglued side. It will probably take some convincing depending on how much glue dripped down. There will be some globs like this that need to be sanded off so the side fits solidly.
upload_2020-5-18_20-40-1.png
Time to do some interior work. Apply the "hybrid cotton" whatever the heck that is supposed to be. I may not have used the right stuff but here is what I used:
upload_2020-5-18_20-29-12.png
Got it at Menards. Way more than I needed. Not cheap. Plans way to put it on these surfaces:
upload_2020-5-18_20-30-31.png
Not lower because it will be visible. I plan on putting a grill over that area but still did not put any there in case I change my mind. I held it on with this stuff:
upload_2020-5-18_20-32-2.png
Contact glue in a spray bottle. Not water cleanup. Real sticky though.
Input jack.
upload_2020-5-18_20-33-49.png
I went with spade connectors for now. Maybe solder later. Hot glued in place. It's not a speaker project for me if there is no hot glue (see other posts). If I had it to do over I would have put it higher up so it was not visible. We can't all be smart.
This path for the wire only needed one hole:
upload_2020-5-18_20-35-46.png
At this time it is a very good idea to vacuum and blow out any and all dust and chips that might be inside the speaker still. Do a very good job. Murphy says that anything you leave behind will end up in the voice coil gap of your driver. And Murphy is always right.
Now I find that picture:
upload_2020-5-18_20-36-33.png
If you miss a hole it is possible to put a drop of water or glue on the dowel after the fact and mark the location. Or just remove that one dowel and get on with your life.
Once the hybrid cotton and wiring is in place you can repeat the process of putting on the other side. Keep in mind that once the glue sets on the second side no human will ever see inside the speaker again. Make sure all the hybrid cotton is attached well and the wire is good. Clamp clamp clamp.
Then the top and bottom can go on. If you put your clamps in the right locations you can get band clamps around while the other glue is setting up. Since I only had a week before work starts up again I multi-tasked.
Don't forget to put padding on the inside of the top. And make sure the top fits solidly. I had to do some sanding because it is an imperfect world.
upload_2020-5-18_20-43-58.png
This MDF does not like to bend like plywood. It is incredibly rigid. So if it does not fit solidly no amount of pressure on clamps will change that much.
upload_2020-5-18_20-46-2.png
I loosly put the clamps on and adjusted the position with the slow hammer before tightening all the way. Yes there is a gap there. It is not in the audio path and will be covered up with veneer. I was not in the mood to replace that board by the time I found the gap.
If (when) you bust out a corner you can just flatten the spot out and glue on a chunk of scrap. Sand it away and no one can tell. This stuff is basically ultra dense cardboard.
Cut the hold in the face for the driver. Make the hole as small as possible. Screws and MDF do not get along well. It is very easy to strip a hole. I would recommend using T-nuts and bolts if you want a classy job. I personally only put in 4 screws until I am done experimenting in case I strip one out I will have at least 4 good ones. You can always rotate 25 degrees and make all new holes but everyone will notice. . .
upload_2020-5-18_20-54-15.png
I went over all the seams and sanded until they were flat. That is a must if you are doing veneer. The plans call for the area behind the driver to be filled with poly-fill. I got mine from Walmart. It comes with plans for a teddy bear also. I added a piece of insect screen directly behind the driver to prevent any poly from coming in contact with the driver. That's as far as I got. I brought them into the basement, hooked them up and that is where this disappointing post started.

Continued. . .
 
Last edited:
Not sure myself but I'd bet it's to do with reflections in each section of the horn. I'm used to seeing a tapered transition throughout the enclosure not these straight sections. Each one is probably acting like a resonator as the pressure wave has no encouragement to move forward. The wave is stalled and cancelling itself in each section.

Probably not what you want to hear but you have the start/finish opening sizes. Maybe tear out the partitons and reconfigure them to form a taper to the exit?
 
Last edited:
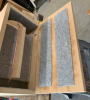
Since I am using this as a learning experience I will veneer them. I'm going with walnut because everyone does cherry. Here is my sample. Oiled and raw sample.
upload_2020-5-18_21-2-54.png
I found that if I put a cherry tinted oil on them it creates a wonderful warm color. I was hoping to do waterfall grain all the way around the speakers but the rolls only come in 96" lengths and that is about 4 inches too short when I include the top. Shoot.
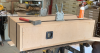
Working on grills also. I decided to cut them out of 3/4" plywood instead of stick framing them. It is a tall speaker and I am worried about the wood warping. And I had scraps of core plywood laying around.
upload_2020-5-18_21-7-42.png
upload_2020-5-18_21-8-8.png
Painted black so they are not visible through the grill cloth. I'm experimenting with magnets to attach the grills. They did that on my Polk LSiM707's and it is super cool. This is the WRONG way to do it:
upload_2020-5-18_21-10-18.png
That is a piece of metal on one side and a magnet on the other. It's cheaper but you HAVE TO USE TWO MAGNETS or the grill will not snap in place exactly and I've had enough frustration. I have super magnets ordered along with the veneer. When will I find time to finish. Depends on how long COVID lasts. . .

More drama to follow. . .
 
Maybe tear out the partitons and reconfigure them to form a taper to the exit?
They would probably burn real nice with all that glue. There is no way any human will ever see inside these speakers again with all the glue holding them together.
Maybe some nice open baffle speakers. . .Much easier to service.
Let's just say that I am not putting $200 worth of veneer on until they sound good.
I'm still thinking my "hybrid cotton" is too thin but there is no way to fix that now either. Maybe I could get into some places with access holes through the back or something to add padding but that's not going to get any sort of taper.

So in the back of my mind I am thinking: I have proven that I CAN get really good bass out of these speakers if I can keep the bass from cancelling out the high frequencies.
  • So cut a hole in the top,
  • Block off the opening between the front cavity and the snake path with a couple of blocks of MDF
  • Add an appropriate 8" woofer on the top
  • Add appropriate crossover.
I get to learn crossover design then too! Then I can change my member name to FrankensteinMN.
 
Last edited:
Speaker behavior is quirky and sometimes things that shouldn't work, do, and things that should work, dont. But this design has so many bends and butt ends of panels and supports that the number of reflections, hence interferences patterns, has to have some effect. The whole idea of back horns and TQWPs is that rear wave is able to get out to the outer world with minimum obstruction and interference in the frequency range being reinforced - while I wonder about reflections in horns like the Klipschorn, I believe the obstructions and bends in the path are at short enough distances that they screw up frequencies that are largely above the range the horn is meant to produce. Additionally, in the Khorn at least, the driver isn't a direct radiator and is a heavy cone, so transmission through the cone isn't as much an issue.
In the case of your speakers, lots of reflections are being produced at relatively high frequencies and amplitudes (including a big slap echo from right behind the driver) which can pass through the cone. You say that at low levels the balance is relatively decent, but at high volumes the mids disappear every time a bass note is produced - to me that sounds like reflections cancelling out mid frequencies.
I don't know if you can bevel all the protrusions and corners along the line, or pull the innards out and replace them with a more conventional TQWP folded horn (which is a hell of a lot easier to make, and lighter, too, since typically it is a single angled panel that runs from the front panel at or near the top of the mouth up and back to the upper rear, creating a folded triangular path).
I wouldn't think cutting holes and adding drivers would do anything to improve the sound. A subwoofer might be easier and cheaper if you want to retain the current speaker design.
 
You have my sympathy - you've spent a lot of time, effort and money making these and the results are disappointing. My guess is that that cabinet is just a very poor design and was never going to produce great sound. However, having put all that work into it I can appreciate that you'd be reluctant to dump it. Maybe try a different driver in there to see if works better with something else, but you may just have to accept that the design of the cabinet is at fault.
 
Geeking out with Room EQ Wizard a bit these days.
upload_2020-5-19_9-50-59.png
Measurements taken with an Anthem USB microphone. No calibration file so only for comparison purposes. Measurements taken approx 6 feet from speaker with microphone pointed directly at speaker.
Red-JBL 4435 all controls flat, recapped, Radian diaphragms.
Blue-Polk LSIM 707 unmodified.
Green-My Tang Bang speakers.

First, notice how efficient the 4435's are. Cool.
The tang-bang's look like the funnest roller coaster you could imagine. Wow. Not good.

I took some measurements playing pink noise also but the results do not make much sense to me. Curiously I do not see any measured evidence of a drop in mid-range when playing pink noise.


You have my sympathy
Thanks but this was unexplored territory for me so I was always expecting a possible failure. Really I'm just out $200 for the wood. I enjoyed all the building and learning new processes. And because I tend not to learn from experience I will probably build those other speakers this weekend. . .
 
The tang-bang's look like the funnest roller coaster you could imagine. Wow. Not good.
Those peaks and troughs appear to be at regular intervals and are characteristic of an undamped transmission line. Some damping material inside the line might help, though I'm not sure how you would get it in there.
Thanks but this was unexplored territory for me so I was always expecting a possible failure. Really I'm just out $200 for the wood. I enjoyed all the building and learning new processes. And because I tend not to learn from experience I will probably build those other speakers this weekend. . .
Well, it's good that you're not too disheartened by the experience. I think I'd be devastated :(
 
Wish I would have been there rooting for ya. I would have stayed out of your way. I would have even supplied the beer. That could have been the problem. You left the beer out.
 
Back
Top Bottom