• The move to the new server is done. There are some software and database maintenance updates in process. This has us passing the hat around to help out. We appreciate any donations. Seriously, even a dollar helps. The payment page may be found here - https://www.audiokarma.org/support.html

Back Loaded Horn Speaker Build. No Happy Ending (Yet).

If i use 1” thick wood i stead of 3/4” some space is taken up by the extra wood so the overall speaker will be a bit larger in the end to keep the audio path the same dimensions. The path size matters, right? Or is it just important that it keep getting bigger?
 
^ If that's a reply to my post, I think I must have misunderstood what you meant. I thought you meant you wanted to eliminate the tapered sections of the pictured design. My mistake.
 
So I ordered a pair of Fostex FE208EZ (actually it's FE208E[sigma] but everyone uses a "Z" apparently). I've got a few sheets of Baltic Birch ordered. All I need now is time. But since the FE208's are the same size as the Tang-Bang's I thought I would put them in the enclosures and see how they sound. I think they are less harsh than the tang-bangs. Possibly a little more low end too. I have not done any REW readings. I did add some newly purchased felt (see below) to the area behind the driver and above the driver compartment to see if some of the high-end drop out might be improved. I did not notice any major improvement in drop out after adding felt with either driver. So at least I proved the problem is not with the drivers.

Before I put on the veneer (which should be here soon) I plan on cutting holes at each bend in the audio path and putting in this thicker felt. Then I can glue the MDF plug I cut out back in and cover my sins with veneer. We will see if that helps the drop out problem.

I did find this stuff on a recent trip to MAC's in Fargo, ND. Lovely place (MACS and Fargo both):
upload_2020-6-4_15-44-14.png
That's the closest product I have found to the "hybrid cotton" on the original plans. It is pretty much 1/2 inch felt with a foil backing that makes it easy to glue.
upload_2020-6-4_15-50-38.png
And while searching Fostex speakers I found another foreign language video:
The design looks like a miniature Dallas II don't you think. But here is an interesting frame from the video:
upload_2020-6-4_15-57-41.png
Hybrid Cotton at all the bends. And in that other tiny space that no air can get to anyway. Hmmm. But yes, damping in all the bends and the top of the speaker compartment also.
More to follow.
 
I wouldn't call myself an expert in transmission line design but my understanding is that the bends aren't the issue - even if there were no bends you would still get peaks/troughs in the midrange due to standing waves in the line. The way to deal with those standing waves is to have damping material filling the full cross-section of the line, not just lining the surface.
 
rothwellaudio, stuffing the line is true for transmission lines but you're looking at a back loaded horn right there.
 
rothwellaudio, stuffing the line is true for transmission lines but you're looking at a back loaded horn right there.
Yes, I don't disagree. However, the thread title is "transmission line speaker build..." and it's not clear (to me) what the heck this design is supposed to be. It certainly looks more like a horn but the frequency response peaks/troughs look like transmission line standing waves. :dunno:
 
Yes, an unfortunate title. This is a back horn. I tried to correct the title with an added note/edit on the first post. Is there a way to change the title of a post? Or would that be even more confusing?

Regardless, I did try stuffing polyfill in the last pathway before the big horn opening at the bottom and lost tons of bass. I also removed some polyfill from directly behind the speaker driver and that seemed to recover some bass even. Obviously I cannot create a tapered pathway like the Dallas II design but I might be able to put 45 degree angles in the bends like the Dallas has. I'm not sure if that will help or hurt. I could do this in addition to and/or instead of adding felt to the bends. But I need to call these "done" soon and move on. No more modifications once the veneer goes on.

I do really enjoy listing to these speakers as long as I include the added bass with an equalizer curve. Like I said, the sound stage is wonderful. Acoustic guitar is a joy to hear. It's strange, I can listen to other speakers I have in the same location (4435, LSIM707) and when I switch over to the ones I made, the ones I made sound tinny and not good. But I listen for a while and everything seems good again. That is why I am trying to rely on instruments to evaluate things lately. Seems like I get used to [almost] anything I hear after a while.
 
I do really enjoy listing to these speakers as long as I include the added bass with an equalizer curve. Like I said, the sound stage is wonderful. Acoustic guitar is a joy to hear. It's strange, I can listen to other speakers I have in the same location (4435, LSIM707) and when I switch over to the ones I made, the ones I made sound tinny and not good. But I listen for a while and everything seems good again. That is why I am trying to rely on instruments to evaluate things lately. Seems like I get used to [almost] anything I hear after a while.

You can't rely on instruments or your ears, which can both be deceiving/deceived based on the content/recording. You can only rely on a sweep or RTA/pink noise. Once you get that right, you can make minor changes to taste.
 
You can't rely on instruments or your ears, which can both be deceiving/deceived based on the content/recording. You can only rely on a sweep or RTA/pink noise. Once you get that right, you can make minor changes to taste.
I agree. Even speakers that have bizarre frequency response anomalies can sound great if you find the right music to play on them. With good speakers you can play any music without feeling something is wrong.
 
Yes, an unfortunate title. This is a back horn. I tried to correct the title with an added note/edit on the first post. Is there a way to change the title of a post? Or would that be even more confusing?

Regardless, I did try stuffing polyfill in the last pathway before the big horn opening at the bottom and lost tons of bass. I also removed some polyfill from directly behind the speaker driver and that seemed to recover some bass even. Obviously I cannot create a tapered pathway like the Dallas II design but I might be able to put 45 degree angles in the bends like the Dallas has. I'm not sure if that will help or hurt. I could do this in addition to and/or instead of adding felt to the bends. But I need to call these "done" soon and move on. No more modifications once the veneer goes on.

I do really enjoy listing to these speakers as long as I include the added bass with an equalizer curve. Like I said, the sound stage is wonderful. Acoustic guitar is a joy to hear. It's strange, I can listen to other speakers I have in the same location (4435, LSIM707) and when I switch over to the ones I made, the ones I made sound tinny and not good. But I listen for a while and everything seems good again. That is why I am trying to rely on instruments to evaluate things lately. Seems like I get used to [almost] anything I hear after a while.

I changed the title for you.
Regards,
Jim
 
Sorry, it's been a while. Life keeps getting in the way when I am planning other things. . .
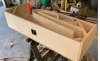
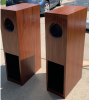
I can now declare a happy ending to this story. Here is the final look:
upload_2020-7-8_21-24-15.png
And I am happy to say the sound as good as they look.
Here is how I got to this endpoint:
Ordered walnut veneer from Amazon. Sticky-back already applied. I had to order three rolls at 2 feet by 8 feet to cover all the surfaces. And sadly 8 feet is not enough material to properly do a "waterfall" edge with the same grain wrapping all the way around the speaker sides/top/other side. Aww.
First step is to layout the veneer so it gets flat.
upload_2020-7-8_21-28-2.png
It took about a week before the curl came out enough to work with it. And one recommendation: DON'T GET THE STICKYBACK if you can avoid it. If you follow the instructions on the interweb, you still have to use contact cement on "raw" surfaces. And the worst thing is this sticky-back smells like Love Canal and Chernobyl had a baby. It's incredible. I had to put a fan blowing to the outside because it was intolerable. Even after 2 weeks. And more issues with the stickback later. . .Just get the raw wood veneer and use your own contact cement. But before the veneer goes on I have to do some surgery:
upload_2020-7-8_21-33-41.png
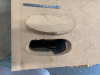
I cut into each speaker in 3 places so I could put the thicker felt at each of the bends in the audio path. I wish I had smaller hands to do this but I managed to spray glue on the thicker felt and stick it in without need any 911 calls. At this point I put some temporary tape over the plugs and brought them to the basement to plug them in. The problem with the high frequencies cancelling out when I raised the bass EQ was gone. Or at least I could not notice it anymore. That is very very good news. I guess the padding is doing its job. Lesson learned. But the plugs were not air tight yet so more to do. . .

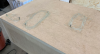
Satisfied that the audio problem was solved I globbed a pile of liquid nails on the plug and pressed it in place.
upload_2020-7-8_22-2-31.png
I drove some screws in the cracks to hold the plugs in place while everything set up. That is a super easy way to adjust the exact height/depth of things like this. In case you ever find yourself in such a situation.
upload_2020-7-8_21-37-53.png
While that glue was setting up I worked on putting magnets into the grills and speaker face. I wanted the magnets behind the veneer so now is the time. Because I am stupid, I bought these:
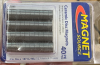
upload_2020-7-8_21-39-25.png
Don't be stupid. While the holding force of these magnets was theoretically adequate, in reality you need much much more holding force because the grill is trying to slide down the face and sliding magnets do not hold very well at all. And they are also separated by the veneer and the speaker grill cloth. So go WAY STRONG on the magnets. I recommend at least 1/2" diameter 1/8th thick rare earth magnets. Seriously I ended up putting in 10 of the ceramic magnets and the grills still slipped off. I added 2 pairs of rare earth magnets and the grills stuck like a dream (along with the 10 other magnet pairs). And I also have some of the smaller 3/8" by 1/16" magnets and they do not have the power needed. I think 8 pound force is what I ended up with for each pair. Also, I used 3/4" plywood for my grills because that is what I had and I also wanted that thickness for visual appeal. Using thinner wood will make for less weight but might lead to warping and or fragile grills. Everything is a compromise.
So here are the steps I used:
Put the grills on the speakers exactly where you want them to align.
Tape them in place.
Drills tiny holes through the grill and just into the speaker face. These holes will let you align the magnet positions without a tape measure.
Drill holes in the speaker face and grills to the appropriate depth. A brad point bit with a depth stop is the best thing. I have one somewhere but could not find it for this effort. Story of my life lately. So I went with a spade bit:
imagine these pictures with rare earth magnets instead of these ceramic ones.
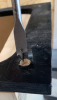
upload_2020-7-8_21-48-31.png
Now, remember back to grade school where you learned that magnets attract when the poles are opposite and repel when they are in the other direction. I managed to get a couple of my magnets aligned correctly but several of them were repelling instead of attracting. Brain fart. Face palm. Do over. But I managed to push them out before the epoxy set up fully. I was then very meticulous about getting the poles to line up correctly.
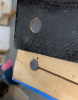
upload_2020-7-8_21-52-34.png
And do you 2 part epoxy to glue these in. I thought about using hot glue but it seriously does not have the holding force if you the correct magnets. And do your best to get the magnets to the correct depth. They will show through the veneer if they are not the correct height. The veneer is very very thin. Like maybe 20 sheets of paper thin.
Eventually the glue on the plugs setup and I sanded it very very smooth. I brought them to the theater room again and WOWAZA the extra padding did its job. I can now raise the low end in the EQ and get the bass sounding like I need it to sound. Actually they sound pretty good even with out any EQ at this point.
Continued. . .

 
I googled how to install this PSA (pressure sensitive adhesive) veneer. Just so see if there was an off chance that I could do something right the first time on this project.
The internet said that if you have raw wood you need to prepare it before applying the PSA veneer. I guess the PSA is mostly for applying over old veneer cabinets or that sort of thing. Since I had raw MDF it is too porous for the PSA goo to work right. Blah Blah Blah
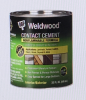
"Prepare" has a lot of meanings in this case. Some talked about painting, sealing with poly, and so on. But I ended up getting some water based contact cement because that internet guy seemed the smartest.
upload_2020-7-8_22-7-21.png
Apparently it has to be water based because the oil based stuff reacts badly with the PSA goo. Whatever.
Get your surface as smooth and flat as you possibly can. Every bump and sawdust spec will show through the veneer. Coat the surface with contact cement. I used a foam roller to apply it.
upload_2020-7-8_22-11-37.png
Let it get tacky.
Cut your veneer to about the correct size of the area you are covering. Maybe an inch of overlap is good. Don't cut it too close because once the veneer touches the contact cement they are joined for life. It's not quite as bad as using contact cement to contact cement so there is a little wiggle room but don't push your luck. Using dowels to hold the surfaces apart while lining things up is a good idea. There are lots of videos on non-PSA veneering.
Get a plastic putty knife like this to press the veneer down.
upload_2020-7-8_22-15-30.png
There are also veneer rollers but they can be pricy and this thing works very well. Don't use a metal one! Plastic is your friend. Start dear the middle of the surface and press outwards to push any bubbles out to the edges of the surface. If you get a trapped bubble you can cut a slot along the grain to pop it. But usually they can be pushed out to an edge. It is also important to apply lots of pressure since P in PSA stands for Pressure. Push hard.
The results are wonderful:
upload_2020-7-8_22-17-0.png
I seem to have lost some pictures of trimming the edges of the veneer but here are 1000 words to make up for not having pictures:
I used a very very new and sharp Buck knife (brand name). You can use a box cutter or exacto knive but make sure you have a new sharp edge on whatever you use. Choose your own weapon. I even used a scissors to cut the excess down before doing the final trim. It is VERY important to get the excess cut down to maybe 1/2 an inch before making the final cut. And be very very sure that the veneer is pressed down firmly all the way to the very edge of the speaker. Anything that is not bonded firmly will make trimming go very badly. Once you get as close as you can with a knife you can take some 200 grit sand paper and sand away any excess that is too small to trim with a knife. I was stressed out about how the edges would look. This veneer is so thin you cannot ever tell there is an edge once it is finished.
upload_2020-7-8_22-25-48.png
This look sent chills up my spine:
upload_2020-7-8_22-26-54.png
They sound better already!
If I really really cared I would route a grove for the speaker to fit in at this stage. I might still do that. But I do have grills so why? Quality, craftsmanship? Yes. Some day. Not today. Some people put a bevel on the back side of the face around the speaker also. Not me.
Again, because I couldn't organize a silverware drawer lately, I decided to point the back and bass port black AFTER I applied the veneer. So I taped it all very carefully and sprayed away.
upload_2020-7-8_22-30-33.png
That's a nice look.
I went with a cherry danish oil for the finish. Yea, cherry color on walnut wood. Don't knock it until you have tried it.
upload_2020-7-8_22-31-54.png
Cherry always make things look better. I always use brown sugar when it calls for white sugar. Life lessons for free.
OOOHHH This is getting good:
upload_2020-7-8_22-33-14.png
The interweb say put on one coat of danish oil, let it dry totally (like over night) and then put on a second coat and WET SAND it with 600 grit sandpaper:
upload_2020-7-8_22-34-26.png
The internet likes to get its hands dirty. I honestly think this step was useless. Maybe I didn't sand enough but it did not look much different that adding another coat of danish oil with a brush. Whatever. I feel like I tried.
Continued. . .
 
Last edited:
Here is the look:
upload_2020-7-8_22-37-48.png
At this point I started to notice some bumps in my veneer. Can you see them?
upload_2020-7-8_22-39-18.png
That is where the PSA on the veneer had a seam in it. The PSA apparently does not come in an infinite roll and where there was a seam in the PSA it peeled off and the adhesive globbed up and stuck to my contact adhesive and every thing stuck to everything and my only choice was to let is stick down and hope it looked ok in the end. It really is hard to notice but check your sheets and look for seams in the PSA to avoid stress in your life.

Since the result of this sanding and oiling was the color that I wanted but not the sheen that I wanted, I broke out the modern chemicals. Polyurethane.
I bought a spray can of satin poly to start. I was hoping to avoid streaks and such. But the result was blotches. They did not photograph well but it was not possible to get the spray on poly to give a consistent sheen. So I did a light sanding to knock off a few bumps in the first coat and got a brand new can of liquid poly. Hint: Always get a new can. A year old can will often start setting up very very quickly once you apply it. It will be more likely to bubble and leave brush streaks in the finish. A new can magically makes bubbles disappear and streaks fade away as it is drying. It really is a huge difference. Because I have no patience I use a foam roller to get the poly out of the can and onto the speaker. This will introduce bubbles bubbles bubbles. So after the poly is on the speaker, use a foam brush or bristle brush to smooth it out. Brush with the grain. I was just doing this in my garage but make sure you allow lots of time for the dust to settle and close up the garage doors, windows and everything as soon as possible or every piece of dust in the room will end up in your finish.
Here is the look before I sealed up the garage. Bubbles and streaks are obvious but they all disappeared as the poly dried. Of you try to brush them out worse as the poly sets up it will make things. Smooth it out one and be done.
upload_2020-7-8_22-49-37.png
That's the look I wanted:
upload_2020-7-8_22-53-33.png
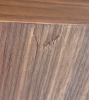
Walnut is wonderful. It has light grains and dark grains and a warm base color. And the grain patterns are almost always attractive.
I stapled some grill cloth on the grill frames. Make sure to cover all the magnets so there is no chance they will scratch the veneer surface. I made sure to pound the staples in far enough that they would not touch the veneer. And I also put a scrap of fabric over the center magnet also.
The cherry and black contrast looks nice:
upload_2020-7-8_22-57-53.png
Gotta get some brass screws, the silver is not cutting it.
upload_2020-7-8_22-58-53.png
upload_2020-7-8_22-59-20.png


upload_2020-7-8_22-59-49.png
I'm a happy camper. . .
Next week previews:
upload_2020-7-8_23-0-58.png
And:
upload_2020-7-8_23-1-57.png
More happy camping. . .
 
How to NOT trim veneer:
This was caused by the veneer not being pressed down firmly along the edge of the speaker.
upload_2020-7-8_23-3-17.png
This is caused by cutting too deeply while doing the final trim.
upload_2020-7-8_23-4-14.png
Both of them are pretty much invisible after the poly but life is better if they don't exist in the first place.
 
Spec sheet attached below. Some T/S values are provided. I have to say this Tang Band W8-1772 driver is probably 90% of what makes these speakers sound good. I have put that driver in several different enclosures now and it sounds good everywhere. I also tried a Fostex FE208EZ and its just not the same. The Fostex sounds hollow. But the Fostex has some nice looks. And fostex did ship with a foam ring and mounting screws which did not come with the Tang Band. But I am ordering another pair of tang band and not any more fostex. Just saying. I am looking for another full range driver to experiment with. Any suggestions?
Dayton Audio PS220-8 8" Point Source Full-Range Neo Driver?
Visaton B 200 8" Full-Range Driver 6 Ohm?
Something in the $250 range would be nice.

I also tried running these speakers with some subwoofer reinforcement. I used a pair of JBL EP250 12" subs with the amps removed and just using the drivers powered with the extra channels on the MX5000. Crossedover at 80hz and boosted +3db from flat in the CX5000 setup. It sounded awful. Then I thought to reverse the polarity on the speakers. That sounded wonderful. Apparently something in the design of the backhorn reverses the phase of the bass and much of the bass was cancelling out. Forgive me it that is really just super obvious but I'm still "wet behind the ears" on speaker design issues.

I can also raise the low end using an EQ curve in Music Bee but ultimately that just sounds forced in the low end and seems to mess up the midrange somehow also. The proper 12" subs are smooth all the way down to 50hz and sound much better to me. I'm not a purist by any means.
 

Attachments

I modeled it quickly as a vented box, but found is it not going to go really low and deep no matter what you do. I am not an expert on the horn loading or transmission line type of stuff, but I can tell you for sure the T/S parameters do not favor huge deep bass.......


The VAS measurement of 94.45 liters is equal to about 3.3 cubic feet.

That will get you to 42hz, IF the Qts was about .40. and the box is close to 3.3 cubic feet.

But the Qts is only .27 on this driver, so it will lose a good bit of the lower end just due to its parameters.
Even with a fairly big box, the low end is going to be limited a good bit.
 
The visaton you mention would by far have the most deep bass due to its 40Hz Fs and the very high qts of .76, but likely would be too much bass unless in a huge box.

I am not familiar enough with your box type to say how it would sound in it.

How many cubic feet (interior) not measuring the wood, does your box have?
 
You can't rely on instruments or your ears, which can both be deceiving/deceived based on the content/recording. You can only rely on a sweep or RTA/pink noise. Once you get that right, you can make minor changes to taste.

An impedance sweep would be helpful also.
 
Back
Top Bottom