• The move to the new server is done. There are some software and database maintenance updates in process. This has us passing the hat around to help out. We appreciate any donations. Seriously, even a dollar helps. The payment page may be found here - https://www.audiokarma.org/support.html

Boston Acoustics A40 Refoam Project

Very nice job. OCD has its merits......

Sorry, I missed your reply the first time through. I agree completely! I tend to tell people I'm "a perfectionist" or I just "pay attention to detail". I think a lot of us say that. :)

On top of that, I've always had to buy my own stuff and I try to live modestly, so everything I own has been heavily researched, a lot of times saved for, and I feel like that makes me appreciate all of it. In my opinion, if it's worth owning, it's worth taking care of it.
 
My first (of probably many) question is: Have I removed enough of the adhesive from the speaker cones?


I got almost all of it off of the metal basket with alcohol and elbow grease, but there is still a visible amount left on the cones. It's getting more and more difficult to remove, even with a little alcohol and cotton swabs and all of the recommended methods. I'm starting to worry that I'm going to damage the cone if I'm too rough with it. If it's necessary to remove every last bit for a good bond, I'll stick with it and keep trying different solvents. Should I just proceed with the refoam when the kit arrives and hope it sticks? Any recommendations for an easy way to remove it that won't trash the cone? Thanks in advance for your help.


EDIT: OK, I think I got the picture thing all figured out.

Yes, I know this post is pretty old, but never too late to give good advice.

The foam left on the outer cone can be easily removed with a razor/utility knife (boxcutters). You just need to hold it at the same angle of the cone and appy just enough pressure to remove the foam. Some of the underneath glue residue may remain, but that will not be a problem.

I am about to refoam 2 of these woofers for the Boston A40 and I will probably use the test tone technique to keep the voice coil aligned.
 
I've read that using a 9V is too much voltage and can damage the voice coil. Did you have any issues with that?

I, for one, didn't even like the popping noise the driver made when I connected and disconnected a 1.2V rechargeable AA battery. Shims only for me from now on!

I have done most of my refoams using either shimming or by test tone.
There are advantages/disadvantages to either.

If you shim, you risk accidentally cutting a wire or part of the voice coil if not careful. AND, you risk getting debris into the pole piece/voice coil gap.
Also, FYI, you do not need to cut the dust caps totally off. You can just simply cut around 90-95% around near the cone and flip them up. When done gluing the surround, simply remove the shims and glue the dust cap back on.

Some dust caps are just plain stubborn to cut/remove (like the pair of Smaller Advent and JBL L26's I recently refoamed), so I sometimes prefer the test tone method over shimming.
 
I have done three pair of A40s, two pair of the originals and one of the Series II, which IMHO are a far better sounding pair. I'd also done two A60s (originals, and Series II), the radiators on a set of A120s, and the woofers on A150s.

I tried shimming only once, and found that it was far more troublesome. After that fiasco, I seated the woofers by hand, gently pressing up and down, and only one of them rubbed. I ended up having a spare A40-II woofer, so I put new foam on that one, and, no issues. Then a month or so later, I redid the one that rubbed, and no further problems. It was that trimmed down O.D. of the surround foam that threw me--it was indeed tougher to work with than the wider originals series woofers.

One thing about the shimming that really bothered me--the dust caps. The kit I bought a dozen years ago came with paper dust caps, which sounded sort of "raspy" against my fingers. The original A40 woofers I used these on were the woven type, which allowed the space behind the dust cap to "breathe" a little, and also had no sound to it. Sure enough, once I reassembled and tested, those d@mned paper dust caps ruined the sound of the A40--it ended up with a peaky response in the upper midrange that, for lack of describing any other way, took on that raspy characteristic of the dust cap. From that point on, I never touched the dust caps.

I ended up buying some surrounds in bulk after my 2nd kit, and paid far less. The 10" foams were, I think, $1.50 each, the 8" under $1.00, and the 6.5" were probably in the 60-75 cent range. Won't do me any good though, as I've moved my electronics stuff at least four times since then and misplaced them. :D

So overall, I've had really good luck with refoams. Saved many an inexpensive pair of speakers, and those A40s are great for toting around wherever I want decent sound. Those A150s only cost me $60 for the pair. Wish I'd kept them. I was selling the A120s, and the buyer came by and listened to the A150s and we cut a deal.

I do need a new A40-II tweeter though, as I once got a little overzealous with that pair and sort of cooked the tweeter on the one side...

 
Thread reanimation!!
On the bench is a set of A40 II speakers. They need foam (my third refoam project) so I went to Simply Speakers (used them before, great folks).
They recommended using FSK-6 foam instead of FSK-628. https://www.ebay.com/itm/Boston-Aco...Kit-FSK-628-/140886977890?hash=item20cd84ad62
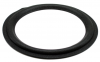
FSK-6 in-hand:
38512608420_0fda85610f_b.jpg


I don't see how it works. Blowing up the pic of the FSK-628 it is angled to meet the speaker on the inside, this one...not so much.

Simply Speakers knows speakers so I assume I'm doing it wrong. Right?

And to the long gone OP, well done. A lot of folks give up after the first roadblock and some good stuff ends up in the dumpster.
 
To me, the FSK-628 looks more correct. They do make this note for the FSK-628:

NOTE: This kit is very tight on the OD for the A40 Series 2 woofers. Some customers find it easier to work with kit # FSK-6 which runs a bit smaller on the OD for an easier installation​

Thing is, the FSK-6 you show looks like the outside diameter (OD) is too large for the basket. (Did you give it a trial fit yet?) What I notice is that the FSK-628 has the OD closer to the foam roll, where the FSK-6 has it further away (which is what my generic foam looked like). If it fits your basket properly, I'd just roll with it. (See below.)

upload_2018-2-17_13-55-59.png

I used generic foam on my A40-II woofers that required trimming on the OD. It, too, was similarly flat on the inside vs. being angled, but by tacking it down with the glue and watching it closely for any bits that popped up as it cured, I never had a problem with it. The only thing I did have a problem with is that I got one of the woofers seated off-center and ended up having to redo it since the voice coil rubbed. That was over a dozen years ago, and it's still holding up!
 
I cheated on mine. Instead of trimming the outside, I cut it across and overlapped it. I used FSK-628.
 
Thanks for the help.

Today I'll clean them up and nail down the outside. We'll see how the inside lines up and go from there.
 
It worked, not the best tool for the job but it fits OK I guess.
I shimmed the voice coils because is seemed to be a trickier job than normal and I wanted to reduce the variables.

Not much of a lip on the frame and the foam "bump" goes too far onto the speaker. The inner flange not being angled had me playing whack-a-mole with rising material until it set up enough to grab.

I used Aleenes Tacky instead of the SS tube, I know Aleene.

26472807728_54413ac368_b.jpg
 
Have fun with those A40's. Here is a couple of pictures of my re-foam job. You can see where I cut and overlapped the foam...

CM180219-163959005.jpg
CM180219-164146006.jpg
 
Thank you, I think i will.
Here's my finished product, looks like it was done by a professional...plumber.
I cut the dust covers to shim, they "took a shape" and were a bear to reinstall, maybe I should have just done a 9V...

25496556997_692ba6343b_b.jpg
 
Back
Top Bottom