• The move to the new server is done. There are some software and database maintenance updates in process. This has us passing the hat around to help out. We appreciate any donations. Seriously, even a dollar helps. The payment page may be found here - https://www.audiokarma.org/support.html

Brian's AU-555 restoration

As long as we're on the subject of safety, the fuses on the main board are a little difficult to find. The service manual doesn't help much. In the troubleshooting section, they're described as 1.5 AGD fuses, in the parts list, they're listed as AGD2A. In my 555, there's one that's a 1.5A that measures 6mmx25mm and it looks like the right size. The other is a 2A that measures 6x32mm and is obviously too long for the holder. A 6x25mm fuse seems to be an AGX package. So I'm going with 1.5A AGX I guess - https://www.mouser.com/ProductDetail/504-AGX1-1-2

The fuse on the back panel seems to be a standard 1/4 x 1-1/4 package (2 amp) so I'll have a spare when I get that wrong one out of the main board.
 
Last edited:
Great score I’d replace the 2sc458 transistors they are known to fail and can cause damage to other components if they fail might even reduce some of that hiss :) ksc1815 is the substitute you need

Interesting - I've read that while KSC1815 is an acceptable replacement for the 2SC458, KSC1845 is a better replacement due to lower noise.

Just curious if there are other opinions. Maybe it doesn't matter.

upload_2023-4-5_21-30-11.png
 
I touched up the bias on the amp a couple days ago. It was pretty close already. The manual says to set it at 22mA across the fuse holder terminals with the fuses removed and at room temp (but with the amp on for a little while I guess). The left channel was at 12mA and the right was at 28mA so not that bad but I set them both to 22mA. It didn't make much of a difference that I could hear.

I was waiting on a dummy load to come so I could do the output alignment and that came last night. I'm not sure if this is a big deal but the left channel is a bit stronger than the right. At max volume I was only able to get the clipping equal at the top and bottom of the sine wave with the adjustment pot. On the right channel, the tops can't be driven enough to clip. The bottom could but I adjusted the right channel so there was no clipping on top or bottom of the sine wave. Not sure that's the right way to do it and the service manual isn't real clear. If anyone has any tips there, please let me know.

After that, I checked the output power with an RMS voltmeter. I got 14.6V on the left channel and 13.3V on the right. So if I did the math right, that gives me 25.38W on the left channel, and 21.06 on the right. Within the 20WPC spec so seems like it's doing ok for 50+ years old.
 
My Mouser order showed up! I think I'm going to start with the power supply. Already found one issue. I ordered parts off the parts list and didn't compare very well to the schematic and what's actually in my 555. So one of the resistors is a different value from what's in there now. I'll add the right one to my next order. It might be ok to leave the old one there for a little while. It's 1/2 watt instead of the 2 watt upgrade.
 
My Mouser order showed up! I think I'm going to start with the power supply. Already found one issue. I ordered parts off the parts list and didn't compare very well to the schematic and what's actually in my 555. So one of the resistors is a different value from what's in there now. I'll add the right one to my next order. It might be ok to leave the old one there for a little while. It's 1/2 watt instead of the 2 watt upgrade.
if it looks original go with what Sansui fitted to your Sansui from factory, its always a good idea to go off what's in your unit when original rather than the schematic as there are often changes during production and schematics are rarely updated
 
if it looks original go with what Sansui fitted to your Sansui from factory, its always a good idea to go off what's in your unit when original rather than the schematic as there are often changes during production and schematics are rarely updated
Thanks! That's what I plan to do. This probably isn't the last time I'll run into this issue so I'm just going to wait a bit to place my second parts order and hopefully get whatever I messed up on the first.
 
I got the power supply about half done last night so hopefully will finish that up today. The 2 caps I've taken out so far were still within 10% of their rated values. 2000 uF measured 2180uF and 0.0 ohm ESR. The 500uF measured 536uF and 0.06 ohm ESR. They were replaced with a 6800 and 1200 uF. I'll post some pics when the power supply is done.
 
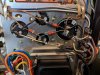
Power supply is done and checked on DBT. Here are some pics. All the old caps were still within 10% of their rated value, so they might have been ok for a bit longer. Still worth it for reliability and the capacitance bump might help too.

Before:
PXL_20230407_181714151.jpg


After:
PXL_20230408_142940416.jpg PXL_20230408_142952542.jpg
 
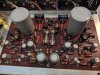
Well I was on a roll so I mostly re-capped the main amp board. I decided to leave the 2 mylar caps and 4 micas in place for now. I have replacement film caps but I wanted to listen to it for a bit before replacing them. Haven't done any mods so far except the larger output caps (6800uF). This board was definitely worth doing. I found 4 electrolytics (all the100uF 6.3V) that were still close to value. The other dozen measured between 25% and 80% high. The only thing that was a little out of the ordinary was fitting the output caps. The ones I got of course don't have the same lugs or spacing as the originals. Based on where the foil on the board is, you can't really move the + lead at all. So I drilled a new hole for the - lead and it worked. You can probably see my output caps are a little out of the original position and that's why. If I did this again, I'd probably see if I could get smaller diameter caps instead of matching the original diameter. But these work ok.

Tried it out on the DBT and touched up the bias. It was a little off. Got the speakers and laptop hooked up to it and I'm pretty blown away. It sounded nice before but there was a lack of detail and it was just a bit heavy on the bass. I was able to adjust that out with the bass controls though. Now, it has a lot more detail, the bass is normal, and I wouldn't say it's lost any warmth either. It sounds fantastic. I'll probably leave it this way for a few days and then maybe do the mods, or maybe work on re-capping the other boards first. I'll decide later. If anyone has thoughts, please share.

Edit: One thing I forgot to mention. I said earlier this thing was receiving a radio station when you turned the volume up all the way with no input signal. That seems to be gone now. I don't know why but since all I've done is replace caps, maybe one of them was a bypass that wasn't working well? If anybody knows, I'm curious about that.

Here are some pics.

Before:
PXL_20230408_144829972.jpg

After:
PXL_20230408_194420737.jpg
 
Last edited:
Well done keep up the good work I use lugs which I solder to the snap in capacitors so it’s easier to mount wires.

I’d recommend replacing the 2sc458 transistors they are very unreliable and can cause damage to the amp next
I thought I had some lugs but the only ones I could find were automotive ones that wouldn't take solder very well so I did it the hard way without them. It turned out ok but I would have rather had some lugs. If you have a link or type you use, please share. I'll pick some up.

Looks like all those transistors are on the tone and control boards so I guess I'll do those next.
 
Just FYI @Brian1970 and as a follow-on to the 2SC458 discussion we had - I happened to come across this post (it's for a 350A) here KSC1845s caused issues when used for 2SC458, on the F-1248 tone control block.

https://audiokarma.org/forums/index.php?threads/sansui-350a-strange-clipping-problem.755929/

Changing to KSC1815s seemed to solve it.
Just thought of a question I've been meaning to ask. Do any of the transistors in the 555 need to be matched? If I understand correctly, only differential pairs need to be matched. I don't think the 555 has any of those but I'm not positive about that.
 
I did some searching and didn't find much on the power switch on the 555. Mine is fine electrically but mechanically it's not great. When I got it, it was very stiff. i tried to get a little deoxit down the shaft but the gap is very small so I'm not sure that's doing much. I don't see any other places to get into it. It did make it a little better for a while but then it got very stiff again. Now it's sort of intermittently stiff and sometimes has very little resistance. Seems like disassembling and greasing is probably the answer but I'm sure that's not real easy and there's of course a chance I'll ruin it trying to do that. Just wanted to see if anyone's done this on this specific switch successfully before or am I better off just trying to get some lubrication down the shaft.
 
Back
Top Bottom