• The move to the new server is done. There are some software and database maintenance updates in process. This has us passing the hat around to help out. We appreciate any donations. Seriously, even a dollar helps. The payment page may be found here - https://www.audiokarma.org/support.html

C32 restoration

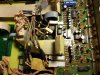
Here is one of the last boards - the input board.

You can see how it was before:
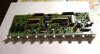
before.jpg

and after capacitor replacement:

after.jpg

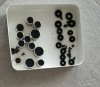
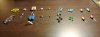
Here is family meeting of old and new generation:
parts.jpg

I have grouped them as old above new caps, and here is the list of replaced caps, from left to right. In the picture capacitors are for one board, but quantity is doubled as there are two boards. All caps are Nichicon except one noted.

3,3 uF/50 V -> 3,3 uF/50 V VR 24 pieces
0,47 uF/50 V -> 0,47 uF/50 V VR 6 pieces
470 uF/40 V -> 470 uF/63 V Vishay 021 ASM 4 pieces axial
10 uF/35 V -> 10 uF/50 V VR 4 pieces
3,3 uF/50 V -> 3,3 uF/50 V FG 2 pieces - this one is on phono signal path
10 uF/16 V (5 pieces) + 10 uF/35 V (1 piece) -> 10 uF/100 V KZ 12 pieces
2,2 uF/50 V non polar -> 2,2 uF/50 V ES non polar 10 pieces
220 uF/16 V -> 220 uF/25 V FG 2 pieces
470 uF/6,3 V -> 470 uF/10 V FG 2 pieces

All connectors are resoldered.
 
Well, almost all electronic work is done so now it is time to put it back together and to do some cleaning. Here are the pictures of assembly. I have used isolation tape for connector fixing.

as1.jpg


as2.jpg


as3.jpg

Here is cleaning of knobs. They was not wery dirty but still they nedded to be cleaned.

knob1.jpg

Taking a bath......

knob2.jpg

Dry and clean:

knob3.jpg
 
Bulbs and glass

Here are some pictures showing bulb replacement. Rubber holders was in very bad shape - during 40 years of heat from bulb rubber was hard as it was like plastic and I could not pull old bulb from it nor reuse it for new bulb. Also, original bulbs are with wires, but I could not find new ones with wires. On first picture you can see old bulb (without wires), and two new. One has shrink tube arround it to better fit to new rubber holder, and you can see two smaller shrink tubes for wires:

lamp1.jpg

Old wires are prepared to be soldered to new bulbs. You can see small heat shrink cable waiting to be heated and shrinked:

lamp2.jpg

And you can see how does it looks after soldering and isolating with shrink cable:

lamp3.jpg

All five new bulbs are in place:

lamp4.jpg

As I read your comments about repair bubbles on glass I have tried to repair mine too. I have scratched bubble part of paint and cleaned it with alcohol. Then I applied new paint and results was excellent. Of course, under certain angle you can see the spot where new paint is applied, but I am very pleased with the result.

Here is glass before. This is first photo on this thread:

glass4.JPG

And here is after removing bubble paint and repainting:

glass1.jpg

If you look closely, you can see where new paint is:

glass2.jpg

And here is the paint that I used. I coud not buy paint which was recommended in some threads (rustoleum black) so I bought what was available. It is Revell number 7 black paint bought in hobby store, which is available in most European countries, so this might be useful information for those who can't find rustoleum brand:

glass3.jpg
 
Well, this journey has unfolded...and I must say that I am very happy with results and impressed with sound. It was very nice restoration job for me and I hope that this thread will be of help to others. I thank for all help and comments from you. Here is final result:

final.jpg

There is just one thing that I would like to do and for that I need help from you. As I wrote before, cables from volume pot to listen/mode switch board is not original. Does any of you have spare unit or this cables and is willing to put it in envelope and send it to Croatia? If yes, please send me PM. These are two coaxial cables ending with connector. I would be happy even with cables only, without connector. Here is the picture of my replaced cables:

cable.jpg

This is complete list of changed electrolytic capacitors, all Nichicon except one noted and main filter capacitors:

10uF/16V -> 10uF/16V, VR series, 3 pieces
47 uF/50 V -> 47 uF/63 V VR series 2 pieces
1000 uF/25 V -> 1000 uF/35 V VR series 2 pieces
10 uF/40 V bipolar -> 10 uF/50 V bipolar ES 2 pieces
100 uF/25 V -> 100 uF/50 V FG 2 pieces
10 uF/35 V -> 10 uF/100 V KZ 2 pieces
1,5 uF/50 V -> 1,5 uF/50 V VR 2 pieces (I could not find better series for this value)
10 uF/40 V bipolar -> 10 uF/50 V bipolar ES 6 pieces
10 uF/63 V -> 10 uF/100 V FG 2 pieces
47 uF/35 V -> 47 uF/50 V FG 4 pieces
10 uF/40 V bipolar -> 10 uF/50 V bipolar ES 2 pieces
100 uF/35 V -> 100 uF/50 V FG 2 pieces
1 uF/50 V -> 1 uF/50 V FG 4 pieces
3,3 uF/50 V -> 3,3 uF/50 V FG 2 pieces
3,3 uF/50 V -> 3,3 uF/50 V VR 1 piece
1 uF/50 V -> 1 uF/50 V FG 2 pieces
10 uF/35 V -> 10 uF/50 V VR 1 piece
3,3 uF/50 V -> 3,3 uF/50 V VR 4 pieces
3,3 uF/50 V -> 3,3 uF/50 V FG 4 pieces
22 uF/35 V -> 22 uF/35 V FG 2 pieces
47 uF/16 V -> 47 uF/16 V FG 1 piece
22 uF/35 V -> 22 uF/35 V VR 1 piece
100 uF/16 V -> 100 uF/25 V VR 2 pieces
10 uF/16 V -> 10 uF/16 V VR 1 piece
3,3 uF/50 V -> 3,3 uF/50 V VR 24 pieces
0,47 uF/50 V -> 0,47 uF/50 V VR 6 pieces
470 uF/40 V -> 470 uF/63 V Vishay 021 ASM 4 pieces axial
10 uF/35 V -> 10 uF/50 V VR 4 pieces
3,3 uF/50 V -> 3,3 uF/50 V FG 2 pieces - this one is on phono signal path
10 uF/16 V (5 pieces) + 10 uF/35 V (1 piece) -> 10 uF/100 V KZ 12 pieces
2,2 uF/50 V bipolar -> 2,2 uF/50 V bipolar ES 10 pieces
220 uF/16 V -> 220 uF/25 V FG 2 pieces
470 uF/6,3 V -> 470 uF/10 V FG 2 pieces
22 uF/ 160 V -> 22 uF/200 V VZ 1 piece on auto-on board
4700 uF/30 V -> 4700 uF/63 V EPCOS / TDK screw terminal 2 pieces - main filter capacitors

I hope that you enjoy reading this as much as I have enjoyed restoration. Seems to me that now I will go looking for MC2205 for bi-amping.......and then tuner.....and then.......
 
Great no nonsense thread on the c32. I'm impressed with your work and grateful for the parts list.
With the equalizer set to FLAT, can you here a difference when you switch the EQ in and out of the signal path?
 
When equalizer is set to flat there is no difference in sound at all. Then I switched to AUX input without any signal and listening closely to hi and mid range speaker with preamp volume at 15 clock position (very loud listening level as power amp gain is always set to max level). Very, and I mean very very small amount of noise is heard without EQ in signal path. With EQ engaged this noise level might be just a little, but very little louder (if this is not autosuggestion knowing that EQ is on). But this can be heard only on very high listening level, and of course, without input signal. Basically, there is no difference with or without EQ in signal path.
 
Very nice job! Thank you for documenting your restoration and the parts list. I got a C-32 hooked up today and plan to upgrade it.
It looks like there are quite a few caps in the signal path that appear to be Mylar. I wonder if there would be any sonic benefit in replacing them with Wima polypropylene caps? I did this on a c26 and it seemed to open up the sound of the pre-amp. Thoughts?
Also, The ribbon cables look good at this point, but wanted to know where you got yours in case I desire to replace them while I have it apart?
Thanks again for sharing your workmanship.
 
I bought 5 wire cables for power supply board from Mouser, part no: 538-25001-0804. Actually they were 8 wire cables so I removed 3 wires.

4 wire cables with connector I bought at my local store. One is used from switch board to expander board and one is used from small output board to another output board (small boards with cinch connectors).

Do not forget to put mask tape around all other cables before you remove them from connector.

I did not change ribbon cables, but there were few posts mentioning C32 cable kit which is available on e-bay. This kit includes all flat/ribbon cables.
 
Ivo,

I am going to put up on the spot as I have been many times before.....

How would you describe the sound improvements you have enjoyed, now that you have listened to the recapped C32 for a few weeks?

I know you spread the work out over a few months and it was your first C32 to recap.

If you had worked on it straight thru, with parts at hand, would you guess that it would have taken 6-7 hours?
 
Very nice job! Thank you for documenting your restoration and the parts list. I got a C-32 hooked up today and plan to upgrade it.
It looks like there are quite a few caps in the signal path that appear to be Mylar. I wonder if there would be any sonic benefit in replacing them with Wima polypropylene caps? I did this on a c26 and it seemed to open up the sound of the pre-amp. Thoughts?
Also, The ribbon cables look good at this point, but wanted to know where you got yours in case I desire to replace them while I have it apart?
Thanks again for sharing your workmanship.

Mylar is Dupont's original marketing name for PET. So you are really speaking of the same dielectric material between the WIMA and the ERO branded caps Mac used extensively back in the 70's and 80's. I do not the manufacturing differences between the two products but I assume they are both the stacked design.

I am trying to remember if Mac has ever used the WIMA product.

I do know there are many cute and not so cute nicknames for the various film caps used over the years, mostly I think coming from the guitar crowd's on going search for tone.

As for the C26, I hope to try to replicate your findings soon, but the project has been going on for two years as I do not have much free time to experiment with it.
 
I cannot begin to imagine the talents & skill it takes to restore the likes of a C32.

Congratulations on a first class job. I love my C32.
 
Last edited:
I can hear no difference either.

My suspicions are confirmed again.
I have the original electronics and mine muddies up a bit when the EQ is in and the tone controls are flat.

Thanks to the OP, I have the confidence and parts list to update when I get the time.
 
If you google ERO capacitors you can come across a Audio Circle 7 page discussion of ERO and other caps with a number of heavy hitters posting like John Curl and Steve McCormack. People do take their cap choices seriously to say the least!
 
How would you describe the sound improvements you have enjoyed, now that you have listened to the recapped C32 for a few weeks?

My overall impression is that sound is more clear, somehow a bit brighter. Instruments are more detailed. This is more noticable with 'simple' songs. By term simple I mean songs with few instruments, like some Dire Straits songs. While listening to them I have noticed that vocals and guitar are 'louder', brighter or clearer then before.

Or, when I listen to old Run DMC album, now I can hear and understand their lyrics a bit better - bear in mind that english is not my native language and listening and understanding to their fast rap is not so easy...

While listening to a bit 'complex' songs, like Pink Floyd, I can better notice all effects. I mean I have noticed them before, but now it is somehow easier to hear them.

And dynamic is improved - difference between quiet and loud sections are somehow 'better', I am missing right word to describe.

So, to summarize, everything is improved. Of course, sound is not twice better than before recap, just as sound was not as twice as better when I just bought C32 compared to previous preamp. But both times there was improvement. Maybe 10, 20 or 30%, it is hard to tell with numbers. But I was very pleased both times.

If you had worked on it straight thru, with parts at hand, would you guess that it would have taken 6-7 hours?

If you talking only about caps replacement, 6-7 hours would be enough. Taking each board out and change capacitors can surely fit in this time frame.

In my case, and I guess in other cases too, there are many cosmetic things to do. There is switch cleaning, preparation for disassemble, inspecting other components, dealing with flat cables, knob cleaning etc. These are about 40 years old units and they probably need some (but not necessarily needed for proper function) work and attention beside caps replacement.

I will agree that if you have more routine and experience in C32 you can do a proper job in one working day.

Of course, it depends on state of unit and what you or your customer wants to be done - just recap or completely cosmetic refresh.
 
The update seems quite subtle unless you have two preamps, a before and after, to A B them. It is then often quite striking. Once done though it is hard to give up the improvement.

It is not a inexpensive project when you consider local labor rates. However, considering the cost of a new Mac preamp.......not so bad. I am surprised this is not a ongoing value added factory/dealer sponsored program. What better way to begin training local techs and add value to your traded in units as well as add value to your local client's units.

You just have to give a unit a listen......maybe that is strange in today's overly video centric audio business.
 
Ivocro,

First off I want to thank you for this amazing thread! I want to use your parts list to recap my C32 I am getting next week, but I am confused by your parts list? Why do you list the caps like this?


10uF/16V -> 10uF/16V, VR series, 3 pieces. Why did you list this cap twice?
47 uF/50 V -> 47 uF/63 V VR series 2 pieces
1000 uF/25 V -> 1000 uF/35 V VR series 2 pieces. Would this be 4 1000uf caps?
10 uF/40 V bipolar -> 10 uF/50 V bipolar ES 2 pieces
100 uF/25 V -> 100 uF/50 V FG 2 pieces
10 uF/35 V -> 10 uF/100 V KZ 2 pieces
1,5 uF/50 V -> 1,5 uF/50 V VR 2 pieces (I could not find better series for this value)
10 uF/40 V bipolar -> 10 uF/50 V bipolar ES 6 pieces
10 uF/63 V -> 10 uF/100 V FG 2 pieces
47 uF/35 V -> 47 uF/50 V FG 4 pieces
10 uF/40 V bipolar -> 10 uF/50 V bipolar ES 2 pieces
100 uF/35 V -> 100 uF/50 V FG 2 pieces
1 uF/50 V -> 1 uF/50 V FG 4 pieces
3,3 uF/50 V -> 3,3 uF/50 V FG 2 pieces
3,3 uF/50 V -> 3,3 uF/50 V VR 1 piece
1 uF/50 V -> 1 uF/50 V FG 2 pieces
10 uF/35 V -> 10 uF/50 V VR 1 piece
3,3 uF/50 V -> 3,3 uF/50 V VR 4 pieces
3,3 uF/50 V -> 3,3 uF/50 V FG 4 pieces
22 uF/35 V -> 22 uF/35 V FG 2 pieces
47 uF/16 V -> 47 uF/16 V FG 1 piece
22 uF/35 V -> 22 uF/35 V VR 1 piece
100 uF/16 V -> 100 uF/25 V VR 2 pieces
10 uF/16 V -> 10 uF/16 V VR 1 piece
3,3 uF/50 V -> 3,3 uF/50 V VR 24 pieces
0,47 uF/50 V -> 0,47 uF/50 V VR 6 pieces
470 uF/40 V -> 470 uF/63 V Vishay 021 ASM 4 pieces axial
10 uF/35 V -> 10 uF/50 V VR 4 pieces
3,3 uF/50 V -> 3,3 uF/50 V FG 2 pieces - this one is on phono signal path
10 uF/16 V (5 pieces) + 10 uF/35 V (1 piece) -> 10 uF/100 V KZ 12 pieces
2,2 uF/50 V bipolar -> 2,2 uF/50 V bipolar ES 10 pieces
220 uF/16 V -> 220 uF/25 V FG 2 pieces
470 uF/6,3 V -> 470 uF/10 V FG 2 pieces
22 uF/ 160 V -> 22 uF/200 V VZ 1 piece on auto-on board
4700 uF/30 V -> 4700 uF/63 V EPCOS / TDK screw terminal 2 pieces - main filter capacitors

I am confused by the listing of caps twice on a row, but some having different voltages? Thanks.
 
Usually in parts lists like this, the first in the line is the specification of the original part, and the item after the-> gives the specifications for the replacement piece. Lots of times the voltage of the original part is no longer available so you have to step up the voltage to the next higher one available.
 
Here is the same list with dashes between. Dashes separates lists for each board. First board is record switch board, then power supply board, then Expander/Balance/Loudness board etc...and, as mnmmt sad, the first value in the line is the specification of the original part, and the value after the-> gives the specifications for the replacement piece and Nichicon series.

For each board total amount of pieces is given for each value. For example, there are only 2 pieces of 1000uF caps.

Indeed, some values are written several times (like 10 uF/16 V VR series) as they are used on several boards.

About voltages, if voltage is higher than original it is for these reasons:

- as mnmmt sad, voltage of the original part is no longer available so I choose next higher one available
- minimum voltage in series is higher (like KZ series)
- capacitor is in power supply circuit so slightly higher voltage gives better ripple current
- for main filter capacitors actual dimensions were used for choosing

Before buying parts, check for possible differences as unit with your serial number might have slight differences than mine (like note 13 in service manual).

------------
10uF/16V -> 10uF/16V, VR series, 3 pieces
------------
47 uF/50 V -> 47 uF/63 V VR series 2 pieces
1000 uF/25 V -> 1000 uF/35 V VR series 2 pieces
------------
10 uF/40 V bipolar -> 10 uF/50 V bipolar ES 2 pieces
100 uF/25 V -> 100 uF/50 V FG 2 pieces
------------
10 uF/35 V -> 10 uF/100 V KZ 2 pieces
1,5 uF/50 V -> 1,5 uF/50 V VR 2 pieces (I could not find better series for this value)
10 uF/40 V bipolar -> 10 uF/50 V bipolar ES 6 pieces
10 uF/63 V -> 10 uF/100 V FG 2 pieces
------------
47 uF/35 V -> 47 uF/50 V FG 4 pieces
10 uF/40 V bipolar -> 10 uF/50 V bipolar ES 2 pieces
100 uF/35 V -> 100 uF/50 V FG 2 pieces
1 uF/50 V -> 1 uF/50 V FG 4 pieces
3,3 uF/50 V -> 3,3 uF/50 V FG 2 pieces
3,3 uF/50 V -> 3,3 uF/50 V VR 1 piece
------------
1 uF/50 V -> 1 uF/50 V FG 2 pieces
10 uF/35 V -> 10 uF/50 V VR 1 piece
3,3 uF/50 V -> 3,3 uF/50 V VR 4 pieces
3,3 uF/50 V -> 3,3 uF/50 V FG 4 pieces
22 uF/35 V -> 22 uF/35 V FG 2 pieces
47 uF/16 V -> 47 uF/16 V FG 1 piece
22 uF/35 V -> 22 uF/35 V VR 1 piece
100 uF/16 V -> 100 uF/25 V VR 2 pieces
10 uF/16 V -> 10 uF/16 V VR 1 piece
------------
3,3 uF/50 V -> 3,3 uF/50 V VR 24 pieces
0,47 uF/50 V -> 0,47 uF/50 V VR 6 pieces
470 uF/40 V -> 470 uF/63 V Vishay 021 ASM 4 pieces axial
10 uF/35 V -> 10 uF/50 V VR 4 pieces
3,3 uF/50 V -> 3,3 uF/50 V FG 2 pieces - this one is on phono signal path
10 uF/16 V (5 pieces) + 10 uF/35 V (1 piece) -> 10 uF/100 V KZ 12 pieces
2,2 uF/50 V bipolar -> 2,2 uF/50 V bipolar ES 10 pieces
220 uF/16 V -> 220 uF/25 V FG 2 pieces
470 uF/6,3 V -> 470 uF/10 V FG 2 pieces
------------
22 uF/ 160 V -> 22 uF/200 V VZ 1 piece on auto-on board
------------
4700 uF/30 V -> 4700 uF/63 V EPCOS / TDK screw terminal 2 pieces - main filter capacitors
------------
 
Last edited:
I bought 5 wire cables for power supply board from Mouser, part no: 538-25001-0804. Actually they were 8 wire cables so I removed 3 wires.

4 wire cables with connector I bought at my local store. One is used from switch board to expander board and one is used from small output board to another output board (small boards with cinch connectors).

Do not forget to put mask tape around all other cables before you remove them from connector.

I did not change ribbon cables, but there were few posts mentioning C32 cable kit which is available on e-bay. This kit includes all flat/ribbon cables.
 
Thanks ivoCRO.
I may begin an upgrade of a stock C32 I purchased recently as I listened to vinyl today and then compared to a C26 I just finished completing a restore on. The C32 did not inpress but when I listened to the C26 it blew me away (still listening to it when I should be doing real work)
:-)
Instruments are clearer, more dynamics and the sound stage is wonderful with each instrument being distinctly heard. I know from your post the C32 will be a boat load of work, but if I can get it up to the leaves of the C26 I will be impressed.
Thanks again for your wonderful post!
 
Back
Top Bottom