• The move to the new server is done. There are some software and database maintenance updates in process. This has us passing the hat around to help out. We appreciate any donations. Seriously, even a dollar helps. The payment page may be found here - https://www.audiokarma.org/support.html

Dahlquist DQ10 Recap and Refoam and Such

FireGuruMN

Active Member
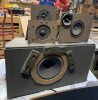
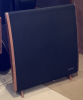
I landed a pair of Dahlquist DQ10 off CL for $250. Supposedly one driver was intermittent. The owner said banging on the side would usually bring it back. Wow like 1970's television. And they have not been serviced (or cleaned) since 1972 that I could tell.
upload_2020-4-4_15-5-33.png
But there is a special place in my heart for this look. Mid-Century modern? Maybe. But this forum is not about furniture choices.
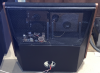
The back:
upload_2020-4-4_15-19-32.png
First step was to leave them in the garage with a fan blowing on them to clear some of the smoke smell. I think the smoke was just from the guy that had them for a couple of months so it came out pretty easy.
I brought them in the house once they passed quality control. I checked the terminals with an ohm meter to ensure there was no short or other major issues that could damage an amplifier. They read about 5.5 ohms so good to go.

They sounded awful. Maybe even worse than awful. Looked like it would be a long road.
Remove the rear metallic mesh grills. There is a series of 8 little screws that hold it on. Mark which grill went on which speaker because the screw holes line up with the holes in the grills and they are not the same on each speaker. Next take off the front covers. Four large screws on each side of the wooden frame. You may need to separate the foam blocks around the woofer from the front grill with a putty knife to prevent tearing it. Mine was good enough to keep. You could use pipe insulation to replace it if needed. This foam is critical to keep the metal mesh on the front grill from rattling and/or deforming. Don't just remove it.

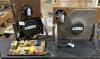
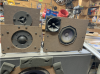
Wow, talk about lipstick on a pig. Beauty is only skin deep but ugly goes all the way to the bone. These are not pretty on without the grills.
upload_2020-4-4_15-22-9.png
I guess the theory with the separate mounting boards for each driver is to they resonate at an appropriate frequency. And all the drivers are on a different level so that they the point in the speaker that makes sound is exactly on the same plane. There's a word for that but it escapes me. Maybe. But too geeky for me.
Next back to the garage to take off 48 years of dust and grime that has drifted through the mesh grill in the back. Eww. Why is it sticky.
Continued. . .
 

Attachments

  • upload_2020-4-4_15-19-7.png
    upload_2020-4-4_15-19-7.png
    1,022.3 KB · Views: 22
Register to hide this ad
Here is a better picture of the whole face:
upload_2020-4-4_15-29-34.png
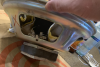
My speakers were mirror imaged for the left and right speakers. There are instructions on how to do that but some versions came from the factory that way. Mine appeared to be factory. The woofer foam needs replacing. That is probably a major reason for the awful sound. Apparently this is the same foam and the same woofer as an Advent Large speaker. Strange Bedfellows. I checked my Advents and that foam was still intact until I touched it. So it's a re-foaming party lined up. There is a super video about refoaming these speakers so I don't have much to add except I did this:
upload_2020-4-4_15-34-25.png
That is a hand towel rolled up and wrapped around the paper cone to keep it raised above the Masonite while the glue sets up on the new foam. This seemed easier than the process shown in the video. Also, the video spills some glue over while gluing the outer ring and then wipes it up with alcohol before it dries. I also spilled but the alcohol did not remove the glue completely. I used masking tape on the next attempt. By the fourth one I didn't spill any. It seemed to me that the foam's I was supplied did not have as large of a roll in them. I'm not sure if it matters but It would be nice to have more bass out of the speakers and I suspect the roll affects that.
On to cleaning. Before:
upload_2020-4-4_15-39-43.png
After:
upload_2020-4-4_15-40-58.png
My process for cleaning such things is to first use an air compressor to blow off anything loose. Soak it in "Totally Awesome Cleaner" from the dollar store. I don't know what is in that cleaner but it is just like the name says. I use a flux brush with the bristles cut short to loosen everything up. Then I use the air compressor to blow the gunk out again. Wear safety goggles for the entire process. I'd say wear a mask but they are unobtainium with the current pandemic going on. Sorry to remind you of that.
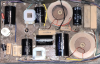
I marked everything so I could remove the crossover but then changed my mine and just worked on the crossover in place. Everything is soldered into the crossover and there are a lot of wires. There are wires on the back side of the crossover also. If you loosen the brackets on one of the driver plates it is easy enough to get to everything. I didn't want to get that much into it so I just cut the wires, bent a loop in the end and soldered in the new capacitors. But wait you say? Those are mostly film caps why replace them? Even the worst caps made today are probably better than the best caps made in 1972. But wait you say? That will change the sound of the speaker. Yes, I certainly hope it does. I also considered replacing all of the resistors but they are strange values and wattages and sizes and it seriously is not going to make any difference. I checked all the value and they were fine. And inductors are inductors and always will be fine.
Here is what mine looked like when I was done:
upload_2020-4-4_15-51-43.png
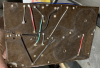
This is what the bottom of the crossover look like if I can save anyone the effort of unscrewing it:
upload_2020-4-4_15-52-57.png
That bare wire next to the green wire looks to be shorting on the green wire's terminal. That appears to be deliberate. It was actually soldered on the other speaker when I looked. I did not trace it out. Maybe later.
Continued. . .
 
Time Aligned. That's the word I was looking for earlier. Dahlquist called it Phased Array Mounting. Whatever.

Here are the bits I ordered (total counts):
Qty 2 of Solen 8.2uF 400V Polypropylene Capacitor Part # 027-564 (original was 8.5uf)
Qty 6 of Solen 6.2uF 400V Polypropylene Capacitor Part # 027-558 (original was 6.0uf and 6.5uf on mine. schematic says they are all 6.0. Whatever.)
Qty 2 of Solen 16uF 400V Polypropylene Capacitor Part # 027-578 (original was 16uf. Schematic says 14 to 16uf. So they say Whatever)
Qty 2 of 80uF 100V Electrolytic Non-Polarized Crossover Capacitor Part # 027-358 (I've seen people put in film caps here. It's a bypass cap across the woofer. It is not in the signal path. Save your money. Save a lot of money! **Edit** Apparently I am bad at reading schematics. the 80uf is in the audio path the the "mid woofer". I still don't know that I would spend $35 for the solen film capacitor. But if I did then no none will ever have to service these again.).
Qty 2 of Dayton Audio PMPC-0.10 0.10uF 250V Precision Audio Capacitor Part # 027-200
I actually ordered: Audyn Cap Plus 0.15uF 1200V Double Layer MKP Metalized Polypropylene Foil Crossover Capacitor Part # 027-127 But that's nuts. This is going to the super tweeter that is a crappy piezo device that generates frequencies that only young dogs can hear. I ended up not installing them in the DQ-10's and I am going to use them as a bypass capacitor on the tweeter when I recap my 4435's. A much better place for them where they might actually do some good. If you believe in bypass caps at all. I'm on the fence on that issue but every studio monitor I own has bypass caps in them. Just saying. 4312's had them. L100's did not. Just saying.
This is what I ended up putting in:
Qty 2 of 667-ECW-F2154JAQ Film Capacitors Film Capacitors 0.15uF 250VDC 5% MPP L/S=10mm (Mouser. Originally ordered for HPM100's but I upgraded to a couple of caps in series to get the value I wanted. Again, going to a super tweeter on the HPM100's that I personally cannot hear anything come out of even with a signal generator).
But to be honest you can just leave the little metallic capacitors in place. They are just fine.
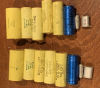
Here is everything I took out:
upload_2020-4-4_16-18-41.png
Interesting that these yellow caps are made in Mexico and they look just like the ones in the 4435's. I wonder.
I ended up removing all of these caps instead of leaving them in place (and disconnected) because the crossover is visible through the back of the speaker. I still do not understand that decision by the manufacturer. I don't think having an open back seriously affects the acoustics. And could they possibly have found a worse material for generating rattles? And letting dust accumulate in places that you can't clean? Were they trying to let audio geeks show off their cool speakers? I have a clear Lucite Bose subwoofer that does it right. Wish I had a set of the clear HPM100's. Came close once but got outbid. Went for $1004.00 as I recall. Nuts.
From my first picture you see that I have the stubby leg model. There is also a model that has a raised mounting base. That's probably better sounding but the stubby legs are way cooler. The raised bases would not have gotten past quality control. I do suggest gluing the stubby legs if they have come loose. They are held in by one central screw and a tiny nail to keep them from rotating. I don't think they were ever glued. Now they are.

Once I got everything screwed, soldered, glued, taped and pushed back in place, I gave them a listen. Something was missing. Yep. A blown fuse on one of the tweeter thingies. It was a strange 2/3 amp value or something like that. I found something close and put it in. But it did not fit solidly. So I tried to bend the fuse holder to make it tighter and some of the metal fell off in my hand. I wonder if that could be the cause of the "bang it to fix it" problem? I'm thinking so. I put a temporary alligator clip in place to hold the fuse and everything was right in the world again.

Something was still missing. OH, Badges. I forgot the badges. There is a guy on EB that remakes badges. He has Dahlquist but they are just printed, not molded like the originals. I wonder if that will affect the sound?

So, how do they sound you ask. Much much better. Even good. They do not have the low end for modern rock music. I love how they handle piano performances. George Winston and such. Dahlquist did make a subwoofer, DQ-1 I believe with a MX-1 crossover. You will probably have better luck finding a ventilator. But I did put it on my bucket list. I switched my receiver from "pure direct" to "straight" which adds in my subwoofers the way I have it configured. Now the DQ-10's sound simply wonderful. Next up: Tannoy System 8. . .or maybe AR3a, all the parts are here for both.

Be safe. Gotta order my Dr. Fauci Bobblehead too.
 
Last edited:
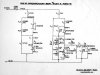
A nice job on the restore. But, one point of order - the 80uF capacitor is in series. It's the high pass cap for the cone midrange. So that's why some owners recap with a poly for that value.

58858008a648c_DQ10COschematic2.jpg.99a58eb912b9f7ddbb57c448fb865799.jpg
 
Wow, talk about lipstick on a pig. Beauty is only skin deep but ugly goes all the way to the bone. These are not pretty on without the grills.

Those look fabulous without grilles. Like someone actually was thinking about making a good speaker. Look under the grilles of early AR speakers. Horrible. Absolutely needed to glue, staple and permanently affix the grilles they were so ugly. Like a 3rd graders paint project of something.
 
Looking at the modified speaker, cut support that would have landed in the middle of the crossover, your speakers are home modified per the instructions of the time. The factory mirrored them and moved the crossover to the other side where it fits behind the wider board. Makes the below about 22000 based on my records which are not extensive. I'm thinking these are from the very late 70s. I think the factory mirrored came out while I was still selling this stuff, before 1981
 
Last edited:
Qty 2 of 80uF 100V Electrolytic Non-Polarized Crossover Capacitor Part # 027-358 (I've seen people put in film caps here. It's a bypass cap across the woofer. It is not in the signal path. Save your money. Save a lot of money!).

As stated above, but please don't tell @Freddymac2 as he has done the film cap and speaks very highly of it. I bypassed the lytic with a film cap. Maybe one day but I have 2 pair so double lot of money for that.
 
From my first picture you see that I have the stubby leg model. There is also a model that has a raised mounting base.
The speakers came with the three legs and the stands either the three column or the single wide column were optional and I believe at different times.

I have one set of legs, held by more than on screw (early pair pre-film cap era). I had stands made about a third larger than the short stands Dahlquist offered. Went from the orchestra pit with the legs to looking down for the music with a milk crate (12") roughly the height of the DQ stands to listening height stands, based on using the dining room chairs at just under 18". The legs make em look way cool.
 
Dahlquist did make a subwoofer, DQ-1 I believe with a MX-1 crossover.

They also offered an active crossover the DQ-LP1 which could handle 4 subs, L, R and two mono. The DQ-1W is not designed to do movies and is power sensitive. They say the SEAS 13" woofer is only wanting to see about 60 watts. I use a single channel of a Hafler on mine but I also have a Mirage sub with different sonics.
 
Once I got everything screwed, soldered, glued, taped and pushed back in place,

Sounds like she went away for a spell at the spa and came back 20 years younger looking good and ready to party. Nice story, thanks for the write up.
 
But, one point of order - the 80uF capacitor is in series. It's the high pass cap for the cone midrange
I edited my original post to clarify my mistake. I might add a bypass cap or put in a film cap some day. But $35 per cap makes for questionable economics. Like any one with dozens of vintage speakers cares about economics. . .

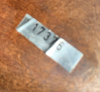
I found this sticker floating around inside one of the cages. I am now guessing it is a serial number. I'm not sure where it was located originally but now I glued it to the back of one of the plates.
upload_2020-4-5_8-51-29.png
It's well under 22,000 so I guess someone did the home brew mirror modification like Blue Shadow said. At least they did a good job.

Look under the grilles of early AR speakers.

I'm going to recap a pair of AR3a's next. And yes, they are truly ugly under the grills. Early Advent's are not much better. The first time I looked under the cover I though for sure someone had retrofitted a home brew woofer and tweeter in an Advent cabinet. I'm not looking forward to dealing with old-school yellow fiberglass insulation in the AR's. Especially since masks are unobtainium lately. At least I have gloves.
 
I edited my original post to clarify my mistake. I might add a bypass cap or put in a film cap some day. But $35 per cap makes for questionable economics. Like any one with dozens of vintage speakers cares about economics. . .

I like bypass caps and use them on most rebuilds. An economical way to improve sound, without overspending. Also, the Audyn Q4 poly isn't too expensive. Their 82uF cap is just over $20 bucks each.

I'm going to recap a pair of AR3a's next. And yes, they are truly ugly under the grills.

I've been recapping all my vintage AR's. I'm still refinishing my AR90 cabinets. Once completed, my AR5's are up next.
 
That is a serial number sticker. Yours are the later film, early were just paper and looked like they were typewritten. It goes above the 0.8A fuse holder for the tweeter. You probably can see remains of the glue on one or both of your speakers. They were individually numbered.

That is the lowest serial number I have seen with original mylar caps so it will help me refine my database. I'd guess yours are from about 1978.

Of all the speakers I have had here the boys really appreciate the DQ-10s for what they can do. 50 watts of Luxman tube power or 200 watts of McCormack power and they are great speakers.
 
I'm making up an order for recapping several speakers. I just inspected my original DQ-10s yesterday - carefully - removing some wax so I could determine. This is the complement of values that I found on mine:
80
16
8.5 (two of em)
6.8 (two of em) ------- not 6.0
0.15
0.1
I'm keeping the two smaller film caps, and replacing most others wit NPE. I may get films for the 6.8s and 8.5s.
 
Nice work!
I used a 80uf film too. Size of a freakin soda can .. well almost . I saw it was in signal path so I went for it . Also had to mirror image mine too . Hope you enjoy them as much as I do
 
replacing most others wit NPE
The factory moved to mylar caps for all except the 80 about 20000 serial number as a nice upgrade. I would recommend you follow that guidance as well as upgrade to the newer values in the crossover shown above. Some like the 80 to be a film cap, too since it is in line with the mid-woofer

80-1
16-1
8.5-1
6.5-1
6.0-2
.15-1
.1-1

Both pair I picked up were full of NPEs except the two smallest caps. If your speakers were cheap enough you can get into film caps for well under 50 bucks and that is almost enough to squeak in a couple 80s, but not quite.

I guess they work with NPEs, mine did.
 
I picked up mine at near retail in 1977 (new) in the box. Serial was way above that # shown in post #4. Three new values, hmmmm. I wonder why/

Surrounds were different too, attached to the cage, not to the fiberboard spacer. I know that because I replaced them myself; glue was on the metal cage not back of the fiberboard spacer. I will mirror-image them soon, maybe when I recap. Odd or a mistake I dunno. I have a thread on this at AK.
 
Back
Top Bottom