• The move to the new server is done. There are some software and database maintenance updates in process. This has us passing the hat around to help out. We appreciate any donations. Seriously, even a dollar helps. The payment page may be found here - https://www.audiokarma.org/support.html

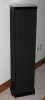
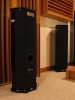
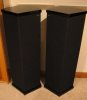
DCM TimeWindow Seven clone project

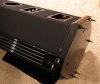
Here’s the finished product after applying the synthetic wax. Compare the deep shine and clearness of the reflection of the light bulb in the second photo to the third one showing the same piece before I started.

Before:
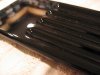
Trim 052.jpg


After.
Trim 100.jpg

Trim 103.jpg
That's a reflection of a Sylvania light bulb.

The tops are next.

Below is one of the tops, again as it came out of the paint booth; you can see the slight orange peel noticeable in the reflection.
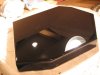
Finish 057.jpg


After block sanding with 1500 grit to level the orange peel, then with 2000 grit then 3000 grit (all wet sanding), this is what the top looks like after a few passes with the heavier compound and corresponding pad. At this stage, I'm using a rotary buffer (wheel spins on one axis like a grinder) as opposed to a DA (dual action which spins but also in a small orbit) because it cuts faster but more risky of burning through the finish. You can see the shine starting to come back.
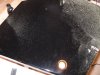
Finish 184.jpg


Here after a few more passes.
Finish 182.jpg

Finished with the first step, but needed to have the excess compound wiped down.
Because the polishing steps are progressive (working down to a finer finish), you need to be careful not to cross contaminate the compounds and appropriate pads.
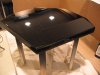
Finish 189.jpg


Here are some shots of the top after using the finer compound and pad.
Finish 193.jpg

Finish 198.jpg


And last, after applying the synthetic wax.
Finish 199.jpg
 
Last edited:
Now comes the fun stuff, final assembly.


Here’s the backside of one of the fluted sidepieces showing the “MOD-EEZ CONCEALED PANEL FASTENERS”. The tops are held on with the same clips.
Finish 092.jpg
Finish 091.jpg
A close up of one of one of the clips.


This is showing one of the new fluted sidepieces next to the one on the original TimeWindow Seven for comparison.
Finish 104a.jpg


Here’s the left speaker on its side waiting for the sidepieces to be installed. The bottom end is propped up with a pillow to make it easier to add the base afterwards. I decided to do the final assembly in the HT because they’re to heavy to more around much from the work shop and lighter and easier to handle without the trim. The slots in the fabric are where the posts are for the MOD-EZZ clips.
Finish 094.jpg

After installed.
Finish 118.jpg


And then the base.
Finish 180.jpg


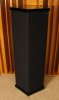
Finally the finished product.

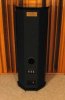
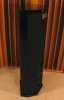
Here are a few full shots of the right speaker temporarily in front of one of the large sidewall Schroeder Diffusers.

Front Full 15.jpg

Rear Ful 05a.jpg

Side Full 12.jpg

Side Full 16.jpg
 
Last edited:
The “Signature” plaque.

The original was etched, not engraved, and with an un-coated mill finish. Minimal cost for etching was around $200 for the pair, which is not very cost effective. There are several DIY ways of etching brass; it can be done electrolytically or with an acid to get the deep recesses. I experimented with both with mixed results. The problem is protecting the surface that you don’t want etched. The DIY method is to use a laser printer to print a mirror and color negative (black and white) image and then iron it the brass. The toner will stick to the brass and act as a mask. It was tough to get a good clean edge with either process. What finally work was having a professional engraver make the plaque ($13 a piece) which consisted of lacquer coated brass that had the lacquer finish engraved off for the lettering and exposes the brass that was then chemically oxidized to darken it. While this was not exactly what I wanted, it did provide me with a perfectly masked surface for etching, which I did electrolytically with excellent results. After that, I filled in the etched lettering with semi-gloss black paint. Once that was dry, I used double-sided carpet tape to attach the back of the plaque to a small block of wood. From there I adhered a sheet 320 grit sand paper to a piece of ¼’ plate glass for a flat surface and set up a straight edge guide to run the block back and forth on to remove the lacquer finish and sand a mill finish on the front of the plaque.

The original plaque.
Original.jpg

The new plaque.
new2.jpg


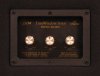
Spectral Balance Control.


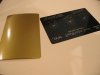
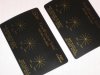
The original spectral balance control decal was metallic gold lettering silk-screened on semi-gloss black vinyl. No one did it locally. After I finished the artwork (I was new to using CorelDRAW and there was a slight learning curve that I had to get past first.), and through a lot of trial and error, I came up with printing the black background on a clear transparency (the lettering staying clear) and using a self-adhering gold vinyl on the back. It did a nice job of reproducing the metallic look in the gold that I could not get with printing the gold lettering with the black background. Then I used a light spray adhesive to mount it to the terminal cup.

The printed clear transparency and self-adhesive metallic gold vinyl before being applied a to the backside.
Spectral Balance 10.jpg


After applied.
Spectral Balance 09.jpg


Finished product.
Spectral Balance 04.jpg


Original, with knobs removed for comparison.
spectral.jpg


Lastly, here are a few pictures for overall comparison.

One of my original TimeWindow Sevens.
Original 01.jpg

The clone and the original.
Comparison 23.jpg


Comparison 07.jpg
Which one’s the original and which one is clone?


It’s been a lot of work, more money than I expected, but worth it. The project was very satisfying and a challenge both in the technical and skill levels for me. I very happy with the results, and yes they sound incredible.

I would like to thank Steve Eberbach for originally designing the TimeWindow Sevens and his input on this project.

TW7.JPG
 
Last edited:
I will be the first to reply HLY SHT!!!!

I am going to assume that you have read this entire 50+ page long thread in its entirety, correct?
https://www.avsforum.com/forum/89-speakers/652191-whatever-happened-dcm-s-steve-eberbach.html


Yes, and I wrote a good part of it.

What I'm posting here is also in that link but it's spread out quite a bit. There is a member here that reached out to me to help him with the TimeWindow Seven and I though it would be beneficial to show the build in a continuous manner.
 
Last edited:
Yes, and I wrote a good part of it.

What I'm posting here is also in that link but it's spread out quite a bit. There is a member here that reached out to me to help him with the TimeWindow Seven and I though it would be beneficial to show the build in a continuous manner.
Very generous of you. An exceptional build, and photo documentation.
 
A phenomenal amount of time and effort and clearly an amazing reproduction. Obviously a labour of love. It seems a shame your production is limited to only one pair with skills like that. :)

At the end of the day however, do you really think that considering all the effort on the project and crossovers, wouldn't going DSP/active on all drivers have enabled a whole other level of performance?

I've never heard the TW7s. I've had several pairs of TW1as and moved them on- they wowed me at first, but not long term.
 
One of my favorite things about Time Windows is their ability to present a good stereo image from almost any seating position. The direct/ambient faces mean that listeners who are sitting outside the sweet spot can still hear both channels well.

Jamie did a great job on these clones and I'm glad he's putting the build here in one concise thread. Much easier to follow here than in the AVS forum.
 
A phenomenal amount of time and effort and clearly an amazing reproduction. Obviously a labour of love. It seems a shame your production is limited to only one pair with skills like that. :)

Thank you for the compliment.

I did this for many reasons, but mostly as I stated in the beginning of this thread "My ultimate goal here was to have four matching TW7’s in a quad formation (4.1) for multi-channel music". The clones replaced my set of TimeWindow Seven's as mains and then the original TW7's where moved to replace a set of TimeWindow Three's as side surrounds.

The TimeWindow Seven’s are hard to come by since there where only 200 pair built. It certainly would have been easier to just buy another set if I could have found one.

At the end of the day however, do you really think that considering all the effort on the project and crossovers, wouldn't going DSP/active on all drivers have enabled a whole other level of performance?

In a word, no. I wanted a match set. While I have no experience in DSP/active crossovers, I would be hard pressed to think that it could reproduce, let alone surpass, what Steve Eberbach designed. At least without an enormous amount of effort (time, knowledge and resources), I wasn't about to re-invent the wheel.

I've never heard the TW7s. I've had several pairs of TW1as and moved them on- they wowed me at first, but not long term.

The TimeWindow Seven’s are in a league of their own. The TW1a’s, and the TW3’s for that matter, don't come close.
 
Back
Top Bottom