• The move to the new server is done. There are some software and database maintenance updates in process. This has us passing the hat around to help out. We appreciate any donations. Seriously, even a dollar helps. The payment page may be found here - https://www.audiokarma.org/support.html

Dual duo: 1245 and 1009

Try the old tubes. Who knows.............
If you are the adventurous type, then consider getting an old oscilloscope, a vintage H.P sine wave generator that adjusts from D.C. to at least 100,000 Hz, a H.V. probe, and a book on how to use your new toys. This is how you can find the A.C. leak. Probably something easy like a power supply capacitor.

Thanks for the advice. I already have a few oscilloscopes (a redoubtable Tektronix and a sturdy old Heathkit that have been my workhorses for thirty years and a cute little DCS Nano that I now carry around everywhere in my pocket) along with several function generators, all from back in the days when I was an electrical engineer. I always hated tracking down ground loops. I could probably spend the day isolating and fixing this particular problem but, frankly, I was hoping someone would say "Oh, EVERYONE knows that old Fisher phono stages have a problem with ____ and all you have to do is ____." I have gotten tons of great answers like that on this forum (including the advice above on fixing common issues with the Dual 1009 headshell and your suggestions on maintaining the motor).

All in all, the generosity of people on this forum with expertise in old audio equipment has saved me a huge amount of time. I am very glad to have found the place.

P.S. I suppose it could be a power supply capacitor but I only hear it on the phono stage (not the aux or the tuner) and the power supply caps (a.k.a. restuffed the cans) were replaced relatively recently.
 
Last edited:
...and speaking of great, time-saving answers I have gotten from Audiokarma:

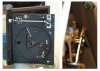
The automatic functions on the Dual 1245 recently became erratic and then stopped working altogether. From this forum I learned that the main suspect was the notorious 'steuerpimpel'. Also known as the 'control nipple guide stud,' this plastic part is apparently one of the elements of the Dual mechanism most sensitive to the ravages of time. Sure enough, when I popped the top I saw that the 'steuerpimpel' had dissolved into a gritty mess.

I bought some replacements on eBay, from a nice German man who didn't even make fun of me when I couldn't find the parts in the padded envelope (turns out they were taped to the back of the invoice). After removing the debris; replacing the part; cleaning up all the old grease that had turned to wax; and relubricating all the moving parts, the old turntable is now running smoother than ever.

In a world full of complex problems it's great to occasionally confront one with a simple solution.

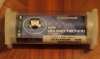
open_case_sm.jpg degraded_SP_2.jpg repaired_sm.jpg
 
The Dual 1009 has become an integral part of my favorite tube-amp system. To increase its flexibility I put together a second headshell with a different cartridge. Some folks here touted the virtues of the inexpensive Shure M35ex (good sound, good tracking) and so I decided to give it a shot.

new_cart.jpg

I also found an aftermarket headshell from a seller on ebay (patsaudioparts -- no affiliation) that appears to address some of the mechanical and electrical issues of the original. Specifically, instead of copper leaf contacts the new headshell uses spring-loaded, gold-plated pins.

headshell_sm.jpg

The contacts on the original headshell that came with my turntable were loose and oxidized and required a bit of repair to make it work reliably. I mounted and aligned the new cartridge and it sounds great. I have to admit that I have never liked the way Dual headshells mate with the tonearm. It always takes a bit of fiddling to get the heashell positioned so that it will lock in place properly and, unfortunately, the aftermarket headshell is just as finicky.

For the photos below I just slapped cartridge in quickly and did not notice that I had the mounting screws in backward. Oops.

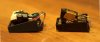
compare.jpg

two_carts.jpg
 
Last edited:
I am loving the new headshell. It makes me want to try 3D printing some hard-to-find stereo components. I have printed up parts for old microscopes but never for audio gear. Anybody here have any experience with this?

Also, the Shure cartridge is mighty fine, mellower than the Stanton.
 
Wow. It turns out to be surprisingly difficult to find non-detergent motor oil in San Francisco. I hit two gas stations and two auto parts stores on the way home from work and nada. I ended up going with an oil from the hardware store that was suggested for electric motors.

This evening I dropped the motor and pulled it apart. I cleaned the shaft with a tiny bit of chrome cleaner and then filled the top and bottom cups with oil. I also adjusted the pulley height so that putting the pitch control smack in the middle gave exactly 33.3 RPM's.

Thanks to everyone for the kibbitzing.

View attachment 726473
View attachment 726475
View attachment 726474

Hey dyche01,

I have a quick question, when you said, "and then filled the top and bottom cups with oil", what "cups" are you referring to? Thanks so much!
 
Hey dyche01,

I have a quick question, when you said, "and then filled the top and bottom cups with oil", what "cups" are you referring to? Thanks so much!

ranf1970,

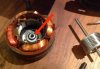
The 'cups' are the stamped metal pieces that hold the sintered bronze bearings. Sintered bronze is porous and can hold a fair amount of oil. The 'cup' surrounding it has a reservoir for additional oil that can seep through the bearing and keep it lubricated. The bottom cup is marked in the photo below. The shaft of the rotor inserts through the hole and into the bronze bearing. If you pull apart the motor and look closely at this part you will see that there is a gap between the hole in the housing and the top of the bearing itself. If you drilled out the rivets and pulled up the stamped metal piece (I do not recommend this) you would see a felt washer that helps hold oil in the reservoir surrounding the bearing. To lubricate, I just filled the entire housing up to the top and let it soak a while before re-inserting the rotor shaft. Some oil spilled out but that isn't really a problem. There are holes in the bottom of the motor housing that allow the excess oil to drain out. If you leave the motor sitting on a shop rag or a few paper towels for a while you should be able to avoid dripping oil into the plinth or onto the tabletop.

bottom_cup.jpg

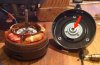
There is a similar 'cup' in the top of the motor housing (see photo below). This one is open on the bottom so you can't just fill it with oil and let it soak. I tilted the motor sideways and used a dropper to fill the gap between the hole in the 'cup' and the top of the bearing. If it hasn't been lubricated in a while you can get a surprising amount of oil into the reservoir before it starts to drain through the center of the bearing.

top_cup.jpg

FWIW, I couldn't find a non-detergent motor oil so I used an SAE 30 compressor oil from the hardware store. It was designed for compressors and pneumatic tools and has no detergents or other additives that might gunk things up. I would not use an oil that contains PTFE.
 
Last edited:
Thank you so much for all the information! I've been meaning to do this and with the really helpful pictures and write up, I think I know what I'll be doing this weekend. :thumbsup: I've heard sowing machine oil is also OK for this job.
 
Sounds like fun!

While you're at it you might want to give the rotor shaft a (light) once-over with a fine grade of scotch brite. I have heard of people using chrome cleaner on this part but I cannot recommend that either. Some people might recommend against scotch brite as well but it cleared up a speed problem I was having.
 
Back
Top Bottom