• The move to the new server is done. There are some software and database maintenance updates in process. This has us passing the hat around to help out. We appreciate any donations. Seriously, even a dollar helps. The payment page may be found here - https://www.audiokarma.org/support.html

Dynaco A50 Questions, part ID

8xlaxx

Have you ever seen a spleen that large?
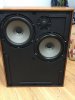
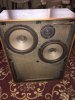
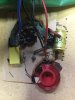
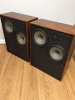
Recently acquired some A50s. Played music through them and one tweeter was not functioning. Rotation of the switch did not improve things. Pulled the woofers and found the following.

AF7AB8E1-696D-40D3-B09F-4C644A81F135.jpeg

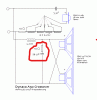
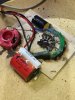
What is the red wirewound part? What is its ratings? It is snapped in two and was resting on the cap.

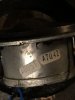
Leaning towards updating and replacing the tweeters and would like to know if the Seas 27TDFC is still the tweeter replacement of choice for the A50. There was a thread with a question about the bolt pattern with the 27TDFC. These are the Scan Speaks
D10B8C5F-3A6A-4498-8DE9-0270DF711BC7.jpeg

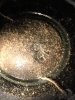
The metal guard for the tweeter had been bent prior and was resting on the dome,...left an imprint that I’m sure didn’t improve tweeter sonics. There was hardened residue sticking to the guard.
F359D395-6DE0-4D9C-9959-29CE0F761EC0.jpeg

Be nice to hear from some Dynaco A50 owners or those that swapped out tweeters. The drivers are still really solid in these. Thank you for the assistance.
 
Register to hide this ad
You got me curious to pull the tweeter in mine to see what they are. not sure if I can see the red wirewound, but will try. I think there are schematics for these. I have to look if I have it.
 
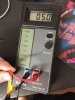
Tested the tweeter above,... open & dead as a door nail. Took a closer look at that red wire-wound resistor and noticed that it was still intact, took a measurement... still10.4ohms.

Going to swap out the 2 caps. All the ceramic resistors were good. Have a lead on some 87 H Seas so hopefully they will be drop in without issues.

Pretty sure this has been posted someplace here on AK but will do so in this thread for those searching.

Inkedpost-20-1171840536.gif
 
I think I repaired one of my tweeters years ago. I have done this on several tweeters over the years. The wire breaks near the edge near the coil and I have either soldered or used a conductive glue and had success repairing tweeters. Don’t toss the dead one without trying to fix it.
 
If you can gently scrap the insulation off the wire near the coil, you might be able to check continuity or just look if you can see a break in the wire near the coil with a very bright light and magnifying glass.
 
Won't toss the tweeters as yet but am looking into installing the 87H Seas tweeters instead.

Noticed that the Scan Speak 87H tweeters have a (6 hole) screw-on pattern that incorporates a black, plastic trim ring which will not marry with the Seas 87H tweeters screw pattern. The Scan Speak 87H tweeter has 3 holes for direct mounting to the cabinet and 3 thru holes for the trim ring to mount thru the tweeter and into the wood. On the back of the plastic trim ring are leg standoffs that cover the screw heads for the tweeter mount. Interesting.

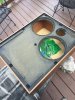
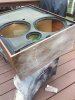
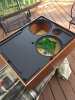
So far, took some 400 grit to the one cabinet and painted the baffle in ultra flat black.


FC1A2727.JPG

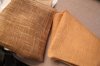
Grill cloth was not identical on both outputs, have seen both textiles used on these speakers, especially on the A50. Strange!

FC1A2728.JPG

Will be discarding the material and looking to re-grill them with something that matches, with a well-spaced slubs.
 
My grills float on pegs. The grills and frame was missing on mine, so I made a frame and put a grill cloth I had on hand. Modernized with black cloth. It looks fairly easy to get to the crossover caps with woofers removed. Looks good. Cabinets look is pretty good condition.
 
Looks like it’s only us @simplynuts We’ll ride this one out together :biggrin:

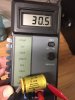
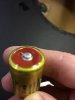
Pulled the caps and resistor. Jensen cap might be still good as data says that 20% drift is OK for older caps like these. Reading was closer to 30% and the axial ends look a little deformed. Going to swap em. WIMA 4.7 type cap was good at 5.

F80CCCA8-E165-48E3-B215-9931A67010D4.jpeg BEDEE4F6-9353-4682-86C6-DBC435AEC59D.jpeg DBB8D27F-6961-4437-9DBC-BC76B11C2C29.jpeg
 
Re-stuffed the cab with R13. The old insulation was pretty nasty stuff. Used 1/4” foam to reseal the drivers and tweeter. Replaced the screws. Starting to come together.

After:

4A91393B-7545-4544-9961-A4DB68F610CD.jpeg

Before:

7C5BD13C-9F09-4A18-A8D2-6F0929BD6D50.jpeg

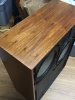
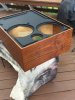
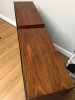
Walnut veneer came out pretty nice with the 400 grit and Tung oil.

EC146C4F-B2B0-4252-988A-E52907C6CA84.jpeg
 
Looks good. I never did anything to mine since they are in my basement room, that is basically my domain. There are lots of scratches, the top and edge was broken on one speaker that I filled in with wood putty and stained to match. I made a frame for the grill cloth and used black speaker cloth that I had in the house. I never opened it to look inside and check the crossovers. The woofers are in a special chamber to control the bass. If you are interested I have reviews of these speakers and maybe the brochure that I can scan. Might be easier to exchange emails to send it. i just acquired another pair of KLH six. I restored a first generation pair several years ago and posted a thread.
 
You might want to change the caps on these to update to better newer ones. My KLH six made a big difference in sound when I replaced the caps. Didn't have a choice though as both tweeters were dead because one cap leads broke and the other cap just failed. original owner of those was 93 when she passed away.
 
Like any other AK member around here, it can sometimes be difficult to get back into projects when time is limited.

Restarted the A50 restoration again this Memorial Day weekend,...raining & cold in the 50s here so back to the basement.

Got into the other output xover. Everybody likes the spotting games so here is one where you too can earn those coveted and highly valuable ‘AK member points’....just kidding...play along and see if you can spot the problem. Ya, and it’s not the sloppy stained black gooey stuff everywhere!

82667035-32BE-429B-984C-6AE33F639352.jpeg
 
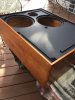
As you strain and challenge your eyeballs and schematic reading abilities, we’ll keep posting some other pics of the cab re-finish on this one. Everybody loves resto pics!

862DEE13-310A-447A-9D15-AC167D494D50.jpeg 08120388-3BB3-42E8-8D15-88921D0BF489.jpeg 22F6EB5B-7289-48B0-90D0-BE55427220F7.jpeg

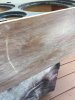
Both those scratches were deep. Tried my best with the 100 and 400 grit sandpaper. All by hand with a 3M handheld sander. More pics coming.
 
Getting the crossover together.

View attachment 2174232

I suggest spacing that 10 ohm resistor so that it can air cool. Generally, resistors should be spaced about 1/4 to 1/2" away from the other components so not to cause heat related problems. The original resistor failed because of overheating and physical damage is visible on the nearby cap.

It is not a good idea to hot glue resistors to a capacitor. Capacitors are sensitive to heat and are easily damaged by excessive heat. And the hot glue will melt when the resistor heats up. I suggest suspending the resistor from its leads with the leads attached to a solid termination point. In this way the resistor will be surrounded by air and not be conducting heat to the cap.
 
I suggest spacing that 10 ohm resistor so that it can air cool. Generally, resistors should be spaced about 1/4 to 1/2" away from the other components so not to cause heat related problems. The original resistor failed because of overheating and physical damage is visible on the nearby cap.

It is not a good idea to hot glue resistors to a capacitor. Capacitors are sensitive to heat and are easily damaged by excessive heat. And the hot glue will melt when the resistor heats up. I suggest suspending the resistor from its leads with the leads attached to a solid termination point. In this way the resistor will be surrounded by air and not be conducting heat to the cap.

Thanks for the advice on elevating the resistor. They’re sealed up now so will just have to roll the dice on that.
 
Back
Top Bottom