• The move to the new server is done. There are some software and database maintenance updates in process. This has us passing the hat around to help out. We appreciate any donations. Seriously, even a dollar helps. The payment page may be found here - https://www.audiokarma.org/support.html

Dynaco ST-120 Unopened Kit

JRhoBurton

All roads lead to music
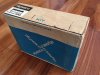
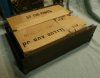
I'm probably a nit-wit, but this just became available and I bought it. If the box contains not just sand in a bag, but an actual complete kit in decent shape, I will be happy. I will feel like an archaeologist when I open it.

I can test caps for capacitance, ESR, Vloss, and do basic checks on transistors, diodes, etc., but the boards should already be stuffed and soldered. I plan to compare this kit with the well documented revision history of these amps, and maybe implement some of those minor updates.

I already have a fully "updated" 120 with new PSU and LM3886 boards. I want to leave this one original if possible.

Suggestions are welcome. I wonder how long it's been since someone opened one of these for the first time. I should make a video as I do that for archival purposes.

I feel like I am not worthy to have this.

John

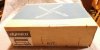
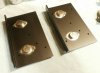
EDIT to add some pics.

s-l1600.jpg s-l1600 (1).jpg
 
Last edited:
Register to hide this ad
Yep, that's a time capsule! At least it is going to someone who would appreciate it - nice! If you're planning to construct it, by all means document it if you have the time and inclination.

I'd suggest, however, that you plan on replacing the electrolytic caps. They're at least 40 years old and will have likely dried out inside in that time. Measure the resistors before mounting then, too, to be sure they've not drifted as well. Use fresh solder, too.

Enjoy!

Cheers,

David
 
Thanks for the positive comments, David. Yes, I think I appreciate this kit. I built one in '74 as part of my first real stereo.

I think if the big caps measure in spec in all respects, I will try to use them. I need to learn how to measure components in-circuit. I might look into getting a variac as well.

I'm taking a chance here, but if it's bricks packed in styrofoam I won't complain.
 
Thanks for the positive comments, David. Yes, I think I appreciate this kit. I built one in '74 as part of my first real stereo.

I think if the big caps measure in spec in all respects, I will try to use them. I need to learn how to measure components in-circuit. I might look into getting a variac as well.

I'm taking a chance here, but if it's bricks packed in styrofoam I won't complain.

Wow! I'd love to find a kit like that?
From the pics, that box looks untampered with. The staples have never been removed as far as I can tell.
Please, fully document every aspect of the opening to the finished product!
 
Wow! I'd love to find a kit like that?
From the pics, that box looks untampered with. The staples have never been removed as far as I can tell.
Please, fully document every aspect of the opening to the finished product!

Yes, the staples look intact. If it was tampered with, they did it skillfully.

Maybe I will have some kind of unveiling party, burn incense and light candles.
 
I would leave it in the box and find another one that needs rebuilt and rebuild to have one that is original .

That's a viable option for me already, batt. I have a 2nd beat up old 120 that appears to need only a few of the big caps replaced to operate normally. I think I will set the time capsule box aside for a while while I think about the best approach.
 
Nice. I dream of finding an unbuilt Fisher tube Stratakit but that's proably never going to happen.

I agree with the suggestion to rebuild another one and leave this in the box for a while. Put it where you can see it and think for a year or two about what you might want to do with it. Maybe you'll build it, maybe you won't. If you do, post lots of pics here please.
 
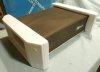
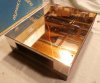
Well, I opened it last night. I had already decided that I would eventually build it, so even if I build later, why not open now? A nice diversion from the mid January blahs. It looks to be in very nice shape. I did see just a bit of rust on the inside bottom of the chassis after I took these pics, but overall that nickle finish is primo. I tested all the big caps and they look good. Capacitances are mostly a bit high, but within 12%. The highest ESR is 0.52, the rest are 0.12 or less. Highest V-Loss is 2.2%, I don't know much about that spec, any tips? I plan to go showroom stock, with the possible exception of a set of bigger feet. The ones supplied are tiny, I want it to run cool.

According to info on Dan's Updatemydynaco.com site, this is what I call Rev. 3. It adds C13, C14, and R28 to the original design to deal with some possible oscillation issues.

This brought back a lot of memories from college days living in my aunt's basement, building the same kit. I will put up a few more posts as I get thru the assembly. I'm lovin' it!

P1170074.JPG P1170086.JPG P1170091.JPG P1170092.JPG P1170095.JPG P1170100.JPG P1170102.JPG P1170104.JPG P1170106.JPG
 
You need to reform the caps to their rated voltage and see what the leakage current is. That's more important than value and esr right now. Ditto any electrolytics on the boards. Failure to do so will lead to tears.
 
I wonder how long it's been since someone opened one of these for the first time.
Well for me it has been since May 4, 1970 since I opened one, thanks for the trip back in time.
That took a few days for you to get around to opening it, didn't it?
Now for the build.
 
You need to reform the caps to their rated voltage and see what the leakage current is. That's more important than value and esr right now. Ditto any electrolytics on the boards. Failure to do so will lead to tears.

Thanks. How do I do that?
 
Nice find!

Think it'll be another year before the next installment? <G>
 
Thanks. How do I do that?

Pretty simple if you have a power supply and a resistor. The cap has to be out of the circuit- lift one lead on pcbs. You just connect the resistor, say anything between 2 and 10 kohms, between the ground terminal of the power supply and the negative lead of the cap. Connect the positive lead of the supply to the positive lead of the cap. Set the supply voltage to the maximum voltage rating of the cap. Measure across the resistor with your DVM. You should see gradually decreasing voltage and can calculate the current. Hopefully, within minutes to hours, the cap will charge up to nearly full voltage, and the current calculated through the resistor will fall to 0.05CV or less. Example- 1000 uF/50 V cap will have a maximum current of 0.05*1000*50 or 2500 uA (since the value is in micro, the answer comes out in micro). If you used a 2 kohm limit resistor, you'd expect to see less than 5 volts across it. I like to put it in the negative lead so it's a nice safe measurement with one end grounded.

In my limited experience, the caps in the 120 held up well under voltage. They should, being huge compared to their values and voltages. No idea how they'll do not having seen voltage for almost 50 years, but disaster is almost assured if you just build and plug in.
 
Back
Top Bottom