• The move to the new server is done. There are some software and database maintenance updates in process. This has us passing the hat around to help out. We appreciate any donations. Seriously, even a dollar helps. The payment page may be found here - https://www.audiokarma.org/support.html

Elekit TU-8900 kit 300b/2a3 SET amp - mods

UPDATE: IT WORKS.

My tubes weren't bad after all. A gentleman over at DIYaudio talked some sense into me. Turns out it was the DBT interfering with the amp. Went back to what I did before - jumpered the inlet PCB, removed the 100V primaries, connected it directly to a variac, 100V, then all the way up to 120V - boom, everything works. Now on mains and voltage readings at all the read points are spot on.

Hallelujah.


In conclusion, this is all that is needed to make the Japanese version of this amp work on 120V:
1763014382256.png


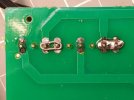
Step 1, jumper 3+4 and 8+9 on the pcb (in the picture one is done the other is not yet soldered):
1763014427358.jpeg


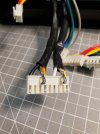
Step 2, remove the 100V primaries from the transformer (I'd heatshrink them):
1763014404437.jpeg

Done!
 
Last edited:
Well done! I'd suggest just swapping the positions of the brown/orange (3-4) and gray/yellow (8-9) pins in the connector to reroute the AC to the 115v path. Save a little soldering...
Saving up for this kit and the TU-8900. They are very fun to build and learn a little about electronics along the way...
Can't wait to see the custom face when you finish it. I thought about doing something for my TU8200, but never got around to it.
 
Well done! I'd suggest just swapping the positions of the brown/orange (3-4) and gray/yellow (8-9) pins in the connector to reroute the AC to the 115v path. Save a little soldering...
Saving up for this kit and the TU-8900. They are very fun to build and learn a little about electronics along the way...
Can't wait to see the custom face when you finish it. I thought about doing something for my TU8200, but never got around to it.
Yes definitely, someone pointed that out on the diyaudio forum as well - much cleaner solution.

Working on the face right now. Hate routers but going to have another try at chamfering using machines instead of hand planes, files and rasps..
 
bhairavi , I've been planning to build a 2a3 or a 300b amp and so far I've purchased a pair of 25w Musical Power Supply 3.5k OT's. When found out that the Elekit TU-8900 will automatically switch between the two power tubes, I've been focusing on that kit rather than a DIY amp. My only hangup is now that I've invested in the OT's, I'm wondering if they'd fit in the Elekit. I checked their size against the optional Lundahl transformers and the MPS OT's have a smaller footprint, so it's just their height that I'm concerned about. You wouldn't happen to be able to check if there is room for an OT that is just under 4" tall in that compartment, would you? Thanks, Jeff

Image.jpg
 
bhairavi , I've been planning to build a 2a3 or a 300b amp and so far I've purchased a pair of 25w Musical Power Supply 3.5k OT's. When found out that the Elekit TU-8900 will automatically switch between the two power tubes, I've been focusing on that kit rather than a DIY amp. My only hangup is now that I've invested in the OT's, I'm wondering if they'd fit in the Elekit. I checked their size against the optional Lundahl transformers and the MPS OT's have a smaller footprint, so it's just their height that I'm concerned about. You wouldn't happen to be able to check if there is room for an OT that is just under 4" tall in that compartment, would you? Thanks, Jeff

View attachment 3674859
I suspect there is just enough room, will get back to you.
 
I suspect there is just enough room, will get back to you.
@kentuckycat

Space between transformer platform is 5 7/8 minus 2 5/16 = 3 9/16

Bummer.

The x and y dimensions are approx 4.5" x 5" on the platform.

The screw holes for the cover are about 7/8" from the bottom of the cover, so you COULD drill new holes and have enough clearance... But then of course there would be an unsightly gap all around the transformer cover. Wood trim? Third party fabrication? Seems like a lotta trouble...
 
So close! Bummer indeed. Thanks for measuring. I like your idea of lowering the platform. I just retired from a sheet metal fabrication company after40 yrs and might still have some pull to get a part made to close that gap. Thanks again!
 
Well I just assembled another one of these. Started around noon and just finished around midnight... with a few breaks for lunch, a hike and a bedtime story.


Just started testing and everything works! Got a matched pair of RCA 2A3 black plates, matched RCA 12BH7s, matched K42Y caps. This time I did the NFB switch mod right from the beginning.


20260913_000300.jpg

20260913_004937.jpg
 
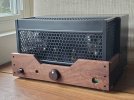
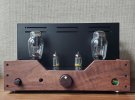
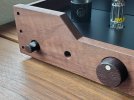
Well I got this far and now I'm wondering if pistachio knob doesn't have sufficient contrast with a cherry face.

Toying with the idea of two part bleach on the cherry..

20260914_155558.jpg
 
20260916_073124.jpg


Two part bleach on the cherry face - gave it a nice ombre look. Of course I had to resand after applying the bleach.


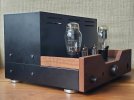
Also fixed that clunky switch, such an odd choice it was to have a long plastic lever arm to actuate the power switch. It's flimsy and as you push it in it bends, making the button feel squishy and off-center. Just a piece of wood the exact thickness of the distance between the long edge of the switch and the side of the chassis makes all the squish go away and gives it a nice thunk.
 
Last edited:
Back
Top Bottom