FireGuruMN
Active Member
First off, if you want a complete restoration guide go here:
http://www.classicspeakerpages.net/...ginal_models_schematicss/restoring_the_ar-3a/
There is absolutely nothing that they did not cover in that document.
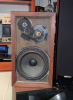
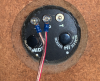
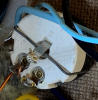
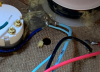
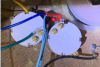
I bought a pair of AR3a's back in 5/5/19. $250.00 on CL with known issues. But that is a good price. I had a local speaker shop refoam the woofers. They charged $40 each which is more than their usual $30 each. Apparently the diameter requires a more rare replacement foam but somehow I'm thinking they charge more for people that can afford nice speakers. Whatever. I also replace the L-pads with some from E-Pray, $130 for four of them with shipping. Getting in deeper. The l-pads were significantly larger than than the old ones but I managed to fit them after moving some wires out of the way. I considered restoring the old ones but two were beyond repair for me. I will end up putting the two good ones in some AR4's. At some point I might find the pictures I took and post them. Right now they are lost on my 4tb NAS somewhere.
After the refoam and lpad's the speakers sounded very good. Really I could have stopped there. But that is not my nature. So the capacitors are coming out:
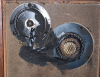
Here is how I opened it up:
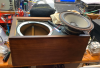
The woofer wires are long enough that they don't need to be disconnected. Inside you will find a cloth piece that prevents the yellow insulation getting into the woofer. Save it and put it back in. If it is trashed find an old t-shirt or something to replace it. Remove enough of the insulation that you can get to the crossover. I found that insulation was tucked under the inductor wires possibly to support them and keep them out of contact from other things. I was sure to restuff insulation in there when I was done. These guys knew what they were doing.

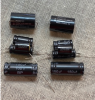
"Compulytic" capacitors. Cool. probably high quality for computers in the 1960's? Probably full of PCB's and other nasty things. Dispose of properly or leave them in place. I left mine in place.
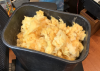
Keep the insulation somewhere handy:
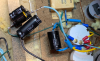
The crossover with l-pads previously replaced:
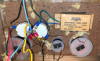
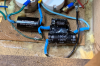
I love old school capacitor. It's staying in place also. I will just remove it from the circuit. Air core inductors! Quality again and again.
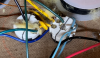
Be careful around this wire:

It is a nichrome resistor of a specific value (0.5ohms I think). You could replace it with a modern resistor if you like but it is just fine and will never need replacement just like the inductors.
Continued. . .
http://www.classicspeakerpages.net/...ginal_models_schematicss/restoring_the_ar-3a/
There is absolutely nothing that they did not cover in that document.
I bought a pair of AR3a's back in 5/5/19. $250.00 on CL with known issues. But that is a good price. I had a local speaker shop refoam the woofers. They charged $40 each which is more than their usual $30 each. Apparently the diameter requires a more rare replacement foam but somehow I'm thinking they charge more for people that can afford nice speakers. Whatever. I also replace the L-pads with some from E-Pray, $130 for four of them with shipping. Getting in deeper. The l-pads were significantly larger than than the old ones but I managed to fit them after moving some wires out of the way. I considered restoring the old ones but two were beyond repair for me. I will end up putting the two good ones in some AR4's. At some point I might find the pictures I took and post them. Right now they are lost on my 4tb NAS somewhere.
After the refoam and lpad's the speakers sounded very good. Really I could have stopped there. But that is not my nature. So the capacitors are coming out:
Here is how I opened it up:
The woofer wires are long enough that they don't need to be disconnected. Inside you will find a cloth piece that prevents the yellow insulation getting into the woofer. Save it and put it back in. If it is trashed find an old t-shirt or something to replace it. Remove enough of the insulation that you can get to the crossover. I found that insulation was tucked under the inductor wires possibly to support them and keep them out of contact from other things. I was sure to restuff insulation in there when I was done. These guys knew what they were doing.
"Compulytic" capacitors. Cool. probably high quality for computers in the 1960's? Probably full of PCB's and other nasty things. Dispose of properly or leave them in place. I left mine in place.
Keep the insulation somewhere handy:
The crossover with l-pads previously replaced:
I love old school capacitor. It's staying in place also. I will just remove it from the circuit. Air core inductors! Quality again and again.
Be careful around this wire:
It is a nichrome resistor of a specific value (0.5ohms I think). You could replace it with a modern resistor if you like but it is just fine and will never need replacement just like the inductors.
Continued. . .