

You are using an out of date browser. It may not display this or other websites correctly.
You should upgrade or use an alternative browser.
You should upgrade or use an alternative browser.
Fisher 800c project for 2014
- Thread starter Omegaman
- Start date

The serial # is 10189A making it a 1963
I should get it next week and the cabinet 30 days later after it is made
I am not seeing a service manual for the 10000 series 800c anybody got a link?
Thanks to Larry for doing the leg work on these model receivers
I should get it next week and the cabinet 30 days later after it is made
I am not seeing a service manual for the 10000 series 800c anybody got a link?
Thanks to Larry for doing the leg work on these model receivers
Last edited:

Use the 1963 EXECUTIVE VIII (Model 950) manual. NOTE that the parts list seems incomplete. That's because it's for parts specific to the 10001-19999 series. Also use the 20001-29999 series for the rest of the parts.
http://www.fisherconsoles.com/service manuals/FISHER EXECUTIVE VIII 950 SM.pdf
Your's is slightly older than mine. 10483A. Perchdog's is 10368A.
http://www.fisherconsoles.com/service manuals/FISHER EXECUTIVE VIII 950 SM.pdf
Your's is slightly older than mine. 10483A. Perchdog's is 10368A.
Last edited:
The 800c Executive arrives
We can all understand the anxiety of "the wait". After seeing all those utube videos and reading all the horror stories
From Michigan to Arizona
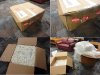
Love at first sight
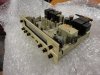
With the 990-116 transformers
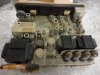
Hello Beautiful
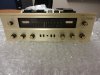
untouched as the pure driven snow
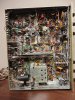
*SIGH-OF-RELIEF* Intact and complete and as-advertised
Next, I'll take the dial glass off and clean the backside real good then take my auto buffer and shine up the front
We can all understand the anxiety of "the wait". After seeing all those utube videos and reading all the horror stories
From Michigan to Arizona
Love at first sight
With the 990-116 transformers
Hello Beautiful
untouched as the pure driven snow
*SIGH-OF-RELIEF* Intact and complete and as-advertised
Next, I'll take the dial glass off and clean the backside real good then take my auto buffer and shine up the front
Last edited:


Agree with Bruce on the peanuts. Hard Foam will help the box keep its integrity.
WOW! Another VIRGIN! Be really careful around the lettering on the dial glass. Q-tips are highly recommended. For one of the earliest 800-C's around, it's a definate looker.
Larry
WOW! Another VIRGIN! Be really careful around the lettering on the dial glass. Q-tips are highly recommended. For one of the earliest 800-C's around, it's a definate looker.
Larry

All cleaned and De-Oxited
Well the guy normally ships lighter, wooden cases and he used that paradigm. I too would use foam and brace the corners better, but it got here okay (bullet dodged)
I was just kidding about the dial glass, I was wondering if anyone actually read the posts. I'm not going anywhere near the dial glass
Here it is all cleaned up with DE-Oxited controls and tube sockets. I have read the sticky about deep cleaning and it was helpful in avoiding pitfalls
It cleaned up very nice. It was in dry, climate controlled storage so no mold
It did have slight green oxidation on the chassis so that I used gloves when removing (cadmium). Thats to be expected after a prolonged cryo-sleep
I tested all the tubes (TC-2 emissions tester) and they all test good
Really can't get a good test of 7591's but they look fantastic

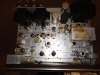

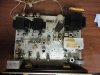
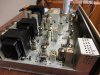

Well the guy normally ships lighter, wooden cases and he used that paradigm. I too would use foam and brace the corners better, but it got here okay (bullet dodged)
I was just kidding about the dial glass, I was wondering if anyone actually read the posts. I'm not going anywhere near the dial glass
Here it is all cleaned up with DE-Oxited controls and tube sockets. I have read the sticky about deep cleaning and it was helpful in avoiding pitfalls
It cleaned up very nice. It was in dry, climate controlled storage so no mold
It did have slight green oxidation on the chassis so that I used gloves when removing (cadmium). Thats to be expected after a prolonged cryo-sleep
I tested all the tubes (TC-2 emissions tester) and they all test good
Really can't get a good test of 7591's but they look fantastic
Last edited:
I order the McShane kit
Noting the serial number I provided, Jim returned a spreadsheet of parts for that version
Approximately $170 US with shipping and he takes PayPal
Plan A was to take this beauty to my technician and have him bring it up and try to get it running in original condition, then upgrade it. I really wanted to listen to it in close to original condition. But very, very unfortunately for me and my hobby, it might be that I lose my awesome connection to a true experienced vintage technician within 2 miles of my home and am on my own.
No one to align FM
Normally if the piece is a real collectible I have the pros do the work. They did my Mac and my Scott and about 15 other pieces.
So plan B is for me to install the McShane kit and then bring it up myself. I can do it.
I am so tempted to power it up. It looks so good
Noting the serial number I provided, Jim returned a spreadsheet of parts for that version
Approximately $170 US with shipping and he takes PayPal
Plan A was to take this beauty to my technician and have him bring it up and try to get it running in original condition, then upgrade it. I really wanted to listen to it in close to original condition. But very, very unfortunately for me and my hobby, it might be that I lose my awesome connection to a true experienced vintage technician within 2 miles of my home and am on my own.
No one to align FM
Normally if the piece is a real collectible I have the pros do the work. They did my Mac and my Scott and about 15 other pieces.
So plan B is for me to install the McShane kit and then bring it up myself. I can do it.
I am so tempted to power it up. It looks so good
Last edited:
Bring it up slowly on a VARIAC with a 150W bulb dbt on it. Start at 30V for an hour and bring it up 10V an hour until 90V. If anywhere in there the light goes bright and stays that way, shut it down. If by the time you get to 90V or so and the bulb is dim and the can's are cool, go ahead and jump to 110 and let it sit for a while. Check the temps on the can's and the transformers. If any are getting hot, shut it down.
Keep an keen eye on the DBT and the temps while bringing up. You may even take an occasional voltage reading on the B+ of the output tubes to make sure they are all drawing plate, grid, cathode voltages fairly evenly.
Any glitches, shut it down and rebuild the power supply and coupling caps 1st.
Make sure Cheap speakers connected.
Keep an keen eye on the DBT and the temps while bringing up. You may even take an occasional voltage reading on the B+ of the output tubes to make sure they are all drawing plate, grid, cathode voltages fairly evenly.
Any glitches, shut it down and rebuild the power supply and coupling caps 1st.
Make sure Cheap speakers connected.
Build my first Dim Bulb Tester
I collected the parts for a DBT and obtained a 150 watt incandescent light bulb
I have a brand new 3amp VARIAC but have never used it...yet
I might play around with the DBT and VARIAC on another less valuable piece of gear first
I have to have a whole day to devote to the VARIAC run up
Tuesday:
- Got the DBT all wired and tested
- McShane kit on the way
Here is the DBT I assembled decorated with a label maker
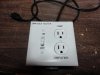
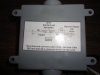
I wired the DBT similar to this
I tested the box with a 25 watt bulb and a known good SS Quadraflex 767 receiver. The 25 watt bulb glowed bright momentarily and then went dim
So that passes the test (that and the intact circuit breakers)
Now I am going to have to stash away a set of various watt bulbs
Thursday: The McShane kit arrives. Parts count looks good
I think this completes the preparations for the VARIAC run up of the Fisher 800c
Now I have to find time, when I can have the whole day to execute "OPERATION VARIC 2014"
But it could be late January before I can start the restore.
I collected the parts for a DBT and obtained a 150 watt incandescent light bulb
I have a brand new 3amp VARIAC but have never used it...yet
I might play around with the DBT and VARIAC on another less valuable piece of gear first
I have to have a whole day to devote to the VARIAC run up
Tuesday:
- Got the DBT all wired and tested
- McShane kit on the way
Here is the DBT I assembled decorated with a label maker
I wired the DBT similar to this
I tested the box with a 25 watt bulb and a known good SS Quadraflex 767 receiver. The 25 watt bulb glowed bright momentarily and then went dim
So that passes the test (that and the intact circuit breakers)
Now I am going to have to stash away a set of various watt bulbs
Thursday: The McShane kit arrives. Parts count looks good
I think this completes the preparations for the VARIAC run up of the Fisher 800c
Now I have to find time, when I can have the whole day to execute "OPERATION VARIC 2014"
But it could be late January before I can start the restore.
Last edited:
I bring the Executive up on a Variac, DBT and amp meter
After months of no activity from my well trusted technician it was decided that I should do the McShane install and then, if I have problems I can bring it back
First check that the parts are all there
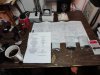
Bringing it up on a Variac, dim bulb tester and amp meter
So here it is cooking away at 30 VAC with 8 ohm speakers.
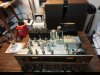
Drawing a couple hundred ma
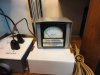
The dial lamps are lit up dim so its working
The 150 watt bulb is warm
11:30 Arizona time
12:30 - 40 vac
13:30 - 50 vac
14:30 - 60 vac
15:30 - 70 vac - steady as she goes
16:30 - 80 vac - stay on target
17:30 - 90 vac - almost there
18:30 - 110 vac - done
After months of no activity from my well trusted technician it was decided that I should do the McShane install and then, if I have problems I can bring it back
First check that the parts are all there
Bringing it up on a Variac, dim bulb tester and amp meter
So here it is cooking away at 30 VAC with 8 ohm speakers.
Drawing a couple hundred ma
The dial lamps are lit up dim so its working
The 150 watt bulb is warm
11:30 Arizona time
12:30 - 40 vac
13:30 - 50 vac
14:30 - 60 vac
15:30 - 70 vac - steady as she goes
16:30 - 80 vac - stay on target
17:30 - 90 vac - almost there
18:30 - 110 vac - done
Last edited:
If no problems @ 90VAC, put the stone's to her, and let'er run for a couple days at low volume to settle down! Keep an eye on the CAN CAP Temps for a while. If they don't heat up higher than the radiant heat from the tubes/transformers, you should be ok until you recap it. I'm surprised that this one has the black epoxy covered "dog turds" for output couplers. Mine had Erofoils in it.
Last edited:
The Fisher 800c is working
Wow! It works.
On/off/Volume pot is perfect
FM stereo, AM and AUX all make music
All the lights work
The Stereo beacon does light in and out as I traverse the FM dial in AUTOMATIC mode
It draws 1.6 amps
This is really a pristine unit
Dead quiet also
Thanks for your assistance Larry. I'll let it run for a couple of days and monitor the temps
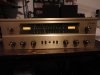
One thing I noticed is the glass is different than on other 500c and other 800c. The bird is positioned different
Wow! It works.
On/off/Volume pot is perfect
FM stereo, AM and AUX all make music
All the lights work
The Stereo beacon does light in and out as I traverse the FM dial in AUTOMATIC mode
It draws 1.6 amps
This is really a pristine unit
Dead quiet also
Thanks for your assistance Larry. I'll let it run for a couple of days and monitor the temps
One thing I noticed is the glass is different than on other 500c and other 800c. The bird is positioned different
Last edited:


Wow! It works.
On/off/Volume pot is perfect
FM stereo, AM and AUX all make music
All the lights work
The Stereo beacon does light in and out as I traverse the FM dial in AUTOMATIC mode
It draws 1.6 amps
This is really a pristine unit
Dead quiet also
Thanks for your assistance Larry. I'll let it run for a couple of days and monitor the temps

One thing I noticed is the glass is different than on other 500c and other 800c. The bird is positioned different
GREAT! The glass is different due to the Conelrad(Civil Defense) markings on it. The 63 Executive and the 20001 series are the only one's that have that I believe as Conelrad Markings were discontinued during 1963. With your's being that early it was probably made sometime in the summer of '62. And the font is slightly different from later iterations.
Install 10ohm resistors on pin 5 of each output tube (remove the ground and replace with the resistor. One of the tubes will have a resistor going to pin5, using it as a ground point. Just move it to the same ground point on the chassis as the cathode resistors. The 10 ohm resistors serve 2 functions. 1 to check the tube draw in mv which you convert to ma, and 2 serve as a fuse to shut down the tube and protect the output transformer if the tube goes chernobyl.
Read up on the 800-C restoration threads, and the sticky's up top and you'll get a bunch of safety, reliability, and ease of us mods you can do, fairly inexpensively and that can be done easily. About $10 in parts for the cathode resistors, screen resistors, output caps and grid return resistors. These 4 will allow any 7591 to run comfortably in it, and save you a bunch of headaches and $$ in the future. Recap the bias supply, get rid of the selenium rectifier(replace with silicon), and replace all the electrolytics underneath. Especially the 1uf 350V axial right next to the multiplexer.
I have to wait to do the McShane install so...
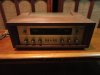
Here is the Executive mounted in its custom cabinet from MacintoshCabinets.com. Dan knew that the big Fishers needed more room to stay cool and to fit new tubes so the case is MONDO
Yeah, kind of dusty. The knobs are recessed for protection
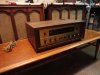
Plenty of room for new production 7591s.
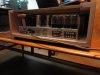
Here is the Executive mounted in its custom cabinet from MacintoshCabinets.com. Dan knew that the big Fishers needed more room to stay cool and to fit new tubes so the case is MONDO
Yeah, kind of dusty. The knobs are recessed for protection
Plenty of room for new production 7591s.
Attachments
Last edited: