• The move to the new server is done. There are some software and database maintenance updates in process. This has us passing the hat around to help out. We appreciate any donations. Seriously, even a dollar helps. The payment page may be found here - https://www.audiokarma.org/support.html

Fisher CA-880 (First Project)

Trodder

Member
Hi all! I am new to the forum! I am taking on my first project in my quest back to vinyl and more importantly back to vintage sound!

I have owned an MCS 6700 for as long as I can remember and it is still in phenomenal shape! The old SHURE RXT5 cartridge that was in there had seen better days and the tip of the stylus was gone, etc so I picked up the Ortofon 2M Red with matching red head. It looks nice and sounds nice. I will figure out where to go upgrade wise a later time but my jumping off point is getting a fully functional system.

Now while I was on the prowl for a receiver a friend of mine made me an offer I couldn't refuse and sold me all of his Klipsch speakers for $75. I thought it was going to just use my old Technics 3 ways with a 12" woofer but $75 for some high efficiency speakers? How could I say no!?!?! I got a pair of KG3.5 towers, a SW-10ii sub that is a monster! Plus a couple of matching bookshelf and center channel speakers. Not sure that I can actually get every speaker hooked up yet but did a quick connection with the bookshelf speakers and one channel of the sub.... oh my....

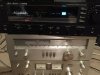
Now onto the meat... I picked up a NIKKO SA-850 with the matching tuner for $100. It does sound surprisingly nice, even though walking into it having read what others have already said here. I was still pretty suprised at how warm and balance it sounds. Good power and frankly it looks pretty dam cool. I may work on getting some blue leds if I can figure out a way to swap out the stock lamps (I believe this will require some soldering.)

Along with the SA-850 I managed to get a Fisher CA-880 for $15. I bought it under the pretense that I was going to have to maybe replace a transistor as the guy said a channel was out and that's why only $15. I plugged it and it works just fine! That said.... it is DIRTY!!! The controls are scratchy! I want to swap all the bulbs for LEDs to give it more vibrant output.

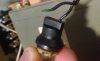
Here is where I need your help! I know the VU meter bulbs are 8v 300ma and I know where to get replacements for the bulbs but the sockets/holders are essentially crumbling trying to pull them out. They are simply dry rotted and will not handle removal at all. They are so stiff that the only way they are coming out is to get shredded a bit :( Does anyone know how or where I can get new sockets? It looks like the LED wedge bulbs come in a T naming convention... not sure if knowing which LED T bulb it gets replaced with?
 

Attachments

  • IMG_3211.JPG
    IMG_3211.JPG
    74.1 KB · Views: 52
Register to hide this ad
Hi all! I am new to the forum! I am taking on my first project in my quest back to vinyl and more importantly back to vintage sound!

I have owned an MCS 6700 for as long as I can remember and it is still in phenomenal shape! The old SHURE RXT5 cartridge that was in there had seen better days and the tip of the stylus was gone, etc so I picked up the Ortofon 2M Red with matching red head. It looks nice and sounds nice. I will figure out where to go upgrade wise a later time but my jumping off point is getting a fully functional system.

Now while I was on the prowl for a receiver a friend of mine made me an offer I couldn't refuse and sold me all of his Klipsch speakers for $75. I thought it was going to just use my old Technics 3 ways with a 12" woofer but $75 for some high efficiency speakers? How could I say no!?!?! I got a pair of KG3.5 towers, a SW-10ii sub that is a monster! Plus a couple of matching bookshelf and center channel speakers. Not sure that I can actually get every speaker hooked up yet but did a quick connection with the bookshelf speakers and one channel of the sub.... oh my....

Now onto the meat... I picked up a NIKKO SA-850 with the matching tuner for $100. It does sound surprisingly nice, even though walking into it having read what others have already said here. I was still pretty suprised at how warm and balance it sounds. Good power and frankly it looks pretty dam cool. I may work on getting some blue leds if I can figure out a way to swap out the stock lamps (I believe this will require some soldering.)

Along with the SA-850 I managed to get a Fisher CA-880 for $15. I bought it under the pretense that I was going to have to maybe replace a transistor as the guy said a channel was out and that's why only $15. I plugged it and it works just fine! That said.... it is DIRTY!!! The controls are scratchy! I want to swap all the bulbs for LEDs to give it more vibrant output.

Here is where I need your help! I know the VU meter bulbs are 8v 300ma and I know where to get replacements for the bulbs but the sockets/holders are essentially crumbling trying to pull them out. They are simply dry rotted and will not handle removal at all. They are so stiff that the only way they are coming out is to get shredded a bit :( Does anyone know how or where I can get new sockets? It looks like the LED wedge bulbs come in a T naming convention... not sure if knowing which LED T bulb it gets replaced with?

You should show us a pic of the bulb socket and we can help you better.
 
CA-800 is almost the same. Meter bulbs were changed in this thread.
I am beyond overwhelmed reading that thread as I am just starting to get my feet wet. That said his approach is far more complicated than mine. I plan to use some led lamps that are already regulated so there is no need for creating a power circuit... I think? The good news is he proved a good pic of the socket that I am worried about. It is VERY hard and does not flex. I think I have the same type of corrosion thing going on as well. It seems all of these it is the right meter light that stops :idea:

Bulb Socket.JPG

I have been trying to research the wedge style bulbs and sockets. I guess they are based off of a T#. I guess I just have to figure out what T# the meter bulbs/socket is. If its a T10 that should be simple to find a new socket as they are pretty plentiful on ebay, Amazon, etc. I would like to confirm the size before I buy. Not sure if there is a way to do that or not?

This is the bulb I was intending to replace the meters with but will likely require new sockets by the time I get the sockets out of the plastic housing. I just need to figure out which T# socket it would be and Bob form VE does not know:
http://www.vintage-electronics.net/led8vwedgelamp.aspx

I think I can use these for all the rest without building any power circuits and can be done without needing any sockets or grommets as the ones in there are still pliable:
http://www.vintage-electronics.net/led8vbi-pinlamp.aspx
 
Hi and welcome. I to have a CA-880 and like it so far. Mine has a very slight scratchy noise when adjusting volume.
 
Dug a little deeper and just went for removing the burnt out bulb and socket. The socket is actually just a grommet. It looks like the leads were soldered directly to the bulb? Just like the other tread... the plastic bulb mount/socket holder thing broke a little pulling the grommet out. I have been working with dgwojo on the bulbs I need now and I think I’m set there.

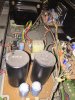
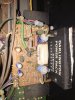
While taking the time to look the guts over what I see visually from top side is it needs to be recapped and the lid has a burn mark to prove it from the cap that is bulging a little.

7CE91A47-45CC-4EE6-8B68-CD156AEBD862.jpeg

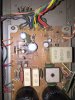
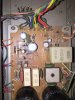
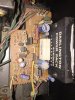
It seems there is a resistor that looks pretty fired... can’t tell if anything else right there, maybe the cap is fried? It’s right by bthe little heat sink? I think that might be an op-amp or transitor? Not really sure. Do I leave it if everything is working or replace to prevent imminent failure? Anything else seem in need? Pots are scratchy and need a good cleaning with some deoxit. What else can I/should I use deoxit on? I see many people use a paint brush to clean also? Isnit safe to use a vacuum cleaner with brush attachment or will that create static? Canned air safe?

C1CE6E94-0A40-4466-BDA8-A93E6F5DC995.jpeg
 
Last edited:
Here is my DC offset readings in case anyone needed that as well :)

Left A Channel Reading = 37.7mv after 1 minute
Right A Channel Reading = 38.5mv after 1 minute
 
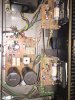
There's a lot of bulging caps on that power board alright, which resistor were you saying was fried? I could just be blind here but not seeing anything. Also is that glue on the filter caps board the corrosive stuff?
If you do recap, be sure to get low-leakage caps (Nichicon KL or other) for the orange ones.
 
There's a lot of bulging caps on that power board alright, which resistor were you saying was fried? I could just be blind here but not seeing anything. Also is that glue on the filter caps board the corrosive stuff?
If you do recap, be sure to get low-leakage caps (Nichicon KL or other) for the orange ones.
The second picture on post #6 (which apparently is the first pic on post #7 also... oops) is where you can best see the fried resistor. I guess I am not sure which is the power board vs filter board? Forgive my ignorance... still learning :) I think the filter caps are the big black caps? If so that is all glue from what I can tell and not leakage around the big caps. The only bad spot on that board is around the fired resistor. The rest of the boards I think are okay as well as far as leakage goes. The one big cap was easy to tell that it was bulging because the top was popped up. The others I can't see. Is there any tips to really being able to identify if they are bulging? Is it just that almost all of them are so I am not noticing the difference?


Thanks for the help thus far guys!
 
The second picture on post #6 (which apparently is the first pic on post #7 also... oops) is where you can best see the fried resistor. I guess I am not sure which is the power board vs filter board? Forgive my ignorance... still learning :) I think the filter caps are the big black caps? If so that is all glue from what I can tell and not leakage around the big caps. The only bad spot on that board is around the fired resistor. The rest of the boards I think are okay as well as far as leakage goes. The one big cap was easy to tell that it was bulging because the top was popped up. The others I can't see. Is there any tips to really being able to identify if they are bulging? Is it just that almost all of them are so I am not noticing the difference?


Thanks for the help thus far guys!
Sorry yeah power board = filter board and yup those are the main filter caps. You'll know if they're bulging/the label shrank, however if you can push down on a cap that looks liek its bulging, it's fine, it's just the plastic most times. Still, the fact that a few are worries me about all the caps. Good luck.
 
There's a lot of bulging caps on that power board alright, which resistor were you saying was fried? I could just be blind here but not seeing anything. Also is that glue on the filter caps board the corrosive stuff?
If you do recap, be sure to get low-leakage caps (Nichicon KL or other) for the orange ones.

I tried looking for some new main folter caps (the large caps I believe) and they are 6800uF 80v. Does it matter how tall they are? It looks like there is 30mm , 50mm etc. It is actually all a little confusing to find the right caps. Should i go with 10,000uF or some other size to upgrade? If so do they still have to be 80v then?
 
I tried looking for some new main folter caps (the large caps I believe) and they are 6800uF 80v. Does it matter how tall they are? It looks like there is 30mm , 50mm etc. It is actually all a little confusing to find the right caps. Should i go with 10,000uF or some other size to upgrade? If so do they still have to be 80v then?
It'll matter how tall they are if the size won't fit in your amp. Stick with 80V as long as the rails are around 70V on the service manual. Occasionally designers cut costs by making the voltage rating too close, but you should be fine with 80V. If you want to go a little higher (like 12,000uF) that's fine, but there's no need to go higher than that, and 10,000uF will be fine. Make sure the diameter of the new caps are the right size. I use Chemi-Con SMH/KMH series for those.
 
It'll matter how tall they are if the size won't fit in your amp. Stick with 80V as long as the rails are around 70V on the service manual. Occasionally designers cut costs by making the voltage rating too close, but you should be fine with 80V. If you want to go a little higher (like 12,000uF) that's fine, but there's no need to go higher than that, and 10,000uF will be fine. Make sure the diameter of the new caps are the right size. I use Chemi-Con SMH/KMH series for those.
There does not seem to be a lot out there that are within spec. Is there something better than these that will fit? Only ones that say audio grade.

https://www.mouser.com/ProductDetai...=sGAEpiMZZMvwFf0viD3Y3TNIZdnxLGvGDDIjV0x94M4=


I think these will fit as well and are the KMH series but the height will be pretty close I think.

https://www.mouser.com/ProductDetai...GAEpiMZZMvwFf0viD3Y3TS1Kq5P/wC9Ji%2byuttIBvo=


Which is better??
 
There does not seem to be a lot out there that are within spec. Is there something better than these that will fit? Only ones that say audio grade.

https://www.mouser.com/ProductDetai...=sGAEpiMZZMvwFf0viD3Y3TNIZdnxLGvGDDIjV0x94M4=


I think these will fit as well and are the KMH series but the height will be pretty close I think.

https://www.mouser.com/ProductDetail/United-Chemi-Con/EKMH800VSN103MA80T?qs=sGAEpiMZZMvwFf0viD3Y3TS1Kq5P/wC9Ji%2byuttIBvo=


Which is better??
It's gonna be personal opinion between the two. Some would see the need for an "audio grade" cap there, I don't. I'd go with the KMH one as it has great specs and will last forever since it's rated at 105C. Your call. Both are good options.
Also know you may have to do some drilling or something, as the original caps have a 4 pin base, and I believe the pin spacing is different there. Shouldn't be too bad though.
 
Recently had one of these I picked up for next to nothing at a yard sale with the matching tuner because it would not turn on. Lovely cosmetic shape except it smelled like an ash tray. (Cleaning story for another thread)

Anyway the main fuse was blown so I replaced it and it fired up, great. Then next time I fire it up It pegs the meters at full tilt boogie! Good thing I was right there and I figured this is probably why the main fuse was blown.

Got lucky and found one of the big white ceramic resistors on the power supply had cracked solder joints probably from all the heat they put out. Repaired that and got it working well. Sounded pretty darn good, very clean and quiet.

100 watts, black face, dual meters what's not to like. That said the traces on the power supply board are paper thin. Had fun fixing the loose resitor as access was not easy. Internal build quality overall was set for the price point at the time and with all due respect not sure it is worth dumping a bunch of money into since they do not sell for much. But if you get some knowledge and learn about vintage gear in the process then it's worth it. The Darlington Power Packs are not the most reliable long term at least in my experience YMMV but if you do keep this recommend 8 ohm speakers.

They do look cool all lit up in the dark. :beatnik:
 
Recently had one of these I picked up for next to nothing at a yard sale with the matching tuner because it would not turn on. Lovely cosmetic shape except it smelled like an ash tray. (Cleaning story for another thread)

Anyway the main fuse was blown so I replaced it and it fired up, great. Then next time I fire it up It pegs the meters at full tilt boogie! Good thing I was right there and I figured this is probably why the main fuse was blown.

Got lucky and found one of the big white ceramic resistors on the power supply had cracked solder joints probably from all the heat they put out. Repaired that and got it working well. Sounded pretty darn good, very clean and quiet.

100 watts, black face, dual meters what's not to like. That said the traces on the power supply board are paper thin. Had fun fixing the loose resitor as access was not easy. Internal build quality overall was set for the price point at the time and with all due respect not sure it is worth dumping a bunch of money into since they do not sell for much. But if you get some knowledge and learn about vintage gear in the process then it's worth it. The Darlington Power Packs are not the most reliable long term at least in my experience YMMV but if you do keep this recommend 8 ohm speakers.

They do look cool all lit up in the dark. :beatnik:
I recommend swapping out bulbs for LEDs. Just got done and it sure look puuuuuuuurty! I am going to swap all the caps on the power board next. I will figure out what to do after that. As of right now it is fully operational and no longer scratchy also :)

Before:

BB28DAF7-12D9-4937-871F-0743F6007100.jpeg

After:

9276E5E8-7D8B-4BD7-873D-C2921C8E2778.jpeg
 
Looks very good with the LED's. They are a nice sounding amplifier actually.

Just watch the solder traces on these they are very thin.
 
Back
Top Bottom