• The move to the new server is done. There are some software and database maintenance updates in process. This has us passing the hat around to help out. We appreciate any donations. Seriously, even a dollar helps. The payment page may be found here - https://www.audiokarma.org/support.html

Fixing those scratched dust covers..

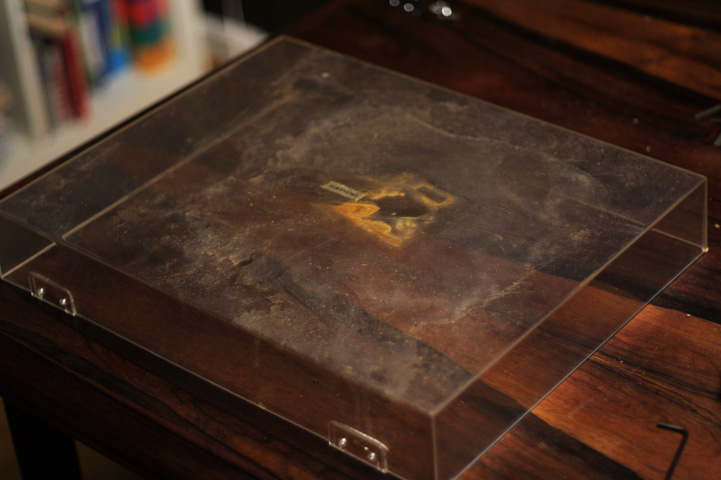
Before:

3344761552_6fb2bb3813_o.jpg


After:

3343933047_6bf50a5448_o.jpg


This is very nice. So, how did you do it? :scratch2:
 
Sometimes it can be alot of work to get the scraches and swirls out . Toothpaste , Lemon Pledge Furiture Polish or Headlight Cleaner / Polish all will help clear it up .
I have found by not going in circles but across in straight lines will work out the best .


Good luck


Barney
 
So I wet sanded my TT cover, starting with a 400 grit and working through to a 2000 grit.

I was able to remove the deep scratches, edge scratches, and deep scuffs. Now the cover has super fine scratches from the wet sanding -- so fine you can't feel them, just see them. So I tried PlastX -- three or four coats so far -- and it's still hazy looking. Next was some Turtle wax for clearcoat finishes. Still hazy. I tried a cotton buffing wheel to no avail. :no:

And what's really the best way to use PlastX? The directions on the container don't really say much. Apply, dry, remove haze, buff? Apply, repeat, apply, repeat?

What's the next step? What can I use to fill in the fine scratches/raise a smooth surface? :scratch2:

The cover was pretty unsightly to begin with, but the fine scratches sure don't look very good either. :no: Or just keep buffing? :D

At that stage you need a little more abrasion than a plastic polish -- look for a metal polish. I have had really good luck with Mother's Billet, which I found at AutoZone. I was going to get the Blue Magic someone mentioned earlier in the thread, but they did not have it. The Mother's was pricier, but I have always had good luck with their products on my car, so I went with the brand I knew.

It might take several applications and buff-outs to get the clarity back. I wasn't counting, but when I was finishing up the dust cover on the 6100 I'm currently working on it must have been at least 6-8 separate applications before it was clear again. I followed up with the PlastX after that.

I only did one sanding step with 1000 grit to take out the deep scratches, wherever I saw them. I used some orange Fantastik cleaner to wet the work area.
 
Last edited:
In order to remove all the haze, swirling and fine scratches; And to make the cover absolutely crystal clear after wet sanding -- You will need to have a heavy duty bench top, long shaft buffer and buffing wheel, with a wheel that is wide, large diameter, and is made of dense, high-quality fabric. Then you need to use ruby buffing compound, and assorted other fine metal/jewelry polishes that come in sticks. You apply these to the moving buffing wheel, and polish the surface of the dustcover accordingly.

This represents a rather large investment though, and I expect one would pay somewhere around $150 or more to obtain the buffing unit and accessories. Unless, of course, you can find one on craigslist for cheap.

I suppose it would be possible to accomplish the task using hand work, but you better plan on spending many hours trying to do what the machine will do in a fraction of the time.
 

Attachments

  • 419XBPKNE8L._SL500_AA280_.jpg.jpeg
    419XBPKNE8L._SL500_AA280_.jpg.jpeg
    11.1 KB · Views: 139
I've tried nearly all of the methods mentioned here, and many of the brands (but never Zaino's; I'll have to try that stuff, too - thanks!). I have a file folder full of sheets of sandpaper/emery paper of different grits, up to 3000, which feels just like very slightly rough paper. In fact, in certain situations I have used plain photocopy paper as a polisher, although you have to be very careful not to crease it; creases can scratch!.

MOST of the time, however, I fall back on Meguire's products for the bulk of the work. It fairly consistently gives the best overall results, often for the least work, of any brand I've used. Plast-X is simply outstanding at making clear-plastic things look NEW again, although it can take a long time.

First, remove any deeper scratches. Fine/gentle "Cutting" compounds like jeweller's polish, and/or fine-grade wet sanding are in order here. Don't use heavy grades (lower than 800 or 1000) for the first sanding, or you'll spend hours doing successive sandings until all the scratches from the sanding are sufficiently removed. When you are up to the finer grades (around 2000+), then switch to the polishes. If the scratches are only minor ones, you can skip this step altogether and save yourself a lot of work and hassle. Minor scratches come out with PlastX alone!

Sometimes I'll use 3M Automotive Plastic Polish first, though, to smooth things down a bit, because it is a little faster than PlastX, then finish with the PlastX.

Apply the stuff with cotton facial pads. I use two types: the small (maybe 1-1/2" square) kind that really feels like cotton, and the larger (about 3" x 4") kind that is a little more cloth-like. Put some the PlastX on the pad, then gently (it's as much chemical action as physical) rub in small circles over a limited area, perhaps 6" square. Keep rubbing and rubbing and rubbing over the same area, until the PlastX has almost disappeared. Then take a clean pad and buff it for a while longer, to remove the remaining faint residue. Repeat as many times as necessary, to get the depth of wet, glossy new-ish-ness that you want.

Note that especially on softer plastics, cotton pads themselves can often be sufficient to give a very good shine. Really worn, very clean fine cotton cloth (like from high-thread-count undershirts) can go even one step further, sometimes, if you make a soft little ball out of it (avoid wrinkles against the surface as much as possible) and use it gently.

For painted plinths, use whatever products to get deep filth off first if needed, then use Meguire's "Deep Crystal" paint cleaner for the final cleaning. Apply, buff off similarly with the cotton pads. Repeat a few times until you get that deep, rich, NEW looking shine.

Finish off with Meguire's "Gold Class" wax for a protective shine. Again, buff this with the cotton pads, then finally with soft cotton cloth (pieces of old --clean!-- cotton underwear work well, but NO seams!).

Similar approaches work well for metal platters: start with fine sandpaper to remove any deeper pitting, then use metal polishes like AutoSol. Finally buff to a shine, and seal with Meguire's "Gold Class" wax. Buff well.

For the rubber mats, use regular dishwashing detergent (CAREFUL! Do not use cleaners with a bunch of unkown chemicals, just plain detergent) diluted in water. Scrub very gently with a toothbrush if it is particularly filthy; otherwise just use a sponge or your fingers. Rinse very well in clean water, pat dry with a clean cotton towel and let air-dry a bit. Detergent solution does wonders not only to clean the rubber, but to actually restore a nice, soft and black finish to it.

Put it back on that shiny platter, above that shiny plinth, with that sparkling crystal-clear dust cover on top.

Enjoy the look for a moment.

Then make sure your tonearm and cartridge are set up properly (see relevant threads for details).

Then go do what it says in the vinyl-cleaning posts, and clean a record you like, very, very, very well, just like you did with the TT.

Sit back and enjoy. :music: You've earned it! :D

Oh, and one thing I forgot to mention: it helps if, as you get into the later stages, you wear clean, soft cotton gloves on your hands. Otherwise, every time you touch the thing to move it's position or just to hold it steady, you put fingerprints on it that you have to buff off again a few moments later! With the gloves on, such incidental handling is more likely to actually add to the polishing action!
 
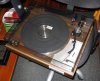
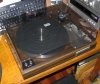
Photos of the "new" dustcover

Well, it's finally done! I hit it again with the 1500-grit and the 2000-grit.

For a lighter abrasive I used Meguiar's Clear Coat cleaner -- about six applications of it, plus two inside the cover.

And for a finishing touch I applied PlastX to the inside and outside of the cover.

I love the way the cover almost disappears in the photograph! :yes:

I wish I'd taken some "before" photos -- the cover had several large (6-inches +) gouges to the left and right of the nameplate, and a long scratch below the nameplate. None of these are visible anymore. :thmbsp:
 

Attachments

  • Marantz 6100 001_edit.jpg
    Marantz 6100 001_edit.jpg
    132.8 KB · Views: 578
  • Marantz 6100 004_edit.jpg
    Marantz 6100 004_edit.jpg
    140.8 KB · Views: 621
Last edited:
vinyl LP's

Is there anything that works on vinyl to take out the scratches and reconditions vinyl like the discussed polishes do for CD's?
 
Brasso is a BIG Bad NO-NO for acrylic or lexan covers. It just dulls the surface. Some of the brands mentioned here is known to me, including Meguiars which I'd like to try but I'm not sure if this is sold in my country. In the past, I've tried Holt's Glass Polish and Sonax. The latter product is used by auto dent removal firms like DentMagic who operates locally.

Deep scratches are best removed by sanding with 3M automotive water paper, starting with 600 or 800grit and progressivly finer grits up to 2000grit, depending on the depth of the scratch/es. Finish with Meguiar's or similar. Care should be taken that the acrylic is not overheated, as has been stated here.

tripod
 
Another vote for the Novus #2. I use it on my pinball game surfaces, including lexan, and it does a nice job. Also just used it to restore a tinted Marantz TT cover. Itching to try the car stuff now, as well.
 
I don't think this was mentioned, apologies if it was. My 12 year old car's headlights were completely hazed over and scratched. I used the headlight restoration pack sold at www.myheadlight.com to bring them back to new status in around 30 minutes. I forgot to take pics, but the before and after pics on the website are good representations. My headlights were as bad as the ones on the first page of the website.

The kit contains chemicals and abrasive sheets - one set for each headlight. I am not sure if the plastic composition of headlights v TT covers is close enough, but seems the process is same.
 
I don't think this was mentioned, apologies if it was. My 12 year old car's headlights were completely hazed over and scratched. I used the headlight restoration pack sold at www.myheadlight.com to bring them back to new status in around 30 minutes. I forgot to take pics, but the before and after pics on the website are good representations. My headlights were as bad as the ones on the first page of the website.

The kit contains chemicals and abrasive sheets - one set for each headlight. I am not sure if the plastic composition of headlights v TT covers is close enough, but seems the process is same.

That is an awesome tip! I did a bit more searching and I found this youtube video that shows the complete process for the 3M Headlight Restoration Kit, which is another similar product. I'm going to buy one and try it.

http://www.youtube.com/watch?v=_t1RBw0IGXA
 
Once your dust cover is done , use a COMBINATION of Pledge and Windex and buff . This was recommended by Joel Thorner (RIP). I did this and the luster is fabulous. If you are not careful it'll slip right from your hands.

Russ
 
Back
Top Bottom