• The move to the new server is done. There are some software and database maintenance updates in process. This has us passing the hat around to help out. We appreciate any donations. Seriously, even a dollar helps. The payment page may be found here - https://www.audiokarma.org/support.html

Harman Kardon 430 - Left Channel Noise

Whelp, it's fixed!! Regretfully I didn't test after each transistor replacement, instead I just swapped them all out, fired it up, and bingo, quiet as can be!

I think the "replace on sight" prompt was a critical lesson learned here. Nicholas did a great job in getting me focused on the tone board, so thanks to the subsequent testing and replacements I couldn't be happier, thank you both so much!

The other silver lining here is this thread will help others, so I'm glad we walked through all the troubleshooting steps, I know I'll refer back to this thread myself in the future.

Enjoy the rest of your Sunday, many thanks! :beerchug:
 
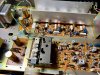
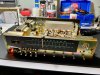
Final post here, wanted to put up some pics of this dude!

In the end, it has new caps and transistors on the main amp, new main filter caps, new rectifier caps, new caps and transistors on the tone board as well as the EQ board. Sounding clear and strong thanks to @merlynski, @nicholas2381, @dlucy and @Spenser (I had your 430 rebuild thread open throughout the process, helped with values for some of the components).

IMG_9963.jpg IMG_9964.jpg IMG_9965.jpg IMG_9966.jpg

You all know your stuff and I'm ever impressed by the caliber of professionals, enthusiast and hobbyists roaming this stellar forum.

Thanks again, I'll be back! :music:
 
In reference to the Harman Kardon 430, I saw a while back you did a recap. Can you share how you replaced the C 6, 7, 8, 9 power supply caps (rectifier pc board C )
The originals are 4 prong (-, +, 2, dummys) 4700uF / 35v, new ones are 2 prong and the spacing is shorter. Thanks
 
See picture below for what I did with mine. Looks like I put a couple 90-degree bends in at least one of the legs of each capacitor to, in effect, widen the lead spacing in order to get them to fit.

The caps were not heavy enough, in my opinion, to warrant extra support beyond what the leads provided. However, it would not take much to fortify. One method could be Mortite Weather Strip and Caulking Cord.* Couple little balls or snakes of this per cap. It's like modeling clay consistency. Doesn't dry out. Can get it at HD or Lowes I think. Others might think this would be too 'amateur hour' or unsafe. There are other ways.

*sometimes used by me for sealing between speaker and cabinet

index.php


index.php
 
Last edited:
  • Like
Reactions: JB8
Hey @Argie , great question! @Spenser did such a fantastic 430 restoration I was just following his lead with my choice of replacement filter caps, specific to size. I took a very similar approach, and while I didn't get mine quite as tight to the board as Spenser did, I'm not concerned at all, they're quite secure.

Oh, and the sound after those caps go in? :biggrin:
 
C6~9 4700uF 35V 50V UKW1H472MRD

Above is what I have in my notes.* Looks like out-of-stock the usual places? Maybe there is a better choice anyway others might suggest that could be available?

*shorthand for, stayed with original spec 4,700uF and bumped up the voltage-handling from 35V to 50V.
 
Last edited:
Thanks. Have another thing.. In reference to the HK430

On the main amp board on the schematic in the service manual for C407 and 408 it has the caps as 1000uF / 16v
but on the parts list in the service manual it has the caps as 470uF / 16v

The caps that are currently in there are 1000uF / 16v, but when I removed them It had 470 / 16v marked on the board below them

Did you run into this too ?
 
Final post here, wanted to put up some pics of this dude!

In the end, it has new caps and transistors on the main amp, new main filter caps, new rectifier caps, new caps and transistors on the tone board as well as the EQ board. Sounding clear and strong thanks to @merlynski, @nicholas2381, @dlucy and @Spenser (I had your 430 rebuild thread open throughout the process, helped with values for some of the components).

View attachment 2427266 View attachment 2427267 View attachment 2427268 View attachment 2427269

You all know your stuff and I'm ever impressed by the caliber of professionals, enthusiast and hobbyists roaming this stellar forum.

Thanks again, I'll be back! :music:
Just have one question, then another, etc.
In replacing the on-off switch, is there some particular tool to help pop off the knobs first? How is the front plate held onto the chassis? Screws, pressure from knobs onto the plate?
thanks
 
Hey @Bahmi, thanks for your questions and I'm glad to hear your digging in on your 430. I'm assuming you're looking to actually replace or repair the switch instead of replacing the lamp? In either regard, the knobs just pull straight off. I'd then pull the top cover (two screws on the top, two on each side) then also pull off the bottom cover which will allow better access to the on/off switch, or the lamp. You can also clean the dust off the bottom plate as well once removed. The front plate can then be removed, two brass screws on the top and two on the bottom. You can then pull the faceplate straight off as well. Good luck, keep us posted on how it goes!
 
I don't know about these switches. Will caution not to spray into switch itself with deoxit as a cleaning method to possibly fix mechanical problem until advised to do otherwise by persons more in-the-know than me. Is conductive and should be avoided in general when dealing with power switches, I've heard it said. My 430 is boxed up and hiding from me somewhere. Can't remember the switch. Dlucy would know.
 
  • Like
Reactions: JB8
Back
Top Bottom