• The move to the new server is done. There are some software and database maintenance updates in process. This has us passing the hat around to help out. We appreciate any donations. Seriously, even a dollar helps. The payment page may be found here - https://www.audiokarma.org/support.html

Help Needed w/ Pioneer SX950

And yes, output transistors are still uninstalled.

:D
Excellent, I learned the hard way (or the person I tried to help did) to be sure. It is not nearly as tough to deal with when you have transistors you can get replacements for, compared to hard (or almost impossible) to find oddball transistors or expensive STK power pac ICs. Output transistors are the most expensive replaceable parts, second only to big electrolytic filter caps.
Once the power supplies are right and power amp dc balance (offset) is working on full mains voltage, without the output transistors, the risk goes way down when you put them in.

EDIT: more
 
Last edited:
While on DBT, measure AWH-050 (power amp) pin 10, is it 0vdc +/- 100mvdc, and can you adjust it to and around 0v with VR1 (left dc offset)?
While on DBT, measure AWH-050 (power amp) pin 26, is it 0vdc +/- 100mvdc, and can you adjust it to and around 0v with VR2 (right dc offset)?
Does the protection relay click? If you are still on 57W bulb and relay does not click try a 100W bulb.

I got pin 10 to about -0.884vdc, pin26 to 0.01vdc
Protection relay did not click on 100w. bulb.

What do you advise?
 
While on DBT, measure AWH-050 (power amp) pin 10, is it 0vdc +/- 100mvdc, and can you adjust it to and around 0v with VR1 (left dc offset)?
While on DBT, measure AWH-050 (power amp) pin 26, is it 0vdc +/- 100mvdc, and can you adjust it to and around 0v with VR2 (right dc offset)?
Does the protection relay click? If you are still on 57W bulb and relay does not click try a 100W bulb.

I got pin 10 to about -0.884vdc, pin26 to 0.01vdc
Protection relay did not click on 100w. bulb.

What do you advise?
Need to figure out why pin 10 will not go to 0vdc. That negative voltage may be why relay is not clicking, unit is in protection.
 
What transistors have already been replaced on the left channel of the power amp? (Q1, Q3, Q5, Q7, Q9, Q11)? If they have not been replaced test them (6-way, power off).
If/when all are good, power on DBT, measure vdc at the base of Q1 on power amp (AWH-050). Should be close to 0vdc and vary as VR1 is adjusted. This is the 0vdc reference point for the left channel (dc offset). Measure the base of Q3, it should be the same as base of Q1, but if pin 10 is offset from 0 it may not be. Measure the collectors of Q5, +1.2vdc; Q7, -1.2vdc.
Q1b:
Q3b:
Q5c:
Q7c:
 
What transistors have already been replaced on the left channel of the power amp? (Q1, Q3, Q5, Q7, Q9, Q11)? If they have not been replaced test them (6-way, power off).
If/when all are good, power on DBT, measure vdc at the base of Q1 on power amp (AWH-050). Should be close to 0vdc and vary as VR1 is adjusted. This is the 0vdc reference point for the left channel (dc offset). Measure the base of Q3, it should be the same as base of Q1, but if pin 10 is offset from 0 it may not be. Measure the collectors of Q5, +1.2vdc; Q7, -1.2vdc.
Q1b:
Q3b:
Q5c:
Q7c:

I got a slightly higher reading on Q1 and Q3 at about 0.750. Is this okay? Otherwise they all check out.
 
Last edited:
A
I got a slightly higher reading on Q1 and Q3 at about 0.750. Is this okay? Otherwise they all check out.
I would say that reading is too positive, causing the positive dc offset.
'About 0.750' is not detailed enough when we are dealing with very small values of voltage (and currents) in a high gain differential amp. What we are aiming for is a dc offset value of less than +/- 0.020vdc from 0vdc. Please post the exact values you measure:
Q1b:
Q3b:
Q5c:
Q7c:
Does Q1b vary when you adjust VR1?
Max positive voltage:
Max negative voltage:
What are the voltages on AWH-050 pcb pins:
Pin 2:
Pin 4:
Pin 9:
What is the voltage on the cathode of D4?"
I can best help you with accurate information to work from, then we can get this fixed!
 
"If/when all are good, power on DBT, measure vdc at the base of Q1 on power amp (AWH-050). Should be close to 0vdc and vary as VR1 is adjusted. This is the 0vdc reference point for the left channel (dc offset). Measure the base of Q3, it should be the same as base of Q1, but if pin 10 is offset from 0 it may not be. Measure the collectors of Q5, +1.2vdc; Q7, -1.2vdc.
Q1b:
Q3b:
Q5c:
Q7c:"

So I think I did the above test wrong. Could you please specify how to measure the vdc at the base of Q1? Since Q1 is a PNP, and I'm not doing a 6 way test, do I just test with one of the leads while the power is on DBT?
 
"If/when all are good, power on DBT, measure vdc at the base of Q1 on power amp (AWH-050). Should be close to 0vdc and vary as VR1 is adjusted. This is the 0vdc reference point for the left channel (dc offset). Measure the base of Q3, it should be the same as base of Q1, but if pin 10 is offset from 0 it may not be. Measure the collectors of Q5, +1.2vdc; Q7, -1.2vdc.
Q1b:
Q3b:
Q5c:
Q7c:"

So I think I did the above test wrong. Could you please specify how to measure the vdc at the base of Q1? Since Q1 is a PNP, and I'm not doing a 6 way test, do I just test with one of the leads while the power is on DBT?

Yes . . .
All of the tests in post 88 are done with the black lead clipped to ground (chassis), meter on a DC volts range, measured with the red lead. This way the positive voltage will show as positive, and the negative voltage will show as negative. Power on with the dbt connected. For voltages less then 2 volts dc use the 2vdc range, unless your meter is an autorange. Cover the meter probe tip with tape or heatshrink, except for the very tip, so you do not short out to other component's leads. Touch each point mentioned with the red lead, it may take a second or two for the reading to stabilize (some may drift a bit), write down the meter reading, copy and paste the list (or reply), then enter each reading next to the list, like this:

Q1b: +0.813 vdc, varies from nnn to nnn when VR1 is adjusted (this is an example)
 
Merlynski, thank you for the detailed response on how to measure correctly. I will report back with my measurements.
 
Merlynski, thank you for the detailed response on how to measure correctly. I will report back with my measurements.
Glad to help, I never know how much detail is needed, so I tend to over-explain for some. We all start without a clue and learn as we go . . .
 
Q1b: -0.264 Q3b: 1. (I think that means null?) measuring with 2vdc multimeter mode. If I turned VR1 counter clockwise, the measurement on Q1B went higher toward negative. By the way, I should mention I took off the heatsink since it's quite heavy and gets in the way of measuring.

Collectors on Q5 and Q7 all test as 1. on 2vdc mode. I think that also means null.

EDIT: More info added.
 
Last edited:
Q1b: -0.264 Q3b: 1. (I think that means null?) measuring with 2vdc multimeter mode. If I turned VR1 counter clockwise, the measurement on Q1B went higher toward negative. By the way, I should mention I took off the heatsink since it's quite heavy and gets in the way of measuring.

Collectors on Q5 and Q7 all test as 1. on 2vdc mode. I think that also means null.

EDIT: More info added.

"Q3b: 1." is probably an over-range condition, you need to use a higher voltage range (like 20vdc) on your meter.
Please use the vertical list format for your voltages, and give actual voltage readings, rather than an unclear description "the measurement on Q1B went higher toward negative"

Example:
Q1b: put measured voltage here
Q3b: put measured voltage here
Q5c: put measured voltage here
Q7c: put measured voltage here

IF the heatsink only had the output transistors on it, and they are not installed (as you said), you may be ok for now. It must be reinstalled when the outputs are installed. Semiconductors that are intended to use a heatsink by the designers will very rapidly overheat and destroy themselves and take other components with them.

I think one of the concepts you are missing here is that you have to take accurate measurements, and report them clearly, in a format the person helping you can understand. Also you are not understanding how a DMM works. Basic DMM use link: https://learn.sparkfun.com/tutorials/how-to-use-a-multimeter/all Here is a link to some extensive training information: https://www.audiokarma.org/forums/i...al-engineering-training-series-online.163636/
Study up on Ohm's Law.
 
Last edited:
Thank you for the helpful links, Merlynski. I have been reading over it.

When attempting to attach the heatsink back, the wire connected to one the AF Choke Coils (part number T63-009) disconnected. Would you advise soldering back on? There doesn't appear to be much for the wire to connect to on this part.
 
Thank you for the helpful links, Merlynski. I have been reading over it.

When attempting to attach the heatsink back, the wire connected to one the AF Choke Coils (part number T63-009) disconnected. Would you advise soldering back on? There doesn't appear to be much for the wire to connect to on this part.
You are welcome!
Is the wire you are referring to broken off the pcb wire wrap pin? If so just strip it back a little bit, give it a bit of a wrap around the pin and solder it.
 
Thank you for the helpful links, Merlynski. I have been reading over it.

When attempting to attach the heatsink back, the wire connected to one the AF Choke Coils (part number T63-009) disconnected. Would you advise soldering back on? There doesn't appear to be much for the wire to connect to on this part.
 

Attachments

  • IMG_20191005_093831.jpg
    IMG_20191005_093831.jpg
    15.2 KB · Views: 14
  • IMG_20191005_093850.jpg
    IMG_20191005_093850.jpg
    44.2 KB · Views: 13
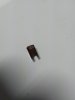
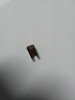
Part number is actually 73c, cannot seem to find it in the manual. Here's a photo of it and the second photo of the one still intact.
 

Attachments

  • IMG_20191005_093850.jpg
    IMG_20191005_093850.jpg
    44.2 KB · Views: 8
  • IMG_20191005_093831.jpg
    IMG_20191005_093831.jpg
    15.2 KB · Views: 8
Part number is actually 73c, cannot seem to find it in the manual. Here's a photo of it and the second photo of the one still intact.
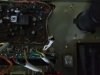
Ouch, that is a thermal compensation varistor (diode) STV4H, notorious for leads breaking off. They are shown on the Power Amp schematic (AWH-050) as D5 and D6. The only source for them is from a donor unit, they are unobtainable otherwise. markthefixer has been known to be able to re-attach replacement leads. There are various work-arounds, using 3 1N4148 diodes, in AK posts as well, here is one thread, see posts 46, 47, 48: https://audiokarma.org/forums/index...awh-033-issue-blown-transistors.879437/page-3
 
Thank you, I'll read through that post. Will get back after I'm able to re-attach the part and heatsink. I feel like I'm over my head but don't want to give up. Thank you for all your guidance.
 
Back
Top Bottom