• Please note that Audiokarma will be offline briefly for updates early on Monday morning, September 28th.

Help! Soldering legs onto tweeter protection lamp (Sylvania 211-2)

cmayo

Member
I have a very limited experience/knowledge of soldering, and need to replace the soldered-in tweeter protection lamps on some old DCM crossovers. I went with the Sylvania 211-2 lamp since it was easily available and was recommended in other threads, and I thought the wire clips on each end would be easier to solder to than the shiny silver caps. I was mistaken.

I've tried scrubbing the cap with [rubbing] alcohol, using a wire brush and sandpaper to rough up the surface and the best I've managed so far is to smear a bit of hot solder across the parts and let it form a weak cold joint; the solder just will absolutely not jump to the lamp, seems like no matter how hot I try to get it with the iron. I've tried leaded and lead-free rosin-core solder with similar failed results, paste flux anbd no flux (no improvement) and I've tried a small chisel-tip and a larger knife-tip on my soldering iron. The iron's temp setting is 350c.

I'm obviously doing everything wrong... what should I be using (solder/flux/temp/tip) and what might be the right way to do this? Any help would be much appreciated.

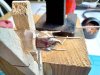
Lamp-Cold-Joint-20230226-131438.jpg


Solder-and-Flux-20230226-131829.jpg
 
Register to hide this ad
Lotta soldering experts here on AK but not "being there" I can only speculate. Here's my 2 cents:
  • First rulle: HEAT THE PART, NOT THE SOLDER.
  • Use flux as you do.
  • 350 degrees is a little "low end" in my experience. Typical 60/40 solder's "liquidus" flow temp is around 375.
  • What you call a lamp I would call a fuse since lamp suggests it's used for illunination, which I do not believe is the case here for tweeter protection. The fuse will blow (open circuit) before the tweeters do same (burned out voice coil=bad); that's when a fuse becomex a lamp, for a fraction of a second.
  • Heating the end cap will require more time or hotter temp than two small wires twisted toghter. On your job a good old-fashion soldering gun (e.g., like a 100-140 dual heat Weller) would probably do the job if parts are not delicate.
  • It would be preferable to have the wire being soldered to the cap alread held in place so you can solder the joint in one operation.
SO, cover the area with flux, increase your iron temp to 400+ and hold it on the end cap longer. You should not heat the solder first and "smear" it. Rather, once you've heated the cap continue to hold the iron on it while you touch the solder to it. Do not melt the solder on the iron tip and expect it to flow nicely onto the part. When sufficiently hot the solder wire should flow onto the part itself when touched directly to it.
Proper soldering is an art and a science. Good luck and don't burn yourself.
 
Lotta soldering experts here on AK but not "being there" I can only speculate. Here's my 2 cents:
  • First rulle: HEAT THE PART, NOT THE SOLDER.
  • Use flux as you do.
  • 350 degrees is a little "low end" in my experience. Typical 60/40 solder's "liquidus" flow temp is around 375.
  • What you call a lamp I would call a fuse since lamp suggests it's used for illunination, which I do not believe is the case here for tweeter protection. The fuse will blow (open circuit) before the tweeters do same (burned out voice coil=bad); that's when a fuse becomex a lamp, for a fraction of a second.
  • Heating the end cap will require more time or hotter temp than two small wires twisted toghter. On your job a good old-fashion soldering gun (e.g., like a 100-140 dual heat Weller) would probably do the job if parts are not delicate.
  • It would be preferable to have the wire being soldered to the cap alread held in place so you can solder the joint in one operation.
SO, cover the area with flux, increase your iron temp to 400+ and hold it on the end cap longer. You should not heat the solder first and "smear" it. Rather, once you've heated the cap continue to hold the iron on it while you touch the solder to it. Do not melt the solder on the iron tip and expect it to flow nicely onto the part. When sufficiently hot the solder wire should flow onto the part itself when touched directly to it.
Proper soldering is an art and a science. Good luck and don't burn yourself.

many speakers actually use a light bulb in line with the tweeter for protection so most likely, it really is a fuse type lamp.
 
Lotta soldering experts here on AK but not "being there" I can only speculate. Here's my 2 cents:
  • First rulle: HEAT THE PART, NOT THE SOLDER.
  • Use flux as you do.
  • 350 degrees is a little "low end" in my experience. Typical 60/40 solder's "liquidus" flow temp is around 375.
  • What you call a lamp I would call a fuse since lamp suggests it's used for illunination, which I do not believe is the case here for tweeter protection. The fuse will blow (open circuit) before the tweeters do same (burned out voice coil=bad); that's when a fuse becomex a lamp, for a fraction of a second.
  • Heating the end cap will require more time or hotter temp than two small wires twisted toghter. On your job a good old-fashion soldering gun (e.g., like a 100-140 dual heat Weller) would probably do the job if parts are not delicate.
  • It would be preferable to have the wire being soldered to the cap alread held in place so you can solder the joint in one operation.
SO, cover the area with flux, increase your iron temp to 400+ and hold it on the end cap longer. You should not heat the solder first and "smear" it. Rather, once you've heated the cap continue to hold the iron on it while you touch the solder to it. Do not melt the solder on the iron tip and expect it to flow nicely onto the part. When sufficiently hot the solder wire should flow onto the part itself when touched directly to it.

Thanks, @daybreak2350, for a great reply. The first rule served me well when soldering phone plugs onto guitar cords over the years, but it just seemed like my iron wasn't able to get the part/fuse/lamp hot enough to melt solder, no matter how long I heated it.

I maxxed the temp on my soldering gun (480c, but it's a cheap soldering station, no telling lhow accurate the temp is) and clamped the tip to the part for a couple of minutes, and the part still wouldn't melt solder.

I've ordered a Weller 100/140 soldering gun that should be here Thursday, then I'll see if I can get Rule #1 working on these lamps (these are actually lamps that serve as fuses, but they may also perform a degree of power regulation to the tweeters. Honestly, the [piezo] tweeters are nearly as cheap as the lamps/fuses and are a damn sight easier to replace... I may wind up wiring around them altogether at some point).

Thanks again, I'll post my results when the new gun arrives and I have a chance to play with it.
 
The fuse will blow (open circuit) before the tweeters do same (burned out voice coil=bad); that's when a fuse becomex a lamp, for a fraction of a second.
many speakers actually use a light bulb in line with the tweeter for protection so most likely, it really is a fuse type lamp.


The lamp is just an ordinary usually automotive 12V lamp. The filament absorbs excess current going to the tweeter and starts to glow. Higher power, brighter glow. It is uncommon for lamps in speaker crossovers to melt the filament under normal, reasonable excess power situations. This is similar to a dim bulb tester, the bulb glowing brighter as more current is requested by the device under test or in this case delivered by the amp.
 
The lamp is just an ordinary usually automotive 12V lamp. The filament absorbs excess current going to the tweeter and starts to glow. Higher power, brighter glow. It is uncommon for lamps in speaker crossovers to melt the filament under normal, reasonable excess power situations. This is similar to a dim bulb tester, the bulb glowing brighter as more current is requested by the device under test or in this case delivered by the amp.
yup. i know exactly how they work, my ohm frs 11 had them on the tweeters
 
I have no difficulty to make my own tailgate fuses with a 50W soldering station. I know you were told to "Do not melt the solder on the iron tip", but it greatly helps heat transfer between the iron tip and the fuse cap if you first melt a small amount of solder to the iron tip. I'm using 60/40 solder and a small amount of rosin paste. Try to solder the wire directly to the cap.
 
I know you were told to "Do not melt the solder on the iron tip", but it greatly helps heat transfer between the iron tip and the fuse cap

Yes-it's all about heat transfer.

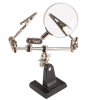
I purchased a "helping hand" widget that I can hold parts and wires together while freeing my own hands to hold the iron and apply the solder.
upload_2023-3-2_13-16-49.png

I have also struggled with cheaper irons not generating the heat that their wattage suggests. I think it have to do with the metallurgy used in manufacturing the iron tip.
 
Lotta soldering experts here on AK but not "being there" I can only speculate. Here's my 2 cents:
  • First rulle: HEAT THE PART, NOT THE SOLDER.
  • Use flux as you do.
  • 350 degrees is a little "low end" in my experience. Typical 60/40 solder's "liquidus" flow temp is around 375.
  • What you call a lamp I would call a fuse since lamp suggests it's used for illunination, which I do not believe is the case here for tweeter protection. The fuse will blow (open circuit) before the tweeters do same (burned out voice coil=bad); that's when a fuse becomex a lamp, for a fraction of a second.
  • Heating the end cap will require more time or hotter temp than two small wires twisted toghter. On your job a good old-fashion soldering gun (e.g., like a 100-140 dual heat Weller) would probably do the job if parts are not delicate.
  • It would be preferable to have the wire being soldered to the cap alread held in place so you can solder the joint in one operation.
SO, cover the area with flux, increase your iron temp to 400+ and hold it on the end cap longer. You should not heat the solder first and "smear" it. Rather, once you've heated the cap continue to hold the iron on it while you touch the solder to it. Do not melt the solder on the iron tip and expect it to flow nicely onto the part. When sufficiently hot the solder wire should flow onto the part itself when touched directly to it.
Proper soldering is an art and a science. Good luck and don't burn yourself.

Even with the 100/140 Weller, I was never successful getting that Sylvania bulb to take solder. Even when I got the metal hot enough to melt solder, the molten solder would just roll off the metal.

Since I would rather use 12V festoon bulbs anyway, I bought some of those guys and tried the new iron on one... success! The solder joint's no thing of beauty, but it's a solid, trustworthy joint. I plan to keep practicing (I bought multiple bulbs) and hope to improve on that first effort, but it looks like the Weller is going to work out for this job.

Thanks again for the tips!

Solder Joint 20230303_164019.jpg
 
How about an upgrade so you never have to do this again?


View attachment 2813400

Also, sanding the part may help.

I'd love to add fuse holders to those crossovers and do plan to look into that, but I really don't have enough confidence in my skills to start modifying those circuit boards.

I know you were told to "Do not melt the solder on the iron tip", but it greatly helps heat transfer between the iron tip and the fuse cap if you first melt a small amount of solder to the iron tip. I'm using 60/40 solder and a small amount of rosin paste. Try to solder the wire directly to the cap.

I've always found that to be true, too... touch the solder to the iron first and it just flows into the work more easily.

I was never able to get that cap to take solder. I got it hot enough to melt solder, but it would never stick to the metal. I even burned through the new Weller gun's factory soldering tip trying to heat the cap.

Yes-it's all about heat transfer.

I purchased a "helping hand" widget that I can hold parts and wires together while freeing my own hands to hold the iron and apply the solder.
View attachment 2815140

I have also struggled with cheaper irons not generating the heat that their wattage suggests. I think it have to do with the metallurgy used in manufacturing the iron tip.

I do have a helping hand gizmo like the photo and it does come in handy! In fact, I finally managed to get the leg soldered onto a festoon bulb using the helping hand, and intend to employ it whenever possible going forward.
 
Last edited:
Only other thing I can think to suggest, take a fine file or some sandpaper and hit the cap itself a few times. It should be brass with a plating on it. Knock the plating off and the brass will take solder very well. If it never turns yellow, the end cap might be steel which doesn't take solder without acid flux, which you definitely do not want here.
 
Only other thing I can think to suggest, take a fine file or some sandpaper and hit the cap itself a few times. It should be brass with a plating on it. Knock the plating off and the brass will take solder very well. If it never turns yellow, the end cap might be steel which doesn't take solder without acid flux, which you definitely do not want here.

Makes sense
 
clean it with acetone. rough it up with 180 grit dry sandpaper. clean again. add flux. heat flux. add solder

Only other thing I can think to suggest, take a fine file or some sandpaper and hit the cap itself a few times. It should be brass with a plating on it. Knock the plating off and the brass will take solder very well. If it never turns yellow, the end cap might be steel which doesn't take solder without acid flux, which you definitely do not want here.

Thanks, guys, but none of these great suggestions changed the outcome. I even went after that cap with a shop file and never succeeded in removing any of the plating. I may take my angle grider to it someday and see if I can make a dent in it but since the festoon bulbs were my first choice and they LOVE solder, I'm just going to get on with assembling the bulbs.
 
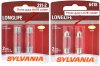
I learned so much and really upped my soldering game in this thread, thanks everyone! I finally gave up on the Sylvania 211-2 bulb and tried the Sylvania 6418 festoon bulb, which loves solder! The spec called for 12V 1.4A and neither of these bulbs provides an amperage rating but the festoon bulb so closely resembles the original (I assume) lamp used in the DCM crossover that I feel good with it.

Bulbs.jpg

Once I'd determed that the festoon bulbs would take solder, I set up a workstation and started practicing.

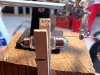
The alligator clip helping hands wouldn't hold the bulb steady, so I hot-glued a clothespin to a hunk of 4x4 and used the helping hands to hold the wire in place, freeing my hands (as suggested here) to manage the soldering iron and flux/solder. Having everything held in place made a huge difference!

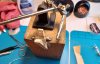
Helping Hands 20230308_110734.jpg .

Practicing

Practice 20230308_104032.jpg
Good Solder 20230308_111043.jpg
Finished!

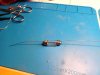
Finished 20230308_112928.jpg

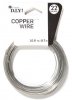
I didn't really know what gauge wire I wanted so instead of ordering a bunch of (relatively expensive) buss wire, I went to Walmart and bought copper hobby wire in 20ga and 22ga sizes for about $2 per coil. I decided on 22ga and since the wire doesn't respond to magnets, conducts electricity, and doesn't measure any resistance across the finished assembly, I plan to just go with it:

Wire.jpg

So sorry for all the unnecessary detail here, but maybe it helps someone else down the road. Oh, and I didn't need the 100/140 Weller soldering gun after all. Once I started on the festoon bulbs I went back to my soldering iron - worked like a champ!

Thanks again everyone!
 
Last edited:
You would need three 6418 lamps in parallel to approximate the original lamp. The 6418 has a resistance, at 12V, of 29 Ohms (R = V^2 / P) but the original lamp has a resistance of 8.6 Ohms (R = V / I).
 
You would need three 6418 lamps in parallel to approximate the original lamp. The 6418 has a resistance, at 12V, of 29 Ohms (R = V^2 / P) but the original lamp has a resistance of 8.6 Ohms (R = V / I).

Well hell. Would a single 6418 attenuate the tweeter signal? Like by 2/3?

Would the wiring be like this? Bridge all three bulbs, then wire the bridge to the circuit board?

Or if I'm using the Ohms law calculator correctly, I'd need a 17W bulb to get the resistance to 8.6 Ohms, is that right? Should I actually look for a 17W 12V bulb? Or is there a specific bulb that folks are using in the TF600 and CX27?

Three Bulbs Parallel 2023-03-08_190530.jpg
 
Last edited:
Back
Top Bottom