First off, I want to thank anyone who takes the time to help me with repairing my T-35 horns. I recently purchased a pair of vintage EV regency speakers. The speakers have some issues that I am trying to take care of. One problem is that a diaphragm on one T-35 was bad. I purchased a replacement diaphragm and watched the videos on youtube showing how to assemble them. The videos show the following process a) glue one gasket on the magnet face; b) glue and center diaphragm in gap; c) thread diaphragm leads through eyelets and solder leads to corresponding terminals.
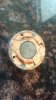
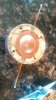
I am sure there is a simple way to solder the terminals to my version of the T-35 but I don't see it. Any help would be appreciated. See the attached pictures. If I attach (e.g. glue) the diaphragm to the magnet side of the casing I would then have to solder the wire to the leads on the other casing. If you look you will see that there are terminals on the inside of the other casing (where the sound exits to the horn). In fact, disassembling the halves was a destructive process (which I was unaware of) where I ripped the leads separating the halves.
How do you hold the halves in position where you can solder them together? Do you fold or bend the leads back upon itself to line up with the terminals? If I separate the halves and use enough lead to solder to the terminals they could end up touching the diaphragm. Perhaps there is someone that I can ship the part to that would know how to do this if it is difficult.
Once again. Thanks for any help you may give.
Regards,
gwho
I am sure there is a simple way to solder the terminals to my version of the T-35 but I don't see it. Any help would be appreciated. See the attached pictures. If I attach (e.g. glue) the diaphragm to the magnet side of the casing I would then have to solder the wire to the leads on the other casing. If you look you will see that there are terminals on the inside of the other casing (where the sound exits to the horn). In fact, disassembling the halves was a destructive process (which I was unaware of) where I ripped the leads separating the halves.
How do you hold the halves in position where you can solder them together? Do you fold or bend the leads back upon itself to line up with the terminals? If I separate the halves and use enough lead to solder to the terminals they could end up touching the diaphragm. Perhaps there is someone that I can ship the part to that would know how to do this if it is difficult.
Once again. Thanks for any help you may give.
Regards,
gwho