• The move to the new server is done. There are some software and database maintenance updates in process. This has us passing the hat around to help out. We appreciate any donations. Seriously, even a dollar helps. The payment page may be found here - https://www.audiokarma.org/support.html

INFINITY QA's RE-VENEER AND?

Atta BOY! Lookin' good, Omi!

What I mean to say is, uh, the SPEAKERS are lookin' good. That pic of you as Mimi's doppelganger is slightly frightening. Funny, but frightening. :D
 
OMI...cool thread. Thanks! I'm going to tackle some Infinity RS9s after this. Great little speakers but gawd awful vinyl wood grain.

Hey what kind of edge trimmer and what is a 2 cherries veneer saw?
 
2 Cherries veneer saw info:

http://audiokarma.org/forums/showthread.php?t=60207&highlight=veneer

How did you do the front edge 'frame'? Was it precut exactly prior to application?:

What I was referring too was the front of the mitered MDF that makes the cab. I used 3/4 inch pre-glued iron-on red oak edging that I cut to length with 45 degree cuts to match at the corners. Will post a pic and show.

On the 'iron-on' method, what does the manufacturer mean about 'must be scraped while cooling'?

I think what they are referring too is that the glue is melted and you need to make sure that as it cools there is good contact between the veneer and base materials. I use a plastic dry wall mud applicator of about 6 inches wide to go over the veneer after I make my passes with the hot iron. Some times the veneer will buckle up a bit, and if you do not make sure the veneer, melted glue and base material are in good contact you will end up with a bubble.
 
Last edited:
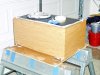
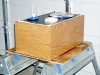
Here are some pics of todays work:
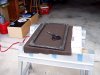
1. Pic of the 2 part Elmer’s wood repair epoxy. Worked GREAT. 2 parts that mix together like clay. It has a long pot life and does not set fast. I was worried that it was not going to set at all. The next morning it had set up hard and workable.
2. Pic of corner with set bondo
3. 2 pics of sanded corner. Did a great job and was easy to sand.
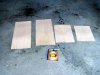
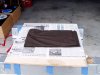
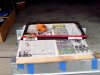
4. veneer cut to size and the package of edge banding for the veneer application
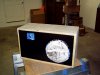
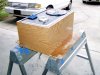
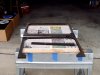
5. speaker ready for veneer
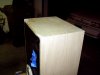
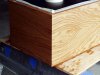
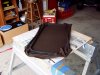
6. one side veneered and trimmed
7. top section of veneer glued in place
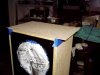
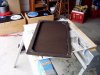
8. bottom section of veneer glued and masked for trimming
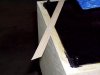
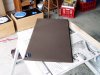
9. ready to trim
10. trimmed
11. edge banding ready to apply to face
12. completed face corner with edge banding.

Used the 2 cherries veneer saw for all trimming. I have decided that it is the ONLY way to trim…. It has done a BANG UP job…. Would work GREAT on cases that are smaller and easier to handle….

Next step is to clean up the speakers and do final detail trimming and start to apply the finish
 

Attachments

  • elmers bondo.jpg
    elmers bondo.jpg
    88.5 KB · Views: 115
  • bondo corner.jpg
    bondo corner.jpg
    68.5 KB · Views: 134
  • corner finish 1.jpg
    corner finish 1.jpg
    62.9 KB · Views: 126
  • corner finish 2.jpg
    corner finish 2.jpg
    58.3 KB · Views: 128
  • veneer  and edge banding.jpg
    veneer and edge banding.jpg
    98.4 KB · Views: 109
  • ready for veneer.jpg
    ready for veneer.jpg
    78 KB · Views: 87
  • one side on and trimmed.jpg
    one side on and trimmed.jpg
    57.3 KB · Views: 88
  • top veneer glued down.jpg
    top veneer glued down.jpg
    52.2 KB · Views: 79
  • finished edge band face.jpg
    finished edge band face.jpg
    47.7 KB · Views: 106
  • bottom trimed.jpg
    bottom trimed.jpg
    89.3 KB · Views: 110
  • bottom veneer glued and sides masked to trim.jpg
    bottom veneer glued and sides masked to trim.jpg
    74 KB · Views: 121
  • edge band face.jpg
    edge band face.jpg
    58.8 KB · Views: 124
Looks outstanding so far. It's got me motivated to actually start working on my projects. So I grabbed a craptacular vinyl-wrapped speaker at the GW on half-priced day for $1.50, and came home to experiment.
Afer a trip to the woodworking shop, I came home with some supplies. The guy there recommended against the glue then iron method. I'm going to try it anyway.

**I'm going to use Titebond 2 - is that that what you're using?**

Also going to try some contact cement ($8) method with dowels to hold the separation until contact.

What I did learn is that a household clothes iron (set to high/cotton) will work fine to remove the vinyl. Just put some construction paper or an old sheet/pillowcase over the speaker before heating or - well let's just say you'll be in trouble with the person who irons in the house.
 
Wank,

I am using left overs from a job I did on a pair of Klipsh Forte's. The stuff came with the glue already applied to the veneer. All I had to do was cut to size and iron away (iron is from the thrift shop... $3.00 and safer than using the wife's iron and having her hit me in the head with it...).

I did 2 cases with tight bond #2 and veneer without any glue. The thing that I did not like with that was the veneer curling as you applied the glue to it. After it dried out the veneer un-curled...

Today I did the Watco Danish Oil, natural… I wet sanded 4 coats.. 120, 220, 320 and 400 grit … The cabs are smooth as silk… Will give the oil 3 or 4 days to dry and then I will do gloss wipe on poly for a top coat. Will put 3 or 4 coats of poly and then all I will need to do is some final touch up on the black face and back…

I have a yard of replacement fabric so I have plenty to re-do the fabric on the grills.

Have an issue with the tweets that I need to get resolved and then they will be done…
 

Attachments

  • 2.jpg
    2.jpg
    94.5 KB · Views: 127
  • 3.jpg
    3.jpg
    96.1 KB · Views: 106
  • 5.jpg
    5.jpg
    99.1 KB · Views: 101
Last edited:
OMI said:
Wank,
All I had to do was cut to size and iron away (iron is from the thrift shop... $3.00 and safer than using the wife's iron and having her hit me in the head with it...).

I did 2 cases with tight bond #2 and veneer without any glue. The thing that I did not like with that was the veneer curling as you applied the glue to it. After it dried out the veneer un-curled...

Today I did the Watco Danish Oil, natural… I wet sanded 4 coats.. 120, 220, 320 and 400 grit … The cabs are smooth as silk… Will give the oil 3 or 4 days to dry and then I will do gloss wipe on poly for a top coat. Will put 3 or 4 coats of poly and then all I will need to do is some final touch up on the black face and back…

Oh my. Isn't that just dead f-ing sexy. Another "O" face from me.
That's red oak? Outstanding grain on that. It looks great.

I'm a cheap-4ss. I'm doing some trial runs on a nothing cabinet with some freebie left over teak veneer. I'm glad I did, because I wouldn't have been happy with the first results on either of my good pairs I want to do. I was thinking teak for my AR-7s, but I may have to look into that red oak. I seriously debating cherry for my utility advents.
 
Wank,

Take a look at tapeease.com and ck their prices on the pre-glued veneer. Cherry is reasonable and you get a 2 ft by 8ft roll.... A LOT of veneer... Each project I learn a little more... Get a 2 cherries saw and have it pre-sharpened also... Joewoodworkers I think... I tend to push hard and fast and am not as slow and detailed as I should be. ALso my "shop" is a few feet on one side of the garage:) These speakers are looking to come out a good 8/10... If I sat down and thought a little more on what I was going to do and how I was going to do it, I would get a better finish at the end... But as I said.. I learn a little from each project I do:)

You might want to start on something smaller than a set of speakers with the GOOD veneer... A small case or something... I did a few small cases before I started on the larger projects...

Just my 2 cents...

BTW attached is a pic of the Klipch Forte's that I did first.

There are some issues with the veneer that was left over and the Infinity's will have a few "glitches" in the veneer, but for the price I paid for the speakes and the veneer already paid for I will live with them... They will still look much better that the junk that was on them...
 

Attachments

  • finished4A.jpg
    finished4A.jpg
    115.8 KB · Views: 173
Last edited:
OMI mentioned heatguns. You can get a high dollar unit or you can get a Wagner paint peeler heat gun. The one I have is variable temp rather than 2 fixed temps. I have a cheap 2 temp gun and it is either too hot or too cool. I have used and abused the Wagner for 5 years and it is still going strong. BTW another reason to get a heat gun is that this is the BEST way to do heat shrink tubing if you are doing some DIY cables or interconnects.
 
I've learned 3 things so far:
1. You're better at this than I am.
2. I need to get veneer wider than my speakers - I suck at seams.
3. I can do this, and the Titebond 2 plus iron works fine.

That red oak though, wow. Nice job. Maybe my Utilities would look good in that.
 
Wank,

They sell paper seam tape that has a glue backing and it will tape 2 pieces of veneer together so you can not even tell it is 2 pieces... But the pieces have to have clean straight cuts... You can sand it off (paper seam tape) after the veneer is glued in place.

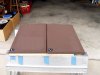
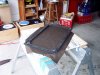
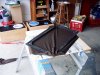
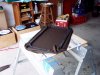
Had a Doctor apt this afternoon so got home early. Decided to do the grill cloth. Pics are:
1. Original grills with old grill cloth.
2. Removed old grill cloth and found that one of the frames had a section broken out. Used epoxy and belt clamp to put it back together.
3. I had a yard of brown grill cloth from parts express.
4. Cut out 2 pieces to fit the frames
5. I had been using the contact cement in the bottle with the brush in the cap. Kinda messy so I was going to get a can of rubber cement and use a plastic bottle with a pointed cap to apply the cement.
6. Got home and found that I had bought the gel rubber cement. Decided to keep and give it a try.
7. Tried a small flux brush and then an old tooth brush…. Bingo.. The tooth brush won hands down.
8. I applied 2 coats of glue with extra at the 4 corners.
9. Used the method as shown on the EPI speaker site.
10. Set the 2 opposing corners and then the other 2 opposing corners.
11. Then set the long sides.
12. Then set the short sides
13. Then worked the corners to get the fabric stretched out.
14. Cut the excess fabric.
15. Glued on the badges…..
16. AND FINISHED…
:banana: :banana: :banana: :banana: :banana: :banana:
 

Attachments

  • 5.jpg
    5.jpg
    84.7 KB · Views: 86
  • 4.jpg
    4.jpg
    82.5 KB · Views: 70
  • 3.jpg
    3.jpg
    92 KB · Views: 65
  • 2.jpg
    2.jpg
    82.7 KB · Views: 88
  • 1.jpg
    1.jpg
    70.9 KB · Views: 105
  • 6.jpg
    6.jpg
    104 KB · Views: 72
  • 7.jpg
    7.jpg
    97.8 KB · Views: 80
  • 8.jpg
    8.jpg
    101.7 KB · Views: 87
  • 9.jpg
    9.jpg
    97.8 KB · Views: 78
  • 10.jpg
    10.jpg
    96.7 KB · Views: 80
  • 15.jpg
    15.jpg
    67.3 KB · Views: 135
  • 14.jpg
    14.jpg
    96 KB · Views: 111
  • 13.jpg
    13.jpg
    94.7 KB · Views: 88
  • 12.jpg
    12.jpg
    98.3 KB · Views: 83
  • 11.jpg
    11.jpg
    101.3 KB · Views: 70
Getting close to finishing:)

Today I applied 4 coats of clear wipe on poly. I sanded between coats with 400 grit paper and wiped down with a tack cloth and mineral spirits. Last coat was a light one. Will do the other speaker on Sunday...

Pic one is speaker ready for first coat. All ready had Pre finished it with Clear Watco Danish oil and let set and dry.

Pic 2 is first coat of wipe on poly

Pic 3 and 4 are after fourth coat of poly. WIll let set and cure for a few days now...

:banana: :banana: :banana: :banana: :banana: :banana: :banana:
 

Attachments

  • BEFORE.jpg
    BEFORE.jpg
    102.7 KB · Views: 72
  • FIRST COAT.jpg
    FIRST COAT.jpg
    102.8 KB · Views: 59
  • FOURTH COAT1.jpg
    FOURTH COAT1.jpg
    91.5 KB · Views: 63
  • FOURTH COAT2.jpg
    FOURTH COAT2.jpg
    91.1 KB · Views: 104
Last edited:
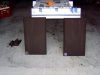
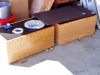
Started on the second speaker this afternoon. I took a pic of both speakers on the floor. The one on the left has the watco danish oil and 4 coats of poly. The one on the right only has the watco danish oil. You can see how the poly adds a bit more depth and brings out the grain a bit more... The rest of this afternoon and evening will be applying poly... give it 2 or 3 hrs to set... Light sanding... And do it 4 times...
 

Attachments

  • side by side.jpg
    side by side.jpg
    82.8 KB · Views: 96
Last edited:
omi-- just so you'll know what kind of trouble you cause, i disassembled a pair of Qb's i've had sittin around for a long time, and am gonna do the same thing you did. i've saved this thread as a tutorial for meself. so ....there.....i'm on my way to HomeD to get a heat gun right now.
 
shrinkboy,

IF I CAN DO IT ANYONE CAN :banana:

GOFERIT....:) If you take your time (like I do not) and plan out your work (like I do not) and do not get in a rush (LIKE I DO) you will have no trouble at all... Now it does take a bit of time.... I have been working on these for over a week (on and off)... It is not a one evening job...

Just finished the fourth coat of poly and will let the speaker dry and cure for a few days. Then some minor touch up to the face and back and a look at the tweets. I think I have a minor issue and will post pics with a rqst for input on the infinity thread...

:banana: :banana: :banana: :banana: :banana:
 
Wow...those are going to look beautiful! Great job OMI. Hmmm...I wonder how tough it would be to make cases and veneer them for all my Marantz stuff. My Sansui....
 
Hmmmm To make cases I would guess a complete wood working shop... Way beyond my limited skill with 2 aluminum knock down saw horses and a skill saw:) That kind of skill I do not have…

Now to re-veneer a case… I can do that:)
 
Back
Top Bottom