• The move to the new server is done. There are some software and database maintenance updates in process. This has us passing the hat around to help out. We appreciate any donations. Seriously, even a dollar helps. The payment page may be found here - https://www.audiokarma.org/support.html

JBL 4333a Restoration Question

RD Airlines

Active Member
Hello AK'ers,
I've really enjoyed reading up on incredible amount of information here at AK. Thanks to everyone for posting.

I recently obtained a set of rough JBL 4333a speakers and am about to restore them. Following some advice here I just installed new surrounds on the woofers and the speakers sound absolutely amazing. I am getting some distortion in one of the mid-horns, but I'll post a solution once I get into that issue.

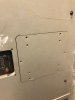
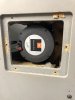
I'm going to document my experience in the restoration here, but I'm hoping someone can help me with a pretty simple question... The cabinet has an access panel on the back that has a cradle for the 2312/2240 horn. I can't get this panel off. The panel is made of particle board and I don't want to damage it. I searched the forum but couldn't find anyone who had an issue removing this - - just that they were removed with no mention of it being stuck.

Can someone with experience with these cabinets please let me know how you remove these access panels? I removed the screws from the back but it's stuck in there solid. I'm afraid that a previous owner might have glued it in but I wanted to hear from others on their experience removing this panel. Does it just come out for you once you remove the screws? Am I missing something?

I believe that the access panel on the L300 is exactly the same. I'm not sure about this but if anyone has experience with this panel on a L300 it will be helpful to hear.

thanks in advance!
 

Attachments
  • IMG_7432.jpg
    IMG_7432.jpg
    60.1 KB · Views: 53
  • IMG_7433.jpg
    IMG_7433.jpg
    28.4 KB · Views: 50
Last edited:
Register to hide this ad
IIRC, I think the outer 6 screws hold the panel to the cabinet and the inner 4 screws attach the cradle/saddle that helps to support the 2420 compression driver and horn.

You might try this: find the inner 4 screws that you removed. Measure their length and obtain screws of same threading but 2-3x longer, and maybe with a larger head if possible. Then screw these longer screws into the inner holes of the panel fully, leaving the exposed lengths outside. Now you have 4 screws that you can gently or firmly pull on, hopefully two at a time to pull evenly or maybe rock slightly side to side. Pulling with a pair of vise grips or similar may help with leverage. Obviously be cautious about stripping the threads out.

Alternatively with long enough screws you could create a slide hammer approach with washers and large heavy nuts. Or you could try tapping the exposed bottom of the cradle from the inside if the screws are out. The compression driver is surrounded by the cradle but otherwise not directly attached. Of course, avoid hitting the driver or magnet casing directly.

If the back panel has seen any moisture, some potential swelling of the panel may make it difficult to remove. With that, I might consider using a hair dryer to try drying out the panel edges but let them cool before attempting removal. That heat may also break down any adhesive or plywood resin that might be there.

IMO, there would be little reason for anyone to glue the panel in and makes removing the compression driver and horn exceedingly difficult.
 
Last edited:
IIRC, I think the outer 6 screws hold the panel to the cabinet and the inner 4 screws attach the cradle/saddle that helps to support the 2420 compression driver and horn.

You might try this: find the inner 4 screws that you removed. Measure their length and obtain screws of same threading but 2-3x longer, and maybe with a larger head if possible. Then screw these longer screws into the inner holes of the panel fully, leaving the exposed lengths outside. Now you have 4 screws that you can gently or firmly pull on, hopefully two at a time to pull evenly or maybe rock slightly side to side. Pulling with a pair of vise grips or similar may help with leverage. Obviously be cautious about stripping the threads out.

Alternatively with long enough screws you could create a slide hammer approach with washers and large heavy nuts. Or you could try tapping the exposed bottom of the cradle from the inside if the screws are out. The compression driver is surrounded by the cradle but otherwise not directly attached. Of course, avoid hitting the driver or magnet casing directly.

If the back panel has seen any moisture, some potential swelling of the panel may make it difficult to remove. With that, I might consider using a hair dryer to try drying out the panel edges but let them cool before attempting removal. That heat may also break down any adhesive or plywood resin that might be there.

IMO, there would be little reason for anyone to glue the panel in and makes removing the compression driver and horn exceedingly difficult.
My suggestion is to remove the 4 bolts
from the driver to the horn.
I have seen more than a few L300s and 4333’s
With gouging of the screw holes on the back panels I believe the Crossovers can be removed from the inside through the Woofer opening
 
Thank you for the recommendations. I just tried the pull method with longer screws but there was no budge whatsoever. I'm now convinced that someone glued these panels in or maybe they got wet and the particle board fused or something.
I'll try to separate the driver from the horn. If there's enough room / play the driver should drop out and I can remove the horn. All through the woofer opening. Thanks again.
 
I had a couple pair of the early versions of those cabinets without the access holes and everything was removed through the woofer hole. IIRC, you have to dismount the driver while still in the cabinet and remove the horn as two pieces.
 
As always, Bart (mech986) has some great ideas.

RD, welcome, and congrats. I seriously doubt that the panel is glued in. I have been in your situation many times (especially with the 250Ti) and without exception the problem wound up being paint stuck to paint (it might not have cured fully before assembly). In this situation it does a great job emulating glue.

I would blast it with a hair dryer on high (or heat gun on low), inside and out, for a long time, then tap a mallet against one end of a soft-wood stick with the other end up against the inside of the saddle, through the woofer hole.

As for the buzzing midrange, the damping foam in the back cap may have oozed down to touch the diaphragm.
 
Last edited:
Perhaps join the Lansing Heritage Site and Forum if you're not already a member. Lots of folks there can help
 
Solved!
Thank you all for the assistance and suggestions to the problem. It was exactly as Zonker92 said. Stuck paint.
I attempted to disassemble the horn from the driver but because of the cradle depth there wasn’t enough play to wiggle them out once they were apart.
In the end I used a combination of Zonker92’s heat gun and mech986’s screw / pull method to get the panel off.
You need to have patience with the heat method because it takes a while. I only applied heat from the back because the driver was still in place. I got the surface too hot to touch but not peeling the paint and maintained this for some time. Then - one corner at a time - pried the panel loose with the screws and a needle nose plier - using a box cutter as a leverage piece and to protect the box.
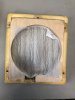
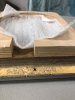
Check out the pics. It was great when it popped off. Thanks again for all of the help. (This site is great!).

I’ll be documenting the whole restoration here and this step will be part of it.
 

Attachments

  • 534B6900-90D5-4F85-9BFF-914771713CCF.jpeg
    534B6900-90D5-4F85-9BFF-914771713CCF.jpeg
    44.6 KB · Views: 36
  • 3666D39A-64E0-4BB8-8281-2FF6737B44B6.jpeg
    3666D39A-64E0-4BB8-8281-2FF6737B44B6.jpeg
    34.7 KB · Views: 34
  • C8661642-5E2C-4742-892D-05AB2BAD9133.jpeg
    C8661642-5E2C-4742-892D-05AB2BAD9133.jpeg
    57.6 KB · Views: 34
  • 329F4FF7-BB1B-4751-9C62-C7DB8CD5C2AE.jpeg
    329F4FF7-BB1B-4751-9C62-C7DB8CD5C2AE.jpeg
    47.7 KB · Views: 33
  • BBE12760-C246-4FA0-B510-12F4D267E310.jpeg
    BBE12760-C246-4FA0-B510-12F4D267E310.jpeg
    52.7 KB · Views: 33
Update:
When reinstalling the panel another issue popped up.
One of the factors contributing to the panel being stuck is overlap. Note in the pics the multiple pieces of wood that make up the panel/saddle. The two saddle pieces slid down slightly (gravity and weight of the driver?). This caused the saddle portion to overlap into the inside of the cabinet. It was likely because the glue had not totally dried when the cabinet was built. I can’t put the panel back in without slotting it in at an angle and probably hammering it in. I’m not doing that. I’ll take these pieces off and re- glue them into their correct position when restoring the cabinet (just about 3mm higher). I looked at the other speaker and it’s exactly the same. More soon!
 

Attachments

  • 602DB585-6FF8-4A87-9A2B-50D8848767CA.jpeg
    602DB585-6FF8-4A87-9A2B-50D8848767CA.jpeg
    29.5 KB · Views: 30
  • 3F42EB28-2C9A-4DD2-847B-30BC1E4F0FC5.jpeg
    3F42EB28-2C9A-4DD2-847B-30BC1E4F0FC5.jpeg
    31.6 KB · Views: 28
Good idea. If the weight of the horn/driver assembly bears on just the baffleboard, the baffleboard will crack over time in that area between the horn and woofer. It's just a hairline crack and difficult to see, so you may want to check for one.
 
My suggestion is to remove the 4 bolts
from the driver to the horn.
I have seen more than a few L300s and 4333’s
With gouging of the screw holes on the back panels I believe the Crossovers can be removed from the inside through the Woofer opening

I didn't remove the rear panel on my L300s. Just hauled the cab over to a tech to test horn, in situ. The crossover network does come out of the 15-inch speaker hole. :)
 
The panels on the back are stuck on mine too. I just knocked them with a long screwdriver and end up cracking both of them on one corner . Then I used wood filler to fill them up and sanded them down. I’m planning to use a router to make a new pair from MDF since the old ones just have the particles failing everywhere.
 
Back
Top Bottom