• The move to the new server is done. There are some software and database maintenance updates in process. This has us passing the hat around to help out. We appreciate any donations. Seriously, even a dollar helps. The payment page may be found here - https://www.audiokarma.org/support.html

JBL Decade L36 restoration and upgrade project

fredjones

Active Member
JBL Decade L36 restoration and upgrade project (Update)

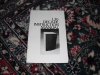
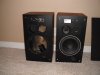
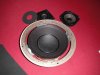
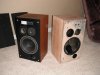
I picked up a pair of JBL Decade L36 speakers on CL recently. I took them home and hooked them up. They sounded really flat and I knew they would need some work. I had to decide how much work to put into them. I purchased them from the original owner who was nice enough to include his original manual and warranty registration card from 1975. I thought this was pretty neat. Anyway, I decided to go all out. I claim no expertise in restoring speakers. I have gained so much knowledge for this job simply be searching the AK forum and simply want post what went right and what went wrong for others if it may help them. I am so thankful for this forum and what it provides for people like me.

The attached pics below show the warrenty card and one speaker cabinet that has been stripped.

More to come.
 

Attachments
  • DSCF0016.jpg
    DSCF0016.jpg
    134.7 KB · Views: 478
  • DSCF0031.jpg
    DSCF0031.jpg
    145.6 KB · Views: 246
  • DSCF0034.jpg
    DSCF0034.jpg
    150.8 KB · Views: 224
  • DSCF0033.jpg
    DSCF0033.jpg
    141.1 KB · Views: 213
Last edited:
Register to hide this ad
Look's like they had the usual plant sitting on the speakers.....hehe.
I purchased a pair of L36's in 1980/81 when they were closing them out....$118 each, brand new in the box......Wish I had bought every one the had now.:scratch2:......Great bookshelf speaker, kinda the baby brother of the L100....:music:
 
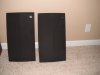
The grills and cloth looked in very good shape, just dirty. I washed them with soap and water and really took the dullness out. When I removed all the hardware and drivers from the front of the screen, I also took off the Decade label. It is made of aluminum and I took great care. First heated it up with an iron. I suppose any heat source will do. I carefully ran some dental floss under it and it came on off. I removed the glue left on the back with Goo Gone. It took some paint off with it but that area would be covered up anyway. Yea, of course the top of one just had to have the stain in the center.
 

Attachments

  • DSCF0012.jpg
    DSCF0012.jpg
    118.4 KB · Views: 272
  • DSCF0013.jpg
    DSCF0013.jpg
    93.2 KB · Views: 199
Not sure why you think they sounded "flat", I own 3 or 4 pair and they sound "phat".....hehe.....:yes:
Keep up posted on your progress....:thmbsp:
 
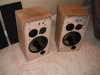
Here they are both fully stripped. I had to use an electric sander because the finish on it was incredibly hard. The oak veneer is beautiful, but it is not as thick as I thought. I could see it from the side where it had been chipped at the rear of one cabinet. I sanded carefully. Unfortunately I could not completely get rid of the stain on the top. I did not want to sand too much and turn this into a veneer project. Be careful near the edges with an electric sander because it can apply more force there. If anyone knows how to get rid of stains on veneer I'd like to know.
 

Attachments

  • DSCF0026.jpg
    DSCF0026.jpg
    152.8 KB · Views: 251
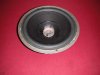
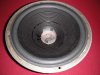
The crossover was lightly glued and attached with 4 screws to the inside of the cabinet. Tricky to get loose, just unscrew the screws partway and press them in to detach the board. I assessed the drivers, all worked fine, and initially the foam surround on the 125a woofer looked good. They had been refoamed 5 years previous according to the owner. But alas the foam was brittle and had to be removed and replaced. When taking the old foam off it was evident it had not been replaced before, so I suspect they had been reconed previously. Removing the last layers of old foam underneath the edges was made easier by lightly moving some sandpaper around the edges to wear it away.
 

Attachments

  • DSCF0019.jpg
    DSCF0019.jpg
    173 KB · Views: 180
i love my l36,s $20.00 yard sale with all the manuals and warranty cards. they needed new foam on the woofers i refoamed them and absolutely love them. steve
 
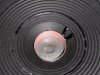
I got the speakers refoamed. I had never done an inverted dust cap before. This thing is huge. The first cap I kind of just cut up and tore out. The glue was very tough and took an ever so slight amount of surface cone paper with it. The next one I cut up in little slices from the center (like a pie) and gently peeled them outwards. This did much better at preserving the cone. I always shim because that's just the way I do it. The space between the magnet and the coil is much smaller in these JBLs than others I have done, so I am glad I shimmed.
 

Attachments

  • DSCF0020.jpg
    DSCF0020.jpg
    190 KB · Views: 195
  • DSCF0022.jpg
    DSCF0022.jpg
    204.8 KB · Views: 190
  • DSCF0023.jpg
    DSCF0023.jpg
    201.4 KB · Views: 159
  • DSCF0025.jpg
    DSCF0025.jpg
    221.6 KB · Views: 176
  • DSCF0027.jpg
    DSCF0027.jpg
    147.7 KB · Views: 198
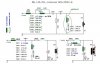
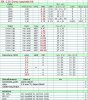
For no particular reason other than the good reviews I read on his work, I elected to upgrade the crossover to one designed by Troels Gravesen. His schematic and parts list are available on his website. I have never put together a crossover before but was up for the challenge.
 

Attachments

  • 125A+LE5-12rd+LE25_finalXO_800-3500.jpg
    125A+LE5-12rd+LE25_finalXO_800-3500.jpg
    84.7 KB · Views: 211
  • Crossover_components_Jantzen.jpg
    Crossover_components_Jantzen.jpg
    190 KB · Views: 165
Phun! So you're gonna abandon the L pads? What's the total parts cost? Please post pix and listening impressions when you finish!
 
Cool project! Too bad Zilch is not here to throw in his .02! I'm sure he would be trying to talk you into building some franken-crossover.
 
Where did you get the replacement gaskets? I refoamed some beat up 125A drivers but the look kind of naked without gaskets.
 
Back
Top Bottom