• The move to the new server is done. There are some software and database maintenance updates in process. This has us passing the hat around to help out. We appreciate any donations. Seriously, even a dollar helps. The payment page may be found here - https://www.audiokarma.org/support.html

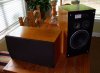
JBL Decade L36 restoration and upgrade project

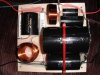
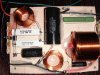
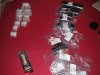
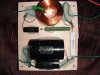
I had to educate myself on inductors, capacitors, resistors and how to read the circuit layout. Parts Express had everything except for a few resistors which I was able to buy from Madisound. I used birch plywood panels for the boards. My goal was just to make sure everything was wired correctly. I certainly won't win any beauty contests for this work. I probably could have saved some money on the larger caps by getting lower quality ones and bypassing them with higher quality ones of lower value. Someone please chime in on this. Not sure how this works. I tested all the boards, one for each individual speaker, and all worked.

Would it have been simpler just to recap the existing crossover? Sure would have been. This project is just for fun and I know there is no way I would ever get my money back if I ever were to sell the speakers.
 

Attachments

  • DSCF0030.jpg
    DSCF0030.jpg
    132 KB · Views: 202
  • DSCF0038.jpg
    DSCF0038.jpg
    169.4 KB · Views: 223
  • DSCF0039.jpg
    DSCF0039.jpg
    160.4 KB · Views: 218
  • DSCF0040.jpg
    DSCF0040.jpg
    178.3 KB · Views: 226
I had to educate myself on inductors, capacitors, resistors and how to read the circuit layout. Parts Express had everything except for a few resistors which I was able to buy from Madisound. I used birch plywood panels for the boards. My goal was just to make sure everything was wired correctly. I certainly won't win any beauty contests for this work. I probably could have saved some money on the larger caps by getting lower quality ones and bypassing them with higher quality ones of lower value. Someone please chime in on this. Not sure how this works. I tested all the boards, one for each individual speaker, and all worked.

Would it have been simpler just to recap the existing crossover? Sure would have been. This project is just for fun and I know there is no way I would ever get my money back if I ever were to sell the speakers.

Your work looks very good to me! Keep the pics coming!
 
I think TG earns a commission on crossover parts. :yes:

Yeah, I think he has a deal with Jantzen.

So to the OP: It seems like you finished this project already, and now you're just doling out a few pictures each day? (That was confusing me, since I thought you were just starting out and posting updates.)
 
I painted the baffles and the rear with a paint I had seen suggested by AK users. I finished the oak veneer with three coats of Watco Danish Oil (natural) followed by two coats of semi-gloss polyurethane.
 

Attachments

  • DSCF0045.jpg
    DSCF0045.jpg
    105.4 KB · Views: 208
  • DSCF0042.jpg
    DSCF0042.jpg
    121.2 KB · Views: 238
  • DSCF0041.jpg
    DSCF0041.jpg
    163.6 KB · Views: 213
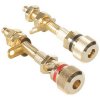
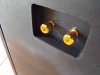
The binding posts were a little long because the back plate was thin. I had to add some washers for spacing in order to get them to fasten tightly. I laid the speakers on their sides when attaching the crossovers to the interior. To expedite installation I wired washers to the input ends of the crossovers and it was easy just to slip these over the binding posts and screw them down.
 

Attachments

  • DSCF0047.jpg
    DSCF0047.jpg
    172 KB · Views: 177
  • DSCF0048.jpg
    DSCF0048.jpg
    158.1 KB · Views: 173
  • Binding Post (2).jpg
    Binding Post (2).jpg
    82.7 KB · Views: 158
  • DSCF1849.jpg
    DSCF1849.jpg
    134.5 KB · Views: 173
This is the final product. After listening for a few days they settled down some, but are not fully broken in yet. Its always difficult to describe how something sounds to someone else due to subjectivity, so I will keep it simple. I know these crossovers were intended for the fully modified cabinets that Troels Gravesen has on his website. I am not a perfectionist so I figured that it would be close enough.

The sound is very balanced and non-fatiguing. My setup now is a Pioneer SX-950 and Yamaha CD-S700 cd player and a turntable of course. The JBL sound is definitely still there, there is no mistaking the 125A woofer presence. I did run a subwoofer, now there is no need. Now I can leave the tonal controls neutral or bypassed as there is no need for any tonal correction, the speakers do it all. They faithfully reproduce with clarity all the music I threw at them. I did not consider the bass to be too boomy that I hear some complain about with JBL. I am very pleased with the results to be had from this vintage set of speakers.


Attachments

  • DSCF1837 2_cr.jpg
    DSCF1837 2_cr.jpg
    142.2 KB · Views: 78
Those look great! I'm kind of new at this, I found a pair of L-46 speakers. I re-oiled the cabinets and then waxed, they look very much like yours now. I need to replace the surrounds, do you know if JBL sells the kit for that? Where did you get your surrounds? Maybe I missed it in the thread, I kind of zoomed through it. The originals are still on mine and they don't look like they are/were foam surrounds, it's like there used to be thin, black rubber-like material for the surrounds. But maybe it's so old that I can't tell what it was, it's jet black though. So what's a good place to get the surrounds? Your thread helped to get me motivated.
 
First of all congrats on a first class job; anything worth doing, is worth doing right.
I bought my daughter a pair of L-36s last Christmas, they sound pretty good, but the cabinets were painted over.
I have always wanted to do a number on them.
I would love to hear one more report, as the new crossovers break in.
One question; did you keep the original sound baffling material and use it to cover the crossovers or get new stuff?
I wonder about tightening the base even more with egg carton foam and getting away from the boom.
 
Speaker surrounds can be bought from many places. I have used simplyspeakers and midwest speaker all with good results. Good tutorials for how to replace a speaker surrounds are all over YouTube. It's really amazing that you can find out how to do just about anything DIY on YouTube. The hardest part about replacing speaker surrounds is just getting the old one off. Usually just takes some time and elbow grease.
 
Does each cabinet have two crossovers or am I seeing it wrong.......:scratch2:
 
Last edited:
One question; did you keep the original sound baffling material and use it to cover the crossovers or get new stuff?
I wonder about tightening the base even more with egg carton foam and getting away from the boom.

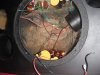
I just screwed in the new crossovers right on top of the original baffling material. I have not decided if I want to lay anything over them yet, or if it would even be beneficial. I am not sure about the egg carton stuff. I have seen versions of egg carton foam used as speaker grills. Is it acoustically transparent? If so, would it be suitable for use as baffling material?

Dose each cabinet have two crossovers or am I seeing it wrong.......:scratch2:

For the sake of preserving the look, I left the original crossover and L-pads in place, they are just not connected.
 
Speaker surrounds can be bought from many places. I have used simplyspeakers and midwest speaker all with good results. Good tutorials for how to replace a speaker surrounds are all over YouTube. It's really amazing that you can find out how to do just about anything DIY on YouTube. The hardest part about replacing speaker surrounds is just getting the old one off. Usually just takes some time and elbow grease.

Oh yeah, the Tube is a great source of info, been watching those surround redos for about a couple of months now. Several of them are really sloppy though, I would never turn a speaker over to some of those guys, really messy looking to me. Could you see what the original material was your surrounds were made of? Mine don't look like they were foam. Some say it doesn't matter, some say it does, but either way I can be really curious whether things matter or not.
 
removing that stain

I just treated a pair of Infinity RSb's with Howard Feed-N-Wax BeesWax Wood polish and conditioner. But there were a few noticeable stains on top I couldn't get rid of with soap and water, dilute ammonia or even light sanding. So tried paint thinner and it actually removed the stain enough so that it was gone after applying the conditioner. It didn't seem to affect the color of the rest of the oak veneer.
 

Attachments

  • ostrich face up close.jpg
    ostrich face up close.jpg
    63.7 KB · Views: 32
"I just screwed in the new crossovers right on top of the original baffling..."

I just did a pair of L36's but recapped the L-pads and deoxited the pots with great results. But I noticed that the presence/brilliance pots affect all 3 drivers. Reducing presence/brilliance also reduces the bass so that when both settings are at 12 o'clock the L36's lose their imaging. It doesn't make sense. With other brands like Infinity, the 2 pots affect only mid- and treble ranges but this seems to be the JBL way. Now I just leave presence/brilliance at about 4:30 - which is nearly wide open. So your totally by-passing the original L-pads may be the right way to go?

Is there anybody more knowledgeable about JBL crossovers that has something to add about these presence/brilliance settings?
 
Back
Top Bottom