• The move to the new server is done. There are some software and database maintenance updates in process. This has us passing the hat around to help out. We appreciate any donations. Seriously, even a dollar helps. The payment page may be found here - https://www.audiokarma.org/support.html

JBL L110 Recap

pjrengineer

Simpler times
Subscriber
Hey AK

I decided to recap my jbl l110 speakers. I really enjoy the feeling these speakers in stock form give you. There is something magical about the 033 tweeter and typical jbl warm forward midrange. The bass isn’t too shabby either. Very heavy woofer.

I have replaced the capacitors with Solen and Dayton (where solen wasn’t available from PE). Also replaced the resistors with Janzen and mills non inductive resistors.

I decided to leave the inductors as is because from my research on the part numbers they are already air core which are supposed to be better than their iron core alternative.

This is my first recap job. I still have one more to do.

PE was out of one resistor so you’ll see the 2.5 ohm not completed yet.

I really look forward to putting these speakers back together and hope it’s an improvement to an already amazing bookshelf speaker.

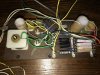
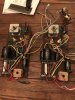
Photos are before and after.
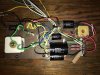
D949E16F-3743-4AA4-B457-98A709C68AF9.jpeg 23F5CC78-85A0-435C-B0E6-BEDFB30178B0.jpeg
 
Register to hide this ad
Looking forward to your opinion before and after. I have a pair these and agree with your opinion compared to other JBLs.
 
I replaced all the capacitors in a pair of L110s several years ago with Jantzen Audio Z-Standard. When compared to the pair with original capacitors, I could not hear any improvement or difference between the two pairs. The most audible difference that I heard was the difference in the low end when comparing a pair re-coned with original JBL re-cone kits and a pair that just had the foam surrounds replaced with aftermarket surrounds. Of course the JBL re-cone kits are no longer available. Sad.

Larry
 
I replaced all the capacitors in a pair of L110s several years ago with Jantzen Audio Z-Standard. When compared to the pair with original capacitors, I could not hear any improvement or difference between the two pairs. The most audible difference that I heard was the difference in the low end when comparing a pair re-coned with original JBL re-cone kits and a pair that just had the foam surrounds replaced with aftermarket surrounds. Of course the JBL re-cone kits are no longer available. Sad.

Larry

I’ve heard mixed things about recapping speakers. Did you update the resistors too to non inductive?
I’m waiting for one last resistor to show up in the mail then I’ll put it back together and post my findings.
 
Love that little JBL. Only listened to mine for about an hour before some L7s were delivered.
From the look of the old caps , the re-cap should be noticeable.
Mine are in the closet.
Looking forward to your findings.
 
Love that little JBL. Only listened to mine for about an hour before some L7s were delivered.
From the look of the old caps , the re-cap should be noticeable.
Mine are in the closet.
Looking forward to your findings.
What condition are yours in
How do you like the L7?
 
Recap complete. Now just to figure out how I want to re insulate these speaker cabs. I’m thinking just use an old tee shirt to contain the fiberglass because I don’t want it flying out the port or damaging the voice coils.

Also the paint on the baffles came out a tiny bit rough. I think I will explore with a very very fine grit sand paper or something to buff the paint.

Suggestions welcome.

In one form or another they will be back together this weekend for a regular meet up with buddies.
 

Attachments

  • 7AD3FD37-4205-4808-A59C-214D95B4B66E.jpeg
    7AD3FD37-4205-4808-A59C-214D95B4B66E.jpeg
    70.5 KB · Views: 94
Here is my review. Overall the sound is crisper. More air. More definition across the spectrum. The image isn’t as blurred, less of a 70s sound if that makes sense.

Same level of bass, which is not a bad thing. I have the bass tone set to 4 just because the sansui 919 on vinyl needs it for my taste.

What’s most impressive to me are the delicate highs and less warm mids. It is closer to hi fi than a party speaker.

Jerr bear likes them. Better move him before doggies think he’s a chew toy. But jerry loves jbl.

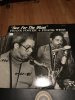
Back to frank + frank on the sax.

These may take the spot of my tannoys.
 

Attachments

  • 24BE6E50-8890-4C71-8376-99435F5CABB6.jpeg
    24BE6E50-8890-4C71-8376-99435F5CABB6.jpeg
    63.8 KB · Views: 80
  • 5C6D8F07-71A1-4131-A927-3146FEB4DC7D.jpeg
    5C6D8F07-71A1-4131-A927-3146FEB4DC7D.jpeg
    54.7 KB · Views: 76
Do not need to turn the bass up after further testing, I put the tweeter control to -1 and all is better balanced. I have low ceilings and hard floors so this makes a difference.
 
Be very careful about replacing inductors in a crossover. Not only the actual inductance, but the resistance of the inductor is part of the crossover design. And don't worry about whether or not some of the larger inductors in the woofer are laminates. As long as they don't over-saturate (which rarely happens anyway) they are also smaller with less resistance than comparable air cores. Also when interior cabinet space is at a premium, an air core may not be feasible. Laminates are a reasonable alternative.
 
Be very careful about replacing inductors in a crossover. Not only the actual inductance, but the resistance of the inductor is part of the crossover design. And don't worry about whether or not some of the larger inductors in the woofer are laminates. As long as they don't over-saturate (which rarely happens anyway) they are also smaller with less resistance than comparable air cores. Also when interior cabinet space is at a premium, an air core may not be feasible. Laminates are a reasonable alternative.

Thanks for the info. That is something I did not plan on replacing.
 
Do not need to turn the bass up after further testing, I put the tweeter control to -1 and all is better balanced. I have low ceilings and hard floors so this makes a difference.
Any chance you still have a parts list from that recap? I'm going to be doing mine in the next month or 2. Thanks!
 
Not a chance I have it but if you download the schematic I can help you figure it out.
Boy, as someone who is trying to learn this and only doing so at a snail's pace, this whole process can just be confusing as hell!
I could not locate a schematic so I just opened them up and took photos.
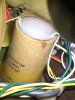
There are 2 ea. 18 mfd 100v caps, 36 mfd 100v caps, 6 mfd 100v caps, 4 mfd 200v caps, then there is one big one that I can only see the 12 mfd value but not the voltage. Thats the big cardboard-wrapped one.
image0.jpeg image1.jpeg image2.jpeg
 
Back
Top Bottom