So I promised to update when I restored the pair of KLH Model 6 speakers that I purchased as a student back in 1975 or 1976 (still have the receipt somewhere). Pictures are all from phone and not ideal as from time to time I forgot to document part of the process. But they should give a pretty good idea of what occurred.
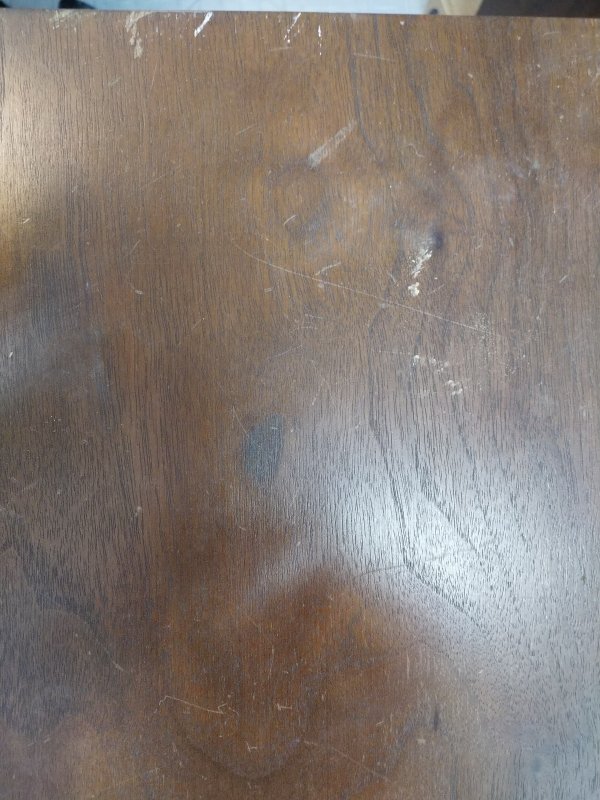
First, I should mention that there's always a surprise of some kind when you do these types of things. I am the only owner of these, so I'll get to the factory screw-ups later. But first, I decided to refinish the cabinets. From the pictures below, you can get a decent idea of the condition - not bad, but plenty of small scratches, a few deeper ones, and paint smudges from hitting walls or having something on the top. I have been woodworking for many years, so had a decent idea of the kind of finish I was looking for. You can see from the pictures below that the finish is not only scratched, but also sort of muddy - not much clarity to the wood grain. That's typical of stain or oil (and 45 or more years of age).
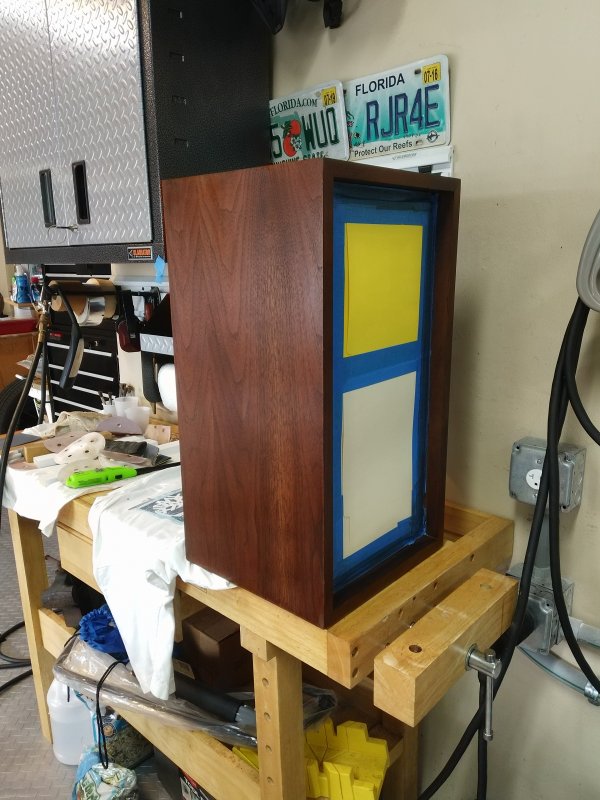
Unlike a prior restoration of a pair of Model 17s, I wanted to strip the finish, use an aniline dye on the bare wood, and top-coat with a padded shellac and rubbed wax finish. So first I taped off the woofer and tweeter to prevent any sanding dust intrusion by using some overlapping manila folders and painters tape all around the edges. Then I began to sand the veneers. I started with a variable speed orbital sander at 180 grit on a setting of 2 out of 5. The objective here was to get most of the finish off but not all - that would be left to less aggressive grits. Then I went to 220 grit with a setting of 1 out of 5 and then 320 with 1 out of 5. Note that some random orbital sanders can be very aggressive and you want to be careful not to sand through the veneer, which creates a much larger job.
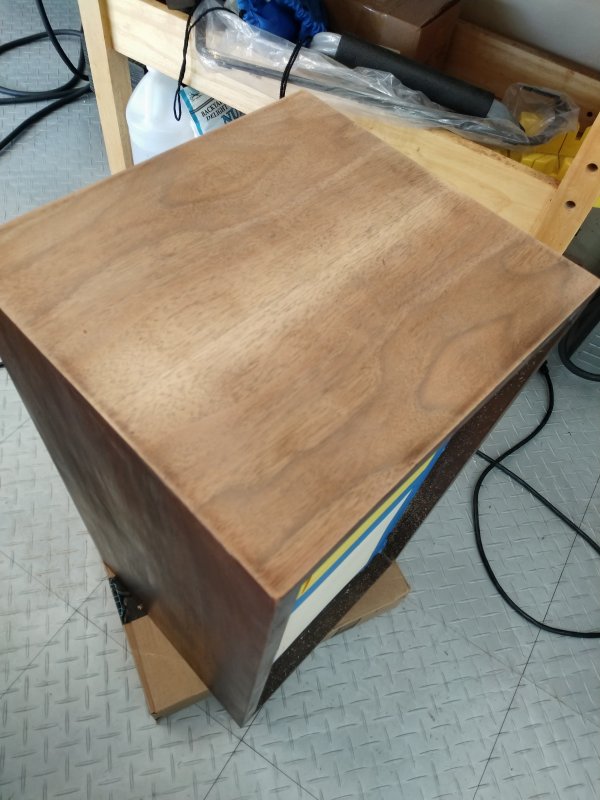
This is what the top of one looked like when I was almost done sanding. That lighter area in the middle is sapwood and not too much sanding. I could have toned the sapwood later if it was too light, but decided it wasn't necessary. Any further sanding was done on a spot basis with hand sanding just on the areas where there was still finish. you can see some on the edges.
Once the basic sanding was done, I tried to raise some of the scratches by applying a hot iron over a damp cotton cloth to create steam over the scratch. This will often swell the wood that was compressed by a dent or scratch and allow you to almost eliminate the scratch completely. After one more light sanding, it was time to color.
Then I applied a water based aniline dye (dark walnut). It looks a little reddish in the light of my garage, but it really was more brown that red. It's important to flood the wood quickly with the water-based dye as if you apply it sparingly, you may get lap marks where you can see where the leading edge of the dye was applied. apply liberally and then wipe off the excess with a paper towel. This is what the dye looks like when wet after being applied.
After the dye was throughly dry, I used a shellac pad to lay on a thin coat of shellac that would fix the wood fiber grain that was raised by the water-based dye. A shellac pad is easily made by using a piece of old sock or cotton cloth in a ball that is wrapped by any smooth cloth - old t-shirts work well. The pad is dipped in shellac and then wrapped by the outer layer, twisted a little to form an egg shape in the hand, and then applied with long smooth overlapping strokes lifting the pad off the surface as you reach the edges. The idea is to lay down a thin layer each time rather than one thick layer.
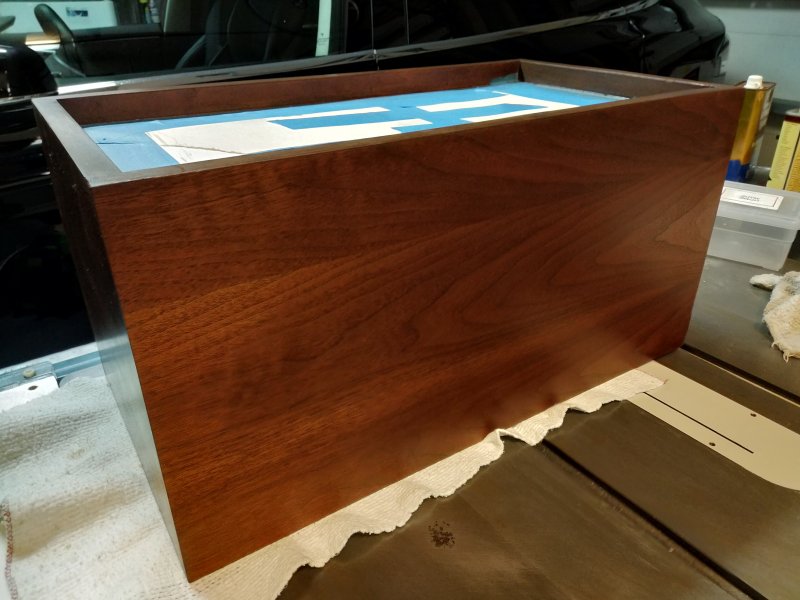
In between coats, I lightly sanded with 320 grit paper and wiped off all dust. Then I repeated the process several times. Eventually, you get something that starts to look like this:
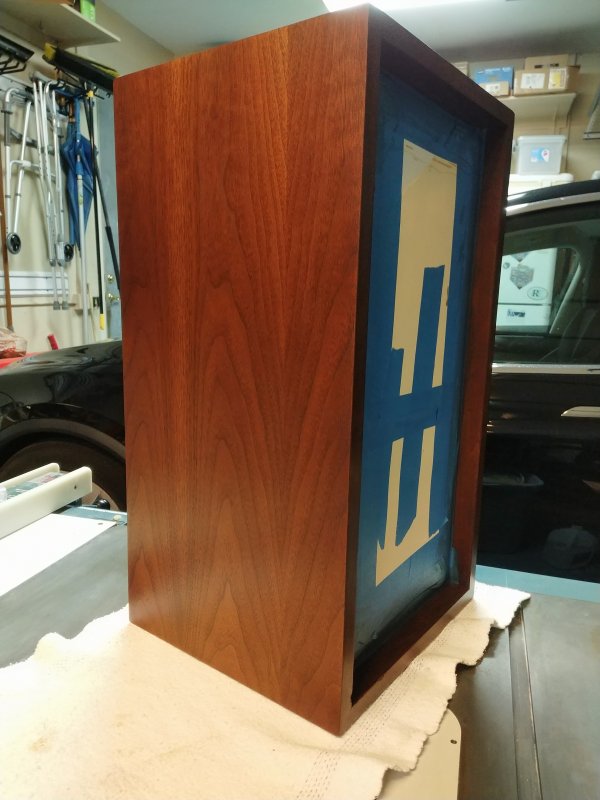
A little buffed wax and you can start to see why I like the dye/shellac/wax combo. It's not shiny at all but just has a clarity and lustre that's hard to get with oil.
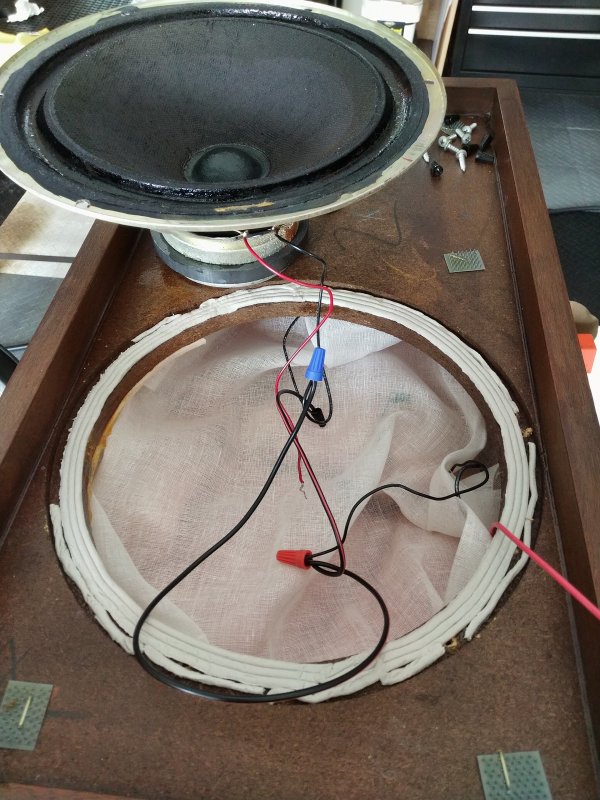
Cabinets done, I then turned to opening up the boxes to replace the capacitors and re-dope the woofer surrounds. I carefully unscrewed both the woofer and tweeter and gently lifted each out of the cabinet, making sure to label each connection with painter's tape and a marker. I also removed the shroud covering the fiberglass behind the woofer and wearing gloves, put the fiberglass in a paper shopping bag to be replaced later. The shroud is apparently there to keep fiberglass and dust/chips out of the woofer structure.
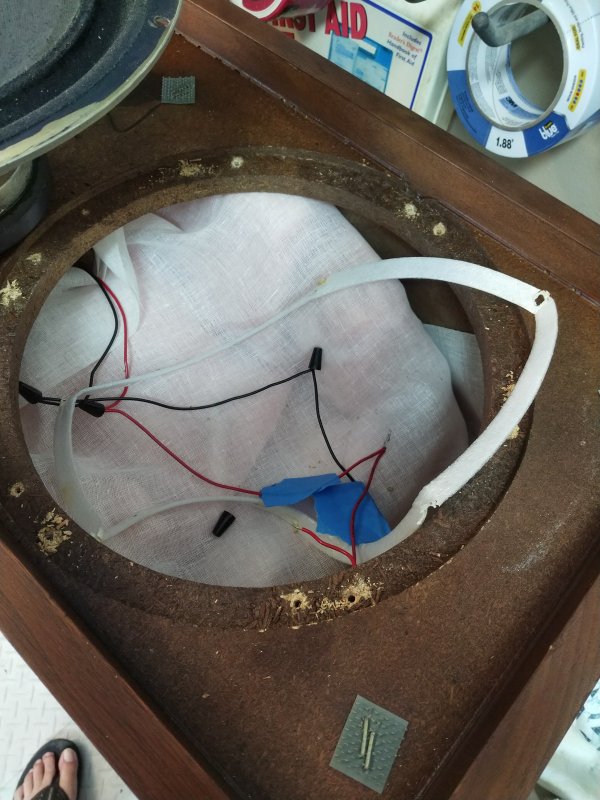
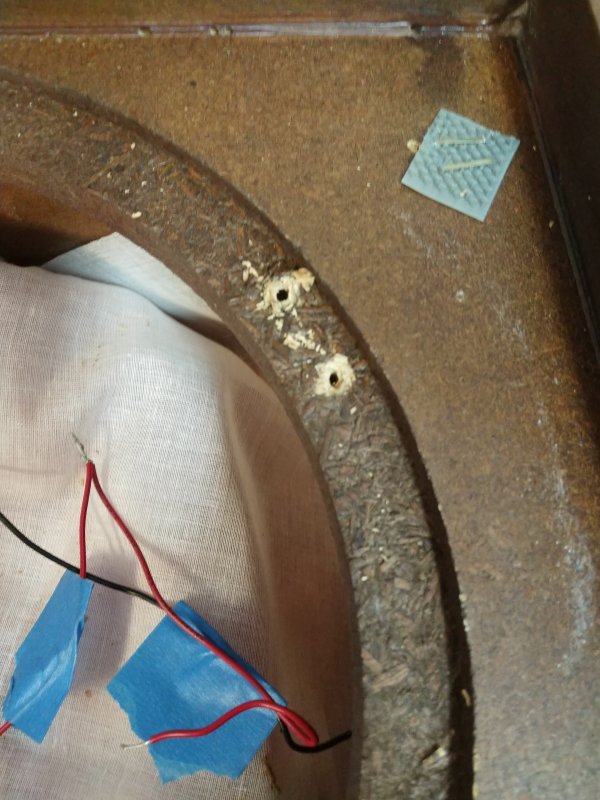
Here's where I discovered that it must have been training day at the factory. Not only were there about five extra wire nuts with short extensions of wires, but the ledge supporting the woofer had two drilled holes for each screw hole in the woofer surround and they were fairly close together. Someone had clearly not used the template correctly to drill the holes and drilled a second set. Not only did this greatly weaken the structure, but it was also causing large chips to come off in my hands from the underside of the fibreboard ledge supporting the woofer.
I was concerned that attempting to screw down the woofer again could break the ledge, so I decided to glue a couple of plywood gussets to the bottom of the woofer surround to strengthen it. I also mixed up some epoxy and after making sure I knew which holes were important, I put some tape to cover the bottom of the unused hole and filled them with epoxy, hoping that would also help to strengthen the surround.
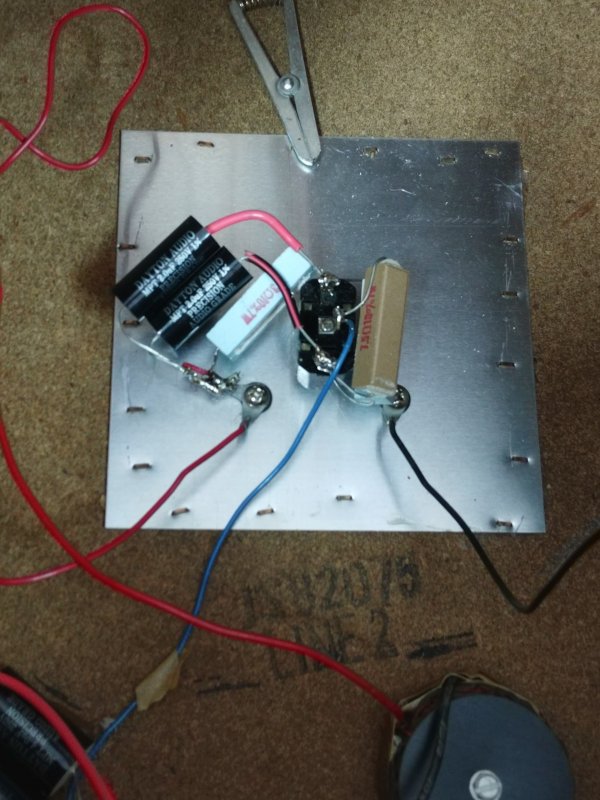
Cabinet fixed, I turned to the crossover, which is fairly simple in the Model 6 - replacing the old Temple capacitors with new Dayton audio capacitors from Parts Express. In one of the speakers, two of the capacitors showed some signs of stress, so it was clearly necessary, even though the speakers had played before I did the rehab. I soldered the new capacitors to the red terminal leg and the switch:
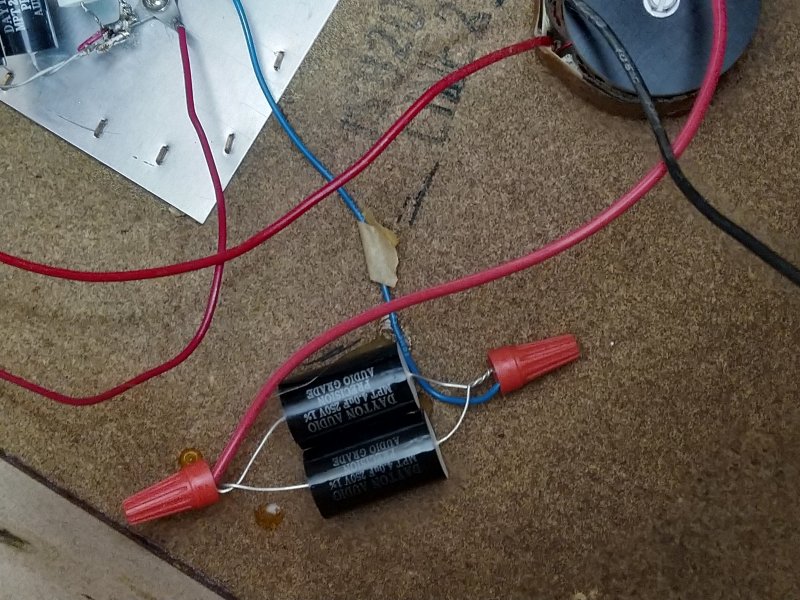
Then I replaced the inline capacitor going to the tweeter and hot glued it to the bottom of the cabinet. I didn't have any heat-shrink insulation, so i used wire nuts to make the connections, which is how KLH did everything anyway.
I cut a few new lengths of wire (black for black and red for red) and eliminated some of the unnecessary short segments. Then I reinstalled both the woofer and the tweeter (though I suggest putting in the first piece of fiberglass that goes in the bottom of the speaker behind the tweeter before reinstalling the tweeter - easier to see). Connected all wires, put all fiberglass back in, and replaced the shroud before reinstalling the woofer. Last step to date was to re-seal the woofer surrounds with the butyl dope supplied by Vintage AR on EBAY or RoyC on this forum (Thanks Roy!). I applied two light coats to each.
Don't yet have finished pictures as I still have the original cloth grills that are kind of ratty and dirty - the emblems are long gone. I ordered some cloth and will make new grills for a slightly more modern look - and will post a finished picture when done.
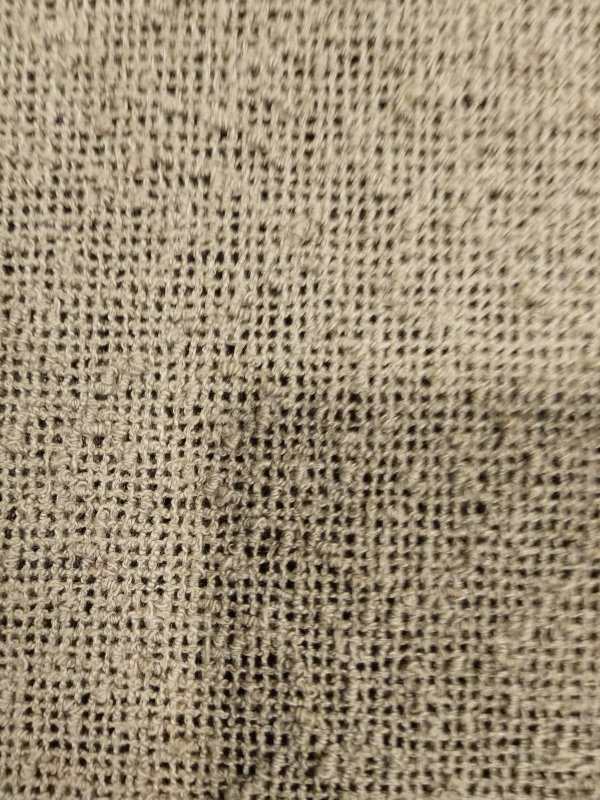
Here's a close-up of the original cloth:
Now the good part: These speakers sound incredible! I've been testing on a bunch of music from rock to theater, to folk, but I have to say that my jazz classics (Coltrane, Desmond, Baker, etal) are just marvelous to hear - the trumpets, saxes, clarinets, bassses - all are crystal clear, the bass is evident but not overwhelming, and I'm just driving things with a 50 watt old Sonos amp for now (still working on some electronics repair to some vintage stereo equipment that was also in the closet!)
All in all, very satisfied and I hope these speakers last for another 50 years with my kids...
Enjoy!
First, I should mention that there's always a surprise of some kind when you do these types of things. I am the only owner of these, so I'll get to the factory screw-ups later. But first, I decided to refinish the cabinets. From the pictures below, you can get a decent idea of the condition - not bad, but plenty of small scratches, a few deeper ones, and paint smudges from hitting walls or having something on the top. I have been woodworking for many years, so had a decent idea of the kind of finish I was looking for. You can see from the pictures below that the finish is not only scratched, but also sort of muddy - not much clarity to the wood grain. That's typical of stain or oil (and 45 or more years of age).

Unlike a prior restoration of a pair of Model 17s, I wanted to strip the finish, use an aniline dye on the bare wood, and top-coat with a padded shellac and rubbed wax finish. So first I taped off the woofer and tweeter to prevent any sanding dust intrusion by using some overlapping manila folders and painters tape all around the edges. Then I began to sand the veneers. I started with a variable speed orbital sander at 180 grit on a setting of 2 out of 5. The objective here was to get most of the finish off but not all - that would be left to less aggressive grits. Then I went to 220 grit with a setting of 1 out of 5 and then 320 with 1 out of 5. Note that some random orbital sanders can be very aggressive and you want to be careful not to sand through the veneer, which creates a much larger job.
This is what the top of one looked like when I was almost done sanding. That lighter area in the middle is sapwood and not too much sanding. I could have toned the sapwood later if it was too light, but decided it wasn't necessary. Any further sanding was done on a spot basis with hand sanding just on the areas where there was still finish. you can see some on the edges.
Once the basic sanding was done, I tried to raise some of the scratches by applying a hot iron over a damp cotton cloth to create steam over the scratch. This will often swell the wood that was compressed by a dent or scratch and allow you to almost eliminate the scratch completely. After one more light sanding, it was time to color.
Then I applied a water based aniline dye (dark walnut). It looks a little reddish in the light of my garage, but it really was more brown that red. It's important to flood the wood quickly with the water-based dye as if you apply it sparingly, you may get lap marks where you can see where the leading edge of the dye was applied. apply liberally and then wipe off the excess with a paper towel. This is what the dye looks like when wet after being applied.
After the dye was throughly dry, I used a shellac pad to lay on a thin coat of shellac that would fix the wood fiber grain that was raised by the water-based dye. A shellac pad is easily made by using a piece of old sock or cotton cloth in a ball that is wrapped by any smooth cloth - old t-shirts work well. The pad is dipped in shellac and then wrapped by the outer layer, twisted a little to form an egg shape in the hand, and then applied with long smooth overlapping strokes lifting the pad off the surface as you reach the edges. The idea is to lay down a thin layer each time rather than one thick layer.
In between coats, I lightly sanded with 320 grit paper and wiped off all dust. Then I repeated the process several times. Eventually, you get something that starts to look like this:
A little buffed wax and you can start to see why I like the dye/shellac/wax combo. It's not shiny at all but just has a clarity and lustre that's hard to get with oil.
Cabinets done, I then turned to opening up the boxes to replace the capacitors and re-dope the woofer surrounds. I carefully unscrewed both the woofer and tweeter and gently lifted each out of the cabinet, making sure to label each connection with painter's tape and a marker. I also removed the shroud covering the fiberglass behind the woofer and wearing gloves, put the fiberglass in a paper shopping bag to be replaced later. The shroud is apparently there to keep fiberglass and dust/chips out of the woofer structure.
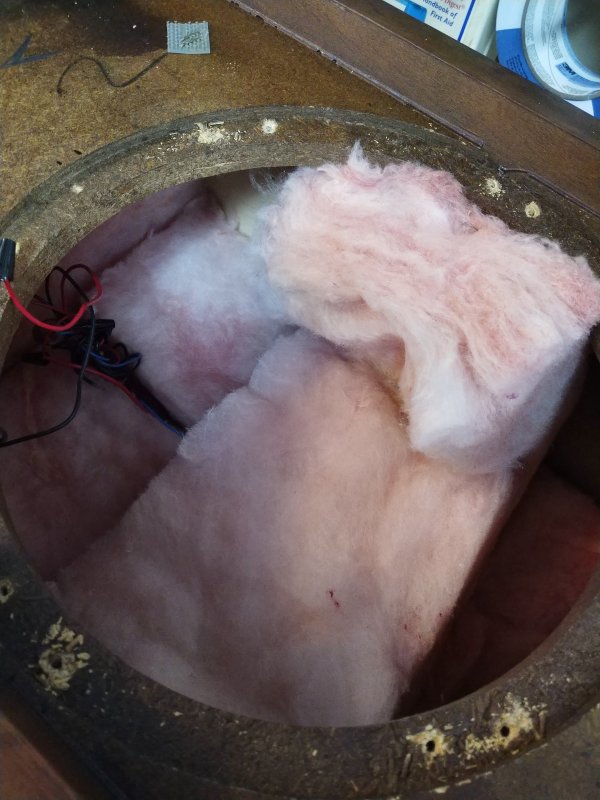
Here's where I discovered that it must have been training day at the factory. Not only were there about five extra wire nuts with short extensions of wires, but the ledge supporting the woofer had two drilled holes for each screw hole in the woofer surround and they were fairly close together. Someone had clearly not used the template correctly to drill the holes and drilled a second set. Not only did this greatly weaken the structure, but it was also causing large chips to come off in my hands from the underside of the fibreboard ledge supporting the woofer.
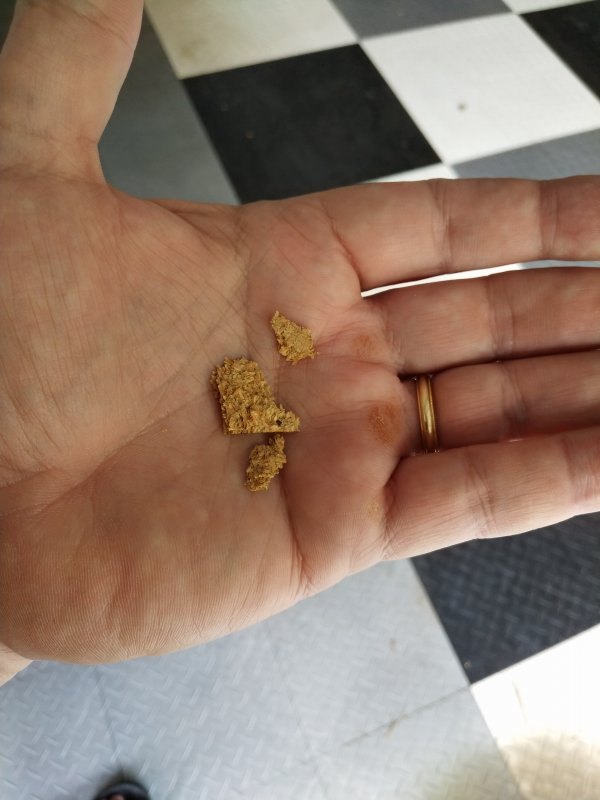
I was concerned that attempting to screw down the woofer again could break the ledge, so I decided to glue a couple of plywood gussets to the bottom of the woofer surround to strengthen it. I also mixed up some epoxy and after making sure I knew which holes were important, I put some tape to cover the bottom of the unused hole and filled them with epoxy, hoping that would also help to strengthen the surround.
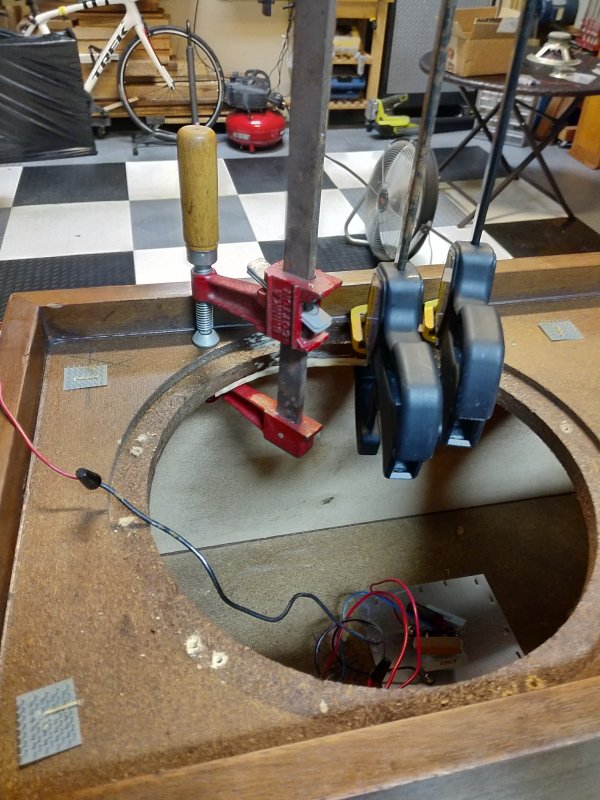
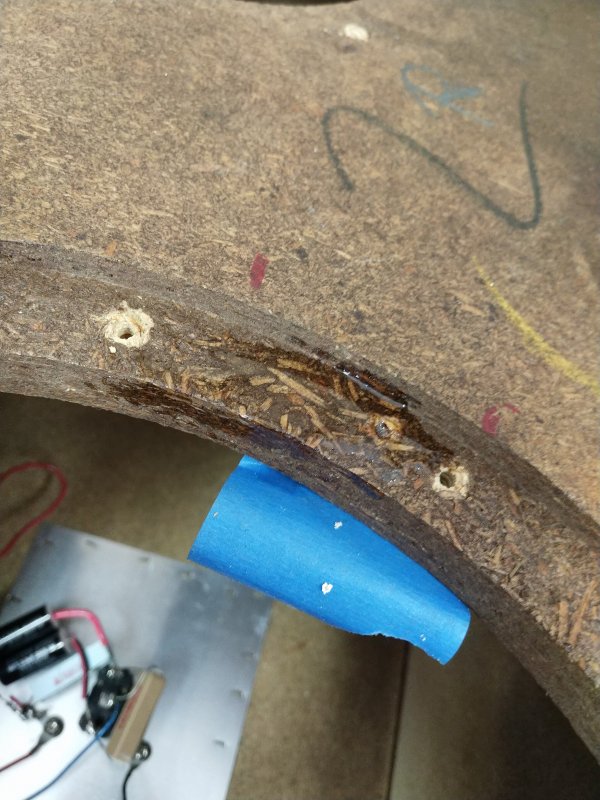
Cabinet fixed, I turned to the crossover, which is fairly simple in the Model 6 - replacing the old Temple capacitors with new Dayton audio capacitors from Parts Express. In one of the speakers, two of the capacitors showed some signs of stress, so it was clearly necessary, even though the speakers had played before I did the rehab. I soldered the new capacitors to the red terminal leg and the switch:
Then I replaced the inline capacitor going to the tweeter and hot glued it to the bottom of the cabinet. I didn't have any heat-shrink insulation, so i used wire nuts to make the connections, which is how KLH did everything anyway.
I cut a few new lengths of wire (black for black and red for red) and eliminated some of the unnecessary short segments. Then I reinstalled both the woofer and the tweeter (though I suggest putting in the first piece of fiberglass that goes in the bottom of the speaker behind the tweeter before reinstalling the tweeter - easier to see). Connected all wires, put all fiberglass back in, and replaced the shroud before reinstalling the woofer. Last step to date was to re-seal the woofer surrounds with the butyl dope supplied by Vintage AR on EBAY or RoyC on this forum (Thanks Roy!). I applied two light coats to each.
Don't yet have finished pictures as I still have the original cloth grills that are kind of ratty and dirty - the emblems are long gone. I ordered some cloth and will make new grills for a slightly more modern look - and will post a finished picture when done.
Here's a close-up of the original cloth:
Now the good part: These speakers sound incredible! I've been testing on a bunch of music from rock to theater, to folk, but I have to say that my jazz classics (Coltrane, Desmond, Baker, etal) are just marvelous to hear - the trumpets, saxes, clarinets, bassses - all are crystal clear, the bass is evident but not overwhelming, and I'm just driving things with a 50 watt old Sonos amp for now (still working on some electronics repair to some vintage stereo equipment that was also in the closet!)
All in all, very satisfied and I hope these speakers last for another 50 years with my kids...
Enjoy!