• The move to the new server is done. There are some software and database maintenance updates in process. This has us passing the hat around to help out. We appreciate any donations. Seriously, even a dollar helps. The payment page may be found here - https://www.audiokarma.org/support.html

LED Upgrade (Guide) - Pioneer SX-636 (w/pics)

heem6

Member
Just did my second one this afternoon. The regulars here probably already know how to do this, but maybe this will come in handy for new enthusiasts just getting into this hobby. Apologies if already posted.

czKLOs6.jpg


1. Pull off all knobs from front of receiver. Remove hex nuts from function and bass knobs.
2. Remove wood cover (2 large screws on each side).

SaHFqDC.jpg


3. Remove the two very tiny screws on top of faceplate holding it to chassis. Be very careful as they strip easily and also fall through cracks easily! (Stud finders are helpful for picking up dropped screws.)

NjRF4mK.jpg


4. Remove faceplate and gently pry the plastic/rubber plate (with the AM/FM dial on it) off the face. It's glued on at the bottom, just go slow). BE VERY CAREFUL not to break off the dial tuning pointer needle. They are extremely fragile.

5. Gently pull out the old fuse lamps.
6. Gently grasp the LED in the middle with your needle nose pliers.

7gmV0ev.jpg


7. Snug it up underneath the fuse mount and gently push it upwards until it slides into place.

tlXcSzz.jpg


8. Power on and check results.

uFOsEbd.jpg


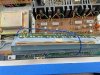
9. To replace the meter lamps, you must detach and lift the metal housing they're mounted in. Turn the receiver around facing away from you. Unscrew screws 1 and 2 in the picture, and gently move the capacitor (3) and black wire (4) out of the way.

s92cUor.jpg


10. The fuse lamps are hiding underneath. You can probably put the LEDs in by hand, they should be facing downward in this picture.

gUtxML2.jpg


11. Slide the cardboard/construction paper piece back in place and power the receiver on to check.
12. Reassemble receiver.

I would post a final pic but my phone and camera both refuse to show the new blue color. It looks fantastic though, just what I was hoping for - kind of like the picture below, but more blue and less purple. It's a thick and solid blue, not thin or overly bright.

Z7wAv3U.jpg


P.S. I purchased the Cool Blue LED fuse lamps from projectblk86 on eBay. I even made a mistake on my order and he called me on the phone on Saturday night and spent an hour helping me find a solution. Ridiculously awesome customer service. He mentioned he has new, amber colored wedge lamps coming in soon as well. Probably look great on the x50 and x80 series. http://stores.ebay.com/projectblk86?_rdc=1
 
Last edited:
Register to hide this ad
Nicely documented. Even if it HAD been posted already, additional images and instructions are a good thing.

It appears to be very well and evenly illuminated.
 
Nice write up. I just changed two of the dial lamps in my newly acquired SX-363. I was able to do it from the back, without taking of the face plate. I just remove that metal panel, then unscrewed the little circuit board, which lifted up and exposed the lamps. It was a little tricky because the circuit board couldn't move very far up, but it did work, and I didn't need to unglue the plastic front plate.

I see your pointer lamp is out too. Have you tried to replace that yet? Mine is out as well. I just got an explanation of how to change it on the thread about my 636 here: http://audiokarma.org/forums/index.php?threads/my-first-pioneer-sx-636.728527/#post-9847737
 
Hi - thanks for the kind words and the 411! HERE'S the thread you want, it's got pictures as well (2nd page).

I was able to replace the lamps on my first 636 without damaging the needle pointer, but on this one it snapped on me. They're very brittle from all the heat over the years I guess. Anyway, you want a 2mm micro lamp for it, 8 volts and 50 amps. I tried a 3mm and it fits as well. I'm going to attempt to use a drop of super glue to put the needle back on, I'm hoping it will still transfer the light since the glue is a clear color. You can get the small bulbs from forum member DGWOJO.com.

I'd be interested in hearing how the replacement goes for you.
 
Awesome! Thanks for finding that thread. I must have missed it in my search. It looks manageable. I'm really glad I didn't snap off my pointer yesterday! I was fiddling around with it trying to figure out how to change it. Now I know to be gentle!
I've ordered bulbs from dgwojo before. I plan to get the pointer one and the STEREO indicator lamp soon.

It's nice to have others working on the same project at the same time!
 
Mr. Soundman - thanks for the kudos and you're very welcome!

WillVT - it sure is nice to have company on jobs like this! How are you removing the micro indicator lamps from that ...styrofoam?... type enclosure they're in? Mine seem to be hot glued in there?
 
As to the micro indicator lamp, I just grabbed the lead wires and pulled. Felt like pulling fresh carrots out of the ground! Hopefully I won't have too much trouble pushing the new one in. From the looks of the old on, I think I can push it in with a small screw driver or similar shaped thing.
 
Ease a very thin metal probe (like a straight dentist's pick) between the glass and plastic, and work it through
360 degrees around the glass. You will cry if you bust a lamp wire or the lamp in place.
(ask me how I know... decades ago, BEFORE the material got even MORE brittle than it is now)

As for the pointer, they make 3mm leds, and smaller.... handle the electrical details for the LED at the other end of the wire leads.
 
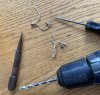
Nice heem6. I'll just add some notes on the function indicators. They are pressed into what was once pliable plastic but with age and heat the plastic has become hard. No way those lamps were coming out! I wound up pulling the wires off so had to poke the lamps from the front, which resulted in broken glass. Do them 1 at a time to be sure to attach the leads to the correct posts. I ended up pushing the lamps from the front with a small nail set, then reaming with a pick. Be sure to poke the rubber sleeve through, too. If your now-hardened plastic is like mine, drill a new hole with a 3/16" drill bit and the new LED will push in from the back with a snug fit. I did not use any kind of glue.

Installing a new needle pointer LED wasn't that difficult--just work slowly and carefully. Problem is the leads are too short and you have to splice some super-thin wires. I ended up cutting the leads on the LED very short so my splice is right up near the pointer and will have less flexing, I think.

My tech friend said he doesn't like LEDs for these old dials because they're too bright and have "hot spots" - not evenly dissipated because they are not omnidirectional like the originals. I aimed mine downward about 45 degrees so the light would bounce off the reflector. Also used warm white to look more like the originals. I think it came out nicely. Just undecided about the Stereo indicator. Wojo says to only use incandescent there but ebay seller peace.love.and.music sent an LED for there and said that's what he uses. Think I'll see if my local electronics shop has an incandescent.

As an aside--I'm doing this for a friend's son and started to do a recap. Replaced all the caps on the power supply board because I'd been told the 220uF's are notoriously leaky. All of the caps I took out (Elnas) were within spec so I think now "if it ain't broke don't fix it."

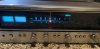
OOPS. Just noticed the photo of the front attached is "before" with half the lamps out. Will post an "after" ASAP.
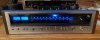
AFTER shot now attached. Knobs & cover still off--it's a work in progress.
Kentnail set.jpgpio lit.jpgtools of destruction.jpg
 

Attachments

  • newlamps2.jpg
    newlamps2.jpg
    74.1 KB · Views: 34
Last edited:
I found it way easier to replace the dial lamps, and avoid peeling away the dial face and possibly damage the needle, by just removing the lamp PCB from the rear, and it's also the access for the indicator lamps.

Why do most sources suggest peeling the face off? Seems risky....
 
I found it way easier to replace the dial lamps, and avoid peeling away the dial face and possibly damage the needle, by just removing the lamp PCB from the rear, and it's also the access for the indicator lamps.

Why do most sources suggest peeling the face off? Seems risky....
So where were you BEFORE I tore into this? :cool:
I did follow your advice when I replaced the STEREO indicator. Perfect!
IMG_0981.jpg
 
Back
Top Bottom