• The move to the new server is done. There are some software and database maintenance updates in process. This has us passing the hat around to help out. We appreciate any donations. Seriously, even a dollar helps. The payment page may be found here - https://www.audiokarma.org/support.html

M-80 Restore

Asmodeus2112

Super Member
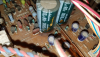
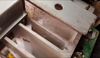
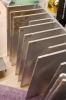
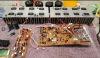
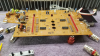
I have a functioning M-80, but it is super dirty. I am going to fully disassemble the main components and clean it. It has glue, so I need to clean the glue and repair damage from glue field. New thermal paste, trimmer pots. Probably will stop there. Reason for thread is any tips for disassembly? Particularly the Main Amp board and the heat sinks. My overview looks like it's best to desolder the output transistors first.
 
Register to hide this ad
When replacing the fusible flameproof resistors that are axial radially bent, is it best practice to bend them into a similar shape?
 
LED replacement? Some LEDs that run on 6V of the right size an color should be about it, correct? Not many 6V LEDs, so probably lower voltage with a resistor.
LED's --- Go with dark red and don't use the existing condoms. If you use the existing condoms it will look kinda pinkish no matter if you use warm white , cool white or red
 
Some LEDs that run on 6V of the right size an color should be about it, correct? Not many 6V LEDs, so probably lower voltage with a resistor.

LEDs must be used with a series resistor to limit the current. The supply voltage can be what you want (>Vf) You can wire several LEDs in series if you want more efficiency
 
Last edited:
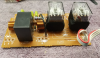
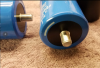
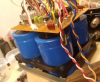
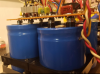
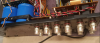
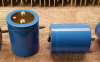
I purchased the 33000µF caps with the stud that are referenced on other threads here about M-80s. Cut the stud off. Also note that one of the caps listed has high screw terminals but the other has low. Space was very tight, but it fit. I was nervous about the stud contacting the chassis back panel. The stud is a negative terminal and on one of the caps will be -88V. I put a big square of Formex as an insulator on the back wall.

upload_2021-9-24_22-29-59.png
upload_2021-9-24_22-34-42.pngupload_2021-9-24_22-35-3.pngupload_2021-9-24_22-35-32.png
 
Last edited:
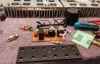
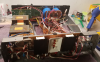
I have it all reassembled now. I heard someone describe these amps as big chassis full of air once. I can understand the reference, but there are quite a few areas in the M-80 that there is very little space and the dimensions matter. Also order of reassembly matters too. I did an ok job, but I did have to undo and then redo a few things due to incorrect order. I didn't take any pics of the completed amp, because we've all seen M-80s before. I will say that pushing the power button (on DBT of course) after putting a lot of hours into this was nerve wrecking. But to my relief it all works! Just now getting it put into my system to start listening to it.

upload_2021-9-24_22-35-55.png
upload_2021-9-24_22-43-10.png
 
Last edited:
This was a big accomplishment for me so I wanted to share. Happy to answer any questions and open for comments.

I am about to start on my second M-80, which has a lot of glue damage and has not had the TSBs done. I am researching the TSBs now, but will have questions on those.
 
I´d chuck them up in a lathe and remove that mounting stud.

index.php
 
Back
Top Bottom