• The move to the new server is done. There are some software and database maintenance updates in process. This has us passing the hat around to help out. We appreciate any donations. Seriously, even a dollar helps. The payment page may be found here - https://www.audiokarma.org/support.html

Maggie Console Rebuild: Chpt 4: 9304-20 Amp Refurb: Round One

Harlon

Active Member
Why round one? At least for the original 9304-20 amp from my console, I am planning a three stage refurb/modification plan. The first round will be doing a frame off refurb of the amp with a few tweaks. The second round will include the replacement of the stock output transformers with a set of new (brand to be determined) ultralinear capable transformers hooked up in pentode mode. The final round will include going ultralinear with the amp and incorporating Dave Gillespies' EFB circuitry.
The plan is to work my way through the stages so I can get a feel for how good the amp can be in stock configuration and how things change for better or worse as I upgrade things.

Round One:
Standard: Basically a complete rebuild with new sockets, new terminal strips, all new resistors and caps throughout. I will be installing a floating ground buss linked to the buss in the power chassis. I will be using the original 6EU7s up front, but I will be purchasing a new (tbd) quad of EL84s for outputs. I blew one EL84 early on.

Tweaks: I'll be installing grid and screen resistors on the output tubes in anticipation of adding EFB later. I'm going to split the cathodes for now with tweaked (tbd) cap and resistor values. I will be adding input caps. I've considered using higher end coupling caps. I was thinking about Auricap XOs. Not sure about that yet though.

The next few days I'm going to review my notes and pull together a final order list. I'm going to enjoy listening to the new power supply until my parts arrive. Then it's on to the next stage.

If after reading my plans you have any further suggestions, or think I've missed something, please share your recommendations. As far as this audio thing, I haven't learned anything that I haven't learned here or elsewhere on the web.
 
Register to hide this ad
After a side tip through idiocracy, I've decided to do the rebuild of the amp and preamp at the same time. I'm going to clean up everything from the tape inputs to the binding posts. Hopefully this will give me a real good picture of what the console is capable of in tweaked stock form.
 
Last edited:
Harlon:
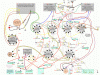
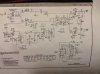
I used this schematic to rebuild my 9300 amp as a stand alone with great results, if this will help.
Patrick
MagVox Tube Amp- AJmods.gif
 
Harlon:
I used this schematic to rebuild my 9300 amp as a stand alone with great results, if this will help.
Patrick
View attachment 633042
Hey thanks, I wish everyone did schematics like this. They make a lot more sense when you're just getting started with this stuff.
I'm following your 175 build as well. For this console I separated the power supply from the amp chassis. The intent is to build a number of amp only chassis to plug and play in it. I'm going to start with the 9304-20, but down the road I plan on building an amp only 175. I'm really intrigued by Cademan's 6L6 modded 175.
Thanks,
Harlon
 
Okay, spent the last week tinkering with the console to get things into listening shape. In the meantime made some changes to my plans for the 9304-20 portion of the amp.
After hooking everything up I continued to have issues with the amps performance. Made several tweaks and chased several demons which lead to the question: to upgrade or not to upgrade output trannies? My conclusion along with the advise I recieved from the forum is to stick with the stock trannies. So at this point we're jumping straight to the lightning round with this amp. In the next day or two I'm going to order the necessary bits and pieces to complete the rebuild of the preamp, amp and crossover. For the crossover I'm just going to swap the caps. I'll check the resistors and keep them unless they've wandered. The preamp and amp are going to get the full recap and reresistor job as before. A new set of tubes will be ordered shortly as well.

Once this work is completed, I still need to do a run through of the radio circuit and MPX. There are few old caps in both that should be updated and a electrolytic in the MPX to change. I'm hoping to get everything refurbed and ready to go back into the console by Thanksgiving. Definitely by Christmas.

While I'm not doing things my wife would like me to be doing, I've begun thinking about how to modify the VM 6V6 I picked up last month. I'm leaning towards rebuilding it as an Amp175 clone, so I can use it in this console with my newly existing stand alone power supply. I need to look at my voltages, but I'm fairly certain with using a 5AR4 in the rectifier slot I can get enough voltage to make things work. Just not sure on the amps. We'll see. If I have enough volts/amps to make it work I may try to push more watts and try a 6L6 variant of the 175. If the power supply will cover it I may reappropriate my transformer funds to buying beefier OPTs that can handle the 6L6s. Again, we'll see. I'll have a week or so waiting for parts to show up, then build time, so I'll have some time to crunch the numbers and see if my ps has what it takes. Wish me luck.
 
Well, put in orders for a quad of TAD-EL84-STRs, and all the bits and pieces I think I need to complete the Preamp, Amp, Crossover and MPX. I'm sure I forgot something, but I'm good to start and probably get close to finishing.
I ordered everything I wanted but the crossover caps. I had a pair of .1uf Auricap XOs and .047 Vitamin Qs on my order. Just couldn't pull the trigger. Will be easy enough to swap them in later on if I feel the need. Think I'll stick to the orange drops for now and use my fancy cap money to recap my VM 6v6.
 
Been talking to GordonW on the side about his Amp150/Amp175 6L6 mod. Trying to see if I can swing a 6L6 powered amp chassis with my power supply. I think my system doesn't quite have what it takes.
Anyway, I subbed in a 5AR4 in the rect socket to find out exactly what voltages I could get out of my ps and a little bigger drop resistor in to keep things at 300 volts for the phase splitters. I ended up with 352 volts B+ once all was said and done.
I know it's a little hot, but I decided to let fly considering the ST35s run that hot or a little hotter in the same tubes. Plus these tubes are no longer the original set so I won't be overly upset if something goes sideways.

To the point of my post.

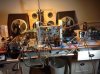
God, I'm in love with this amp. It's literally just a bunch of pieces and parts strung together on an old office table. But I love it.

Someone more knowledgable can probably explain, but somehow the extra ~30 volts of B+ ironed out the last of the wrinkles. It's awesome.

I'm actually dreading breaking it down to finish the rebuild. For fear that it won't sound this good when I'm done.
image.jpg
 
image.jpeg
Maggie got a present today.

First of three parcels of parts for the amp rebuild arrived by Fedex today. Don't know if these were the best option, but they're what I went with. They're in right now and I have the Doors playing at a comfortable level. Sounds pretty good to me. Maybe a little more separation and clarity on the lower bass frequencies.
 
So I decided to skip ahead and start on the MPX refurb first.
image.jpeg
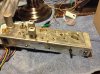
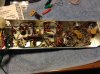
Here is a shot topside. No real changes to be had here. This is a model 7001-20 MPX with a 12AT7, 6EU7 and 6AB4. I was going to swap out the 9-pin sockets but decided against it. They look pretty good and I don't want to muck up the tube retainers.
image.jpeg
Here's a shot below decks. I will be replacing all the larger ceramic caps, a few electrolytics and select resistors.

More to come.
 
wafer sockets are usually OK for non-power tubes that don't get stupid hot. I'd clean them and see what you get. I wouldn't touch the ceramic caps either. Messing around with components in those things can require an alignment, and ceramic caps seldom go bad. Swap the electrolytics and any off-value resistors and call it square.
 
This unit is the only part of the console that didn't work when I originally got it. The radio worked but no fm stereo. Someone early on suggested that either the 4uf lytic in the main circuitry might be bad or the 6EU7 was bad or had a dirty socket.
I have lytics to replace the 4uf in circuit and the 30uf smoothing cap.
As far as the ceramics, I bought replacements for .02uf caps before and after the two halts of the 6EU7 AF Amp. As well as the larger .1 and .05 cathode bypass caps for the 12AT7 and 6BA4.

Resistor-wise I have replacements for all the cathode resistors and all the various resistors in the AF Amp section.

I figured I'd be okay cleaning up the AF Amp section as its after the MPX works, just boosting the already split signal.
Am I wrong on that?

Likewise, would you stay away from the othe tube cathode caps and resistors?

I won't be upset either way. It's all just practical experience. The more I solder the better I get.

I have schematic but it's too big to post and my copy is too small to get a good pic.
 
ok, this one is set up a little different than others I've seen. The caps in and out of the AF amp stage should be OK to change, just stay away from any upstream of that. The stuff in the oscillator and the doubler will affect alignment.
 
Here are some action packed before and after shots of the old and new smoothing capacitor and drop resistor for the MPX.
image.jpeg
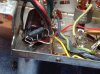
Here is the ginormous 2 watt 15k drop resistor tied into the can cap.

image.jpeg
Here is the new 47uf cap and 15k resistor.

My soldering looks a little suspect but there is continuity everywhere there should be. I repurposed a kitchen sponge to clean my regular soldering iron tip. There must have been some cleaner or something on the sponge. The tip just kind of melted away. I had to use the pin point tip to do these joints.

For all those who would advise me against it, no the resistor was not out of spec. I think it was 14.9k. I didn't have to change it but I had this really cool Dale Resistor just begging me to solder it in.
 
Hey, the more new parts the better! If you have the parts, put them in. Nice work.

I highly recommend rewiring the 6EU7 sockets for 12AX7. My 9302-00 came with Mullard made 6EU7's(test NOS) and using Telefunken smooth plate 12AX7's instead makes a world of difference in imaging and clarity. It really does give you so much more versatility in tube rolling.
 
I agree with the flexibility, but that will have to wait til I have a problem down the line. I've got four 6EU7s in this project and only one spare 12AX7 lying around. No money left in the budget right now for "not gotta haves." Someone mentioned this early on, but I only was thinking about the not having four AX7 replacement tubes. Flexibility and replacing worn out tubes didn't occur to me at the time. If I would have I probably would have incorporated the change into the original plans. I may think about rewiring the tube in the Tuner/Preamp though. It's pretty buried. Don't necessarily want to do that one twice.
 
Complaint to life: where oh where are you dear RadioShack?

The end of the much maligned dear RadioShack has left me without a local source for replacement soldering iron tips.

Anyone with connections to Home Depot or Lowes, feel free to suggest for me that they start carrying replacement tips for the irons they sell.
 
Back
Top Bottom