• The move to the new server is done. There are some software and database maintenance updates in process. This has us passing the hat around to help out. We appreciate any donations. Seriously, even a dollar helps. The payment page may be found here - https://www.audiokarma.org/support.html

Marantz 2238b Lamp kit

Drew Kepler

New Member
I just picked up a 2238b and some of the lamps are out. At first I wanted to go LED to reduce the heat, but I want to keep the original look and color. Anyone know the best place to get the lamp kits, and how hard is it to DIY.
 
Register to hide this ad
I have bought both OEM fuse bulbs and LED fuse bulbs off of the auction site and all have worked very well. For LED kits, I really like the kits put together by Randy at IRebuildMarantz.com. Just replaced all dial lights, input selector lights, meter lights and dial pointer light with one of his kits on a 2245. Everything worked and looked great.
As far as difficulty, it does take a lot of work, but it's not that hard. On the 22xx receivers I have worked on, I always remove the front panel, the dial and the old velum. When you do that, you can see the fuse bulbs from the front and they are simple to change. Get some 48# translucent velum from Amazon and cut a piece to match your old velum. Getting to the meter velum is more difficult and requires more disassembly. If they don't have a yellowish cast to them, you might get by without doing them. I believe some disassembly from the back of the dial area will allow you to change the bulbs without removing the front panel. But the velum is nearly always yellowed, and if you want it to look like new, you're going to have to replace it. You will need a strong double sided adhesive tape to reassemble velum and dial. Here is a thread where this was discussed recently for some ideas on the adhesive. Good luck!

http://audiokarma.org/forums/index.php?threads/adhesive-for-dial-face.728984/
 
Last edited:
I change every unit that I own to LED's, if you open any Marantz that has been used at all, the white plastic taht surrounds the lamps will be melted from the heat of the bulbs. To prevent further damage, I change to 'warm white LED's', just make sure they are the newer style that the PC board is the same size as the end caps. You can change the bulbs from the back by removing the screws that attach the metal frame to the white plastic housing.

1150d_leds.jpg

1150d with LED's, did not change velum.

1150d_leds.jpg
 
change the bulbs from the back by removing the screws that attach the metal frame to the white plastic housing

Unfortunately on the 2238B/2252B/2265B etc they don't have screws and no metal frame. The light board is clipped into the very fragile plastic housing. Any attempt to pull the board out the back will most definitely break the clips. It can be glued/taped back together but it doesn't look pretty. Neatest way is from the front on these models.
 
Unfortunately on the 2238B/2252B/2265B etc they don't have screws and no metal frame. The light board is clipped into the very fragile plastic housing. Any attempt to pull the board out the back will most definitely break the clips. It can be glued/taped back together but it doesn't look pretty. Neatest way is from the front on these models.

Sorry, never worked on these, did one with the clips, very fragile, going in from the front presents it's challenges.
 
I converted a 2216b to LEDs for everything including the stereo indicator. I don't think you can avoid breaking some part of the white plastic housings. I broke a clip that holds the pcb behind the dial. I used a dab of hot glue to hold the pcb when I was done. It didn't look to bad. I also cracked the housing around the tuning meter. The crack wasn't too bad and I used a piece of that foil tape for ducts. The housing around the meter was like egg shells. For the stereo indicator I used the old bulb and removed all of the glass from the metal base and hot melt glued a surface mount LED at the right height. It was a little fiddly to get the height right.
 

Attachments

  • Marantz 2216b-102515-032~01.jpg
    Marantz 2216b-102515-032~01.jpg
    111.7 KB · Views: 56
  • Marantz 2216b-102815-038~01.jpg
    Marantz 2216b-102815-038~01.jpg
    36.8 KB · Views: 56
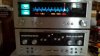
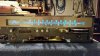
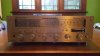
This is the 2238B. Single owner, still had the manual. Needs deoxit, the volume was a little scratchy. Two or three lamps out, but overall in really good condition. Also the mono push button is a little hard to engage, I have to put a lot more pressure on it to get it to click. Not sure what would cause this, anyone wants to chime in on that Im listening.
 

Attachments

  • 20160823_201919.jpg
    20160823_201919.jpg
    51.9 KB · Views: 39
  • 20160823_201948.jpg
    20160823_201948.jpg
    36.8 KB · Views: 32
Also the mono push button is a little hard to engage, I have to put a lot more pressure on it to get it to click. Not sure what would cause this, anyone wants to chime in on that Im listening.

Lube the part of the switch plunger that the little wire clip under the coil spring runs in.

Tom
 
I'm going out to get some deoxit tomorrow, is there a lubricant that works best or does the deoxit do the trick for cleaning and lubricating.
 
Deoxit has a sister product called Faderlube F5. On pots, I give several flushes with Deoxit while turning the shaft back and forth to clean. After several repetions of that, shoot it with Faderlube to lubricate the pot. Not sure if that is the best method, but it really quiets down noisy and intermittent pots for me. For switches, just use the Deoxit, except when things aren't working smoothly like Tom described above.
 
The bay kits look expensive compared to the other option but I'm surprised that dgwojo hasn't been mentioned. His name usually shows up in all discussions of lamps.
 
A button that is hard to get to lock down can also be the plastic trim ring on the back of the faceplate. They come off and get pinched between the spring and the button stop. Make sure they are all attached and secure.
 
Picked up some deoxit yesterday. I was able to take the top cover off and hit the volume pot, no more noise. I'm going to have to do some more disassembling to get to the mono push button. Lots of dust inside the receiver. Can I just use dust off and blow everything out?
 
Without getting into liquids, which are fine if done correctly, a soft dry paintbrush and dust off will do a pretty good job and shouldn't hurt anything.
 
A button that is hard to get to lock down can also be the plastic trim ring on the back of the faceplate. They come off and get pinched between the spring and the button stop. Make sure they are all attached and secure.
It was indeed the plastic piece that's mounted to the back of the faceplate. Thanks for the info.
 
Back
Top Bottom