• The move to the new server is done. There are some software and database maintenance updates in process. This has us passing the hat around to help out. We appreciate any donations. Seriously, even a dollar helps. The payment page may be found here - https://www.audiokarma.org/support.html

Marantz 2500 Refurb

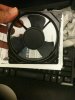
Hi TMZ, I don't know as I didn't take Mech up on his kind offer. You might try PM'ing him. I had a new unused (but old) Rotron fan so used that.

Danged if I can't find the box full of fans right now, been looking for a day or two. If I do find them, I'll post back here and let you know. Sorry to pull your hopes up just yet.

Bart
 
Thanks everyone about the fan and rBuckner great-looking work and excellent thread very helpful and nice to read !!!!
 
FYI, EMB Pabst 4606Z is a high quality, all metal, ball bearing, low noise fan that fits with a minor modification to one of the screw brackets.

Tom

Out of curiosity, how come you decided to go with this as opposed to a quiet operation computer fan like a Gentle Typhoon? Just curious. I ask because I recently built my own desktop and spent a ton of time research fans for it as I have it water cooled.
 
Hi Sanc

Tom did use a "low noise" fan. The one I had on hand and installed may have been a "low noise" type or maybe not. At it's normal low speed you can't hear it unless there is no audio so it was good enough and quieter than what was in there. It's the first 2500 I've ever come across so I don't know if it's original fan (outside of the rattle it made turning off) is normal for these or not.

Aren't most computer fans 12Vdc types? I think they're certainly smaller than this fan so the one you mentioned wouldn't fit anyway?
 
FYI, EMB Pabst 4606Z is a high quality, all metal, ball bearing, low noise fan that fits with a minor modification to one of the screw brackets.

Tom

I absolutely concur. Echowars recommended the Papst fans when I was restoring my 2600, and I eventually selected the 4606Z. It's basically a drop-in replacement, and IMHO, much quieter than the original fan. Superior in every way - you will absolutely not be disappointed. :thmbsp:
 
The 2500 and 2600 use 120VAC fans so that is what I wanted to use.
My experience mirrors EchoWars', Pabst makes great fans.
This is no way scientific, but the old fan at full speed read 15dB(A) higher on my spl meter than the new fan at full speed. The old fan had a 'chirp' at low speed, the new one is dead quiet, at least to my ears.

Tom
 
Fantastic looking work . Thanks for all the pictures and detailed shots . Could you tell us where you found your 100 v 8200uf caps from ? I tried looking at digikey and mouser and coundn't find that size listed . Thanks again for all the pictures and taking the time to share .
Brian
 
Hi Brian

Thanks for your kind words! I got them from Mouser: 667-ECE-T2AP822FA and they're in stock.
 
Danged if I can't find the box full of fans right now, been looking for a day or two. If I do find them, I'll post back here and let you know. Sorry to pull your hopes up just yet.

Bart

Ok, found one of them (right behind me on my work bench, natch!)

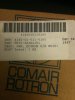
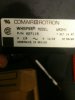
Its the Rotron WR2H1 Whisper fan, 115VAC, an older and now obsolete or superseded part, you can see a spec sheet here:
http://datasheet.octopart.com/027119-Comair-Rotron-datasheet-11768176.pdf

Whisper AC - WR2H1 - 027119
(Family) (Model) (Part Number)
Electrical Specifications
Rated Voltage: 115 VAC
AC Frequency: 60 Hz
Power Supply: 10.0 Watts
Line Current: 0.11 Amps
Locked Rotor Current 0.14 Amps
Nominal Speed: 2350 RPM

Mechanical Specifications
Dimensions: 4.72in x 1.50in
Weight 17.0 oz
Max Airflow @ 0 in H 2O 72.0 CFM
Max Pressure @ 0 CFM 0.128 in H2O
Noise 37.6 dBA
 

Attachments

  • IMG_0582.jpg
    IMG_0582.jpg
    64 KB · Views: 31
  • IMG_0583.jpg
    IMG_0583.jpg
    43.4 KB · Views: 36
  • IMG_0584.jpg
    IMG_0584.jpg
    70.1 KB · Views: 44
Last edited:
I've heard the best place to hide things is out in the open! I do that to myself regularly! Thanks for the info, I bet there's an equivalent fan in Comair's line or better yet Pabst! I bet that ball bearing model Tom used is already "whisper" quiet though.
 
I've heard the best place to hide things is out in the open! I do that to myself regularly! Thanks for the info, I bet there's an equivalent fan in Comair's line or better yet Pabst! I bet that ball bearing model Tom used is already "whisper" quiet though.

here's the Pabst specs from The links shown above:

Nominal data
Type 4606 Z
Phase 1~
Nominal voltage VAC 115
Frequency Hz 60
Speed min-1 3100
Power input W 18.0
Min. ambient temperature °C -40
Max. ambient temperature °C 85
Air flow m3/h 180
Sound power level B 5.6
Sound pressure level dB(A) 45

Note that speed is 3100 rpm with corresponding increase in CFM airflow of 180 and SPL of 45 db(A) at nominal full speed.

The Rotron Whisper AC is running at 2350 rpm with a lower CFM airflow of 72 and an SPL of 37.6 db(A) at nominal full speed. IME, these sleeve bearing fans can run a good long time with just occasional maintenance.

So a lot depends on your airflow needs for the amp tunnel and overall noise when running at reduced speed and full speed as the 2500 sets it. I'm sure at the lower speed both fans will obviously be quieter, but a full power there will be a lower speed, lower air flow, and lower noise for the Whisper. Just need to figure out if its enough to keep the unit cool enough.

A typical engineering problem for fan systems. They both have the same form factor so both should fit and would be a reasonably easy thing to try each and see how they work.

I think Rotron still makes something that fits this description, ie low noise fan.
 
Back to work this evening!

First item is a sample of whats all wrapped up like a roll of toilet paper inside a cap. The paper on the left is impregnated with whatever stuff they use for electrolyte. It is VERY smelly! The paper is 2.5mils (63.5microns) thick and the aluminum sheet on the right is 3.5 mils (89microns).
10831936275_bdc8f2735a_z.jpg


The cleaned out can. I scraped it out with a small flat blade screwdriver and a hobby knife with a curved blade. I thought it may be easier to bust out tthat stuff inside if it were frozen but that actually makes it worse. If I had some liquid nitrogen that would do the trick!
10832255233_9a86aa70e8_z.jpg


I cut out some discs of .020" lexan to glue into the bottom for an insulator. The strip I had on hand wasn't quite wide enough to make a circle but it is wide enough to prevent any contact of the cap leads to the case.
10831985555_5364a276c3_z.jpg


I borrowed someone's idea of taping the caps end to end with electrical tape. The negative terminal of one end aligns with the positive terminal on the other cap.
10832306673_1bbb861294_z.jpg


A quick test fit in the can reveals an "uh oh".
10832301583_b6d072c177_z.jpg


I went back to Mouser and rechecked what I could get and nothing shorter is available so I march on. Here is some wiring. The black wire is the common center node and the white wire will be the negative one.
10832298263_9f3ef74452_z.jpg


Here's the other end. The black wire was cut to length and stripped about 3/8" at the terminal, crimped down and soldered on. The yellow wire is the positive node.
10832024216_e615c632b8_z.jpg


Another fitment check and it looks a lot better! The plan is to order some mondo 3" heatshrink to splice the sides together. I put the cut at the place the clamp hits to provide the most support. Yep, got that tip on one of the cap rebuild posts too!
10831967995_9e3b490226_z.jpg


The payload is in the silo!
10831964145_52daa24677_z.jpg


The top covers were drilled out for the wires. After the caps are potted the wires will be pulled through as far as is comfortable, stripped and wrapped around the bottom of the lug. Again, I ripped off this idea!
10831959975_ea257d4db4_z.jpg


Some discs were punched out of the lexan with a paper punch and epoxied onto the inside of the top cap for insulation. I also dabbed it around the perimeter to coat all metal so there won't be a possibility of shorts.
10832123804_5919d9118e_z.jpg


So off to my job they go tomorrow to get potted with the thermal epoxy I mentioned a few posts back. That should be fun! :D
 
Hi RBuckner ,
It was early in the morning when I asked where you got your main filter caps and forgot that I had only tried parts connection and digikey . I want to thank you and all the others that share their knowledge and know how on these forums . Too bad we can't get our government to work together and help each other out like everybody here does !! I'm watching with great interest on all your work , especially the dual core caps restuffing . Thanks again ,

Brian
 
I did get to pot the caps at work today, you can see the black "moat" around the caps.
10849383253_f29f6c37ae_z.jpg


Wires are pulled through the lids and the lids taped in place (2 laps) with electrical tape. It seems plenty strong so I'm going to forego the heatshrink as I'd have to wait for it to get here. I will order some next time I need something else.
10849109926_22edec8a22_z.jpg


Each wire is cut to about 1" long and stripped as close as is practical. Then the remaining insulation is carefully nibbled into with cutters and pulled off. Then the wire is re-twisted then wrapped around the post bottom.
10849039625_26c6bfd3f0_z.jpg


One cap all done. There's not a lot of solder on there yet. Once the final soldering is done I'll use a big 140W gun to get it all melted at once.
10849191024_7124cdf03e_z.jpg


The clamps are on and we're ready to reinstall them. The clamps did bridge the gap nicely and it's a sturdy assembly. A prayer of thanksgiving was offered!
10849099556_316be81583_z.jpg


Back on the bottom side, melted insulation was trimmed as necessary and 1/8" diam. heat shrink tubing is installed.
10849182104_115ab36c72_z.jpg


All wiring is installed again and 2.2uF bypass caps are installed.
10849023355_2a49de0d33_z.jpg

10849355423_440c321760_z.jpg

10849016405_13f859cd58_z.jpg


I brought it up slowly on a variac, monitoring the voltages all the way. After that it was time to lay it right side up and hook up some test speakers. Well whaddaya know, it works fine! I've been enjoying some Supertramp as I type this. That's really it for the electronic work unless I redo the function LEDs. The scope needs to go back in too. Then all the adjustments and tuner alignments are to be done.

There's some faceplate damage I hope to minimize and the bottom cover needs the screening replaced as a lot of it is torn. Then final reassembly can commence. I'll still be adding posts until the project is completed and audio analyzer checks are done.
 
Thanks, Randy!
This thread has been a big help to me, I'm a couple of steps behind you in a 2500 restoration.

Tom
:thmbsp:
 
Your welcome Tom and I'm flattered that you're learning from me! I actually was just lying in bed feeling like I better get that nicer Pabst fan so I just ordered it. Now I'll be able to sleep! :boring:
 
Your welcome Tom and I'm flattered that you're learning from me! I actually was just lying in bed feeling like I better get that nicer Pabst fan so I just ordered it. Now I'll be able to sleep! :boring:
:yes:
I also replaced the fan and soft start resistors with 25W vitreous enamel types like Glenn recommended in this post. I couldn't source the parts he recommended so I used these, from Digikey:
10Ω L25J10RE-ND
750Ω L25J750E-ND
mounting brackets 9E-100-ND,
4.7KΩ (5W) ALSRJ-4.7K-ND.

Tom
 

Attachments

  • 2500 ss.JPG
    2500 ss.JPG
    113.1 KB · Views: 72
Thanks for the info! I did see all that this morning at work (don't tell the boss!), after ordering from Mouser last night. Dang it! I'm going to see what I already have at home at lunch.

P.S. The 4.7K part number is actually ALS5RJ-4.7K-ND. All are in stock so that's good.
P.P.S. No luck at the home storeroom, order submitted to Mouser but with different parts.
 
Last edited:
Back
Top Bottom