Hello.
As part of my restoration and on the advice of enough members, I decided to use Mouser.ca (for those who do not live in the Great White North, Mouser.com exists, too) as my source of components for the task. At the same time, it was obvious that some resistors and a few other components might benefit from being replaced. I created what Mouser calls 'Projects,' one for each board. That allowed me to export the list of components and part numbers to Excel, subsequently allowing me to generate a spreadsheet that could be useful to other AK members.
My approach was guided by some of the research I'd done. There were two that were quite instructive: here, and here. From my readings, the replacement of old electrolytic and tantalum capacitors seems to be a 'default' part of restoration. One can hope/assume that modern versions of the components will perform better to spec., and likely last longer, if the proper replacement is found. That's why a took the approach of using one of the best capacitor manufacturers (they'd clearly been used by many, many other restorers), and using their best audio line. It was an approach that I felt could only help keep the unit close to the original design of the circuit diagrams, and less so to the manufacturing cost-awareness of Marantz.
Eventually, one realizes that, with only a single handful of exceptions, the 2500's boards use standard lead spacing. There are some problems on the P700 (and one or two on P800, IIRC), however, where I was not able to get an exact fit, mainly because the board does not use standard spacing for those capacitors. One has to choose between leads that are wider than the holes or vice versa. My approach was to use the lead spacing that, in this order, allowed the cap. to sit properly on the board, or, if not, to hide the leads under the component for neatness. It's not as obvious in practice as it seems on paper.
It took me a while to come to an approach to buying caps that I felt would work. I wanted both quality and simplicity.
For the elecs., I decided to go for Nichicon, where available, and their highest quality audio line, i.e. the UKZs you have chosen. I discovered that some exact replacements are not manufactured and that, given what Mouser had in stock or would have in stock, I had to make some minor substitutions. Also, I notched up the voltage by one level of voltage; e.g., 50V -> 63V, etc., and tried to get the best tolerance at the capacitance and voltage.
For the Tantalum replacements, I went for the WIMAs, with the same approach to voltage, and the best tolerance at the capacitance and voltage.
The other issue is finding capacitor leads at the correct spacing for mounting the capacitor using the existing holes in the boards. This can limit the selection of the final capacitor as much as tolerance and voltage, resulting in compromises, some based on voltage, some on leads, some on tolerance.
As you can imagine, it took many, many hours trolling through the digital catalogue (thank goodness for modern databases that feed websites…) to arrive at the chosen capacitor for a given Cnnn.
In the end, one ends up with some capacitors that have leads a couple of mm to wide apart or too close. Occasionally, notwithstanding the likelihood that modern capacitors are in general smaller than the original ones, the physical size of the capacitor ends up causing problems and the need to order another capacitor for a given Cnnn.
It's a frustrating, somewhat iterative process. I had thought that I'd have to have two or three 'extra' orders for these complications and occasional incompleteness of the component list in my orders. I ended up with six.... :-/
The mylar and film caps. were a little harder, because I had to change WIMA range for many of the caps., because they simply were not available in the configuration needed for some Cnnns.
Then, I addressed my potential insanity of buying the best audio capacitors from Nichicon, and realized that, frankly, the overall extra cost for the entire set of boards I was updating was small in the grand scheme of things; $50 extra overall is just not worth the hassle and brings so many other benefits. So, it was simply easier to always go for that range of caps. from a single manufacturer. That simplicity likely paid for itself in spades, vs. finding the cheapest high-quality capacitor.
Another advantage is that, if one likes tidy work, there is a consistency to the board, when one has finished replacing the caps. One brand of elec. caps., with one colour (mostly), and one manufacturer/colour for the beads. Of necessity, there was a handful of caps. that had to come from other manufacturers, but, needs must, and all that.
I hope to put up a switch cleaning post in the not-to-distant future, but have other things to do before then. I already have the photos, so it will happen.
Using that information and the various approaches to choosing components, I went for the top-line audio series by Nichicon at the time I ordered. I found this AK thread about capacitors useful. This page speaks to Nichicon audio capacitors, at least as Mouser sees them.
I tried to replace all the tantalum caps. with polypropylene, which all my readings had indicated were the right way to go. See also this Mouser page.
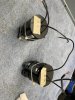
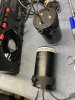
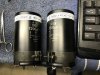
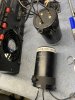
There are very few resources that I've found for replacing the big caps., but there is one good one.
For resistors: aikenamps.com/index.php/resistor-types-does-it-matter
After replacing the components and dealing with the problems of weak traces on the Printed Circuit Boards (PCBs), I still have some audio chain issues to sort out, esp. a fuzzy contact, that may be in my input signal, or something else. I'm not convinced it's the big caps., because they seem fine, but I will get to them at some point.
One thing I have discovered is that it is REALLY important to clean your switches. Way back in the early eighties, after getting my unit back from my repair shop (just a single, dedicated technician), I noticed a massive change (to my younger ears) after he had worked on the unit. I'd not sent it to him for audio issues. He told me that, as a matter of course, he cleaned all the switches of clients' units when they came in. It was just that. Nobody has ever smoked in my apartment, so it was just general cruft that he had cleaned away. Frankly, I suspect you'll get much more bang for your buck, cleaning switches than replacing capacitors; perhaps a little weird, but I suspect it's most often true.
I'd check out each and every one of the resistors I have listed in the Excel file. There are pictures of quite a few of them in my earlier posts. Often the heat came from something 0.5 to 1 cm away. There may be indications of a warm board on either side of the board. The fibreglass discolours a bit, or the nearby components do. It takes holding the board under a strong light and moving the angle of the board with respect to you and the light quite a bit to be sure. In my case one P700 had a lot of heat in one area, but, when I looked at the other, it did not appear at first to have as much damage or indications of long-term heat. Upon further inspection, there was often an issue. Also, for the P700 and main power boards under them, if you replace resistors on one board, it may be best to replace the component on both boards, so that that part of each board is using more comparable components. Ultimately, matching with new components, carefully chosen to be of as good or better specs. can't be a bad thing, and saves having to dig back into the unit in a couple of years. Note how I often go to better % tolerance of resistors and capacitors than the specified values.
Please, please read ALL of the Introduction in the Excel spreadsheet. It describes the approach and rationales for the various sheets, and it tells you how to use them to upload the component lists you'd like to order from Mouser.
I hope this helps Marantz 2500 owners who are about to start the process of capacitor replacement.
Trevor.
P.S. if any of you find errors in the spreadsheet, please DM me and I'll update the file and upload the new version to this thread. Thanks.
P.P.S. If I've duplicated parts of my description above, please forgive me. I brought the text in from several places to set the context of the spreadsheet file.
As part of my restoration and on the advice of enough members, I decided to use Mouser.ca (for those who do not live in the Great White North, Mouser.com exists, too) as my source of components for the task. At the same time, it was obvious that some resistors and a few other components might benefit from being replaced. I created what Mouser calls 'Projects,' one for each board. That allowed me to export the list of components and part numbers to Excel, subsequently allowing me to generate a spreadsheet that could be useful to other AK members.
My approach was guided by some of the research I'd done. There were two that were quite instructive: here, and here. From my readings, the replacement of old electrolytic and tantalum capacitors seems to be a 'default' part of restoration. One can hope/assume that modern versions of the components will perform better to spec., and likely last longer, if the proper replacement is found. That's why a took the approach of using one of the best capacitor manufacturers (they'd clearly been used by many, many other restorers), and using their best audio line. It was an approach that I felt could only help keep the unit close to the original design of the circuit diagrams, and less so to the manufacturing cost-awareness of Marantz.
Eventually, one realizes that, with only a single handful of exceptions, the 2500's boards use standard lead spacing. There are some problems on the P700 (and one or two on P800, IIRC), however, where I was not able to get an exact fit, mainly because the board does not use standard spacing for those capacitors. One has to choose between leads that are wider than the holes or vice versa. My approach was to use the lead spacing that, in this order, allowed the cap. to sit properly on the board, or, if not, to hide the leads under the component for neatness. It's not as obvious in practice as it seems on paper.
It took me a while to come to an approach to buying caps that I felt would work. I wanted both quality and simplicity.
For the elecs., I decided to go for Nichicon, where available, and their highest quality audio line, i.e. the UKZs you have chosen. I discovered that some exact replacements are not manufactured and that, given what Mouser had in stock or would have in stock, I had to make some minor substitutions. Also, I notched up the voltage by one level of voltage; e.g., 50V -> 63V, etc., and tried to get the best tolerance at the capacitance and voltage.
For the Tantalum replacements, I went for the WIMAs, with the same approach to voltage, and the best tolerance at the capacitance and voltage.
The other issue is finding capacitor leads at the correct spacing for mounting the capacitor using the existing holes in the boards. This can limit the selection of the final capacitor as much as tolerance and voltage, resulting in compromises, some based on voltage, some on leads, some on tolerance.
As you can imagine, it took many, many hours trolling through the digital catalogue (thank goodness for modern databases that feed websites…) to arrive at the chosen capacitor for a given Cnnn.
In the end, one ends up with some capacitors that have leads a couple of mm to wide apart or too close. Occasionally, notwithstanding the likelihood that modern capacitors are in general smaller than the original ones, the physical size of the capacitor ends up causing problems and the need to order another capacitor for a given Cnnn.
It's a frustrating, somewhat iterative process. I had thought that I'd have to have two or three 'extra' orders for these complications and occasional incompleteness of the component list in my orders. I ended up with six.... :-/
The mylar and film caps. were a little harder, because I had to change WIMA range for many of the caps., because they simply were not available in the configuration needed for some Cnnns.
Then, I addressed my potential insanity of buying the best audio capacitors from Nichicon, and realized that, frankly, the overall extra cost for the entire set of boards I was updating was small in the grand scheme of things; $50 extra overall is just not worth the hassle and brings so many other benefits. So, it was simply easier to always go for that range of caps. from a single manufacturer. That simplicity likely paid for itself in spades, vs. finding the cheapest high-quality capacitor.
Another advantage is that, if one likes tidy work, there is a consistency to the board, when one has finished replacing the caps. One brand of elec. caps., with one colour (mostly), and one manufacturer/colour for the beads. Of necessity, there was a handful of caps. that had to come from other manufacturers, but, needs must, and all that.
I hope to put up a switch cleaning post in the not-to-distant future, but have other things to do before then. I already have the photos, so it will happen.
Using that information and the various approaches to choosing components, I went for the top-line audio series by Nichicon at the time I ordered. I found this AK thread about capacitors useful. This page speaks to Nichicon audio capacitors, at least as Mouser sees them.
I tried to replace all the tantalum caps. with polypropylene, which all my readings had indicated were the right way to go. See also this Mouser page.
There are very few resources that I've found for replacing the big caps., but there is one good one.
For resistors: aikenamps.com/index.php/resistor-types-does-it-matter
After replacing the components and dealing with the problems of weak traces on the Printed Circuit Boards (PCBs), I still have some audio chain issues to sort out, esp. a fuzzy contact, that may be in my input signal, or something else. I'm not convinced it's the big caps., because they seem fine, but I will get to them at some point.
One thing I have discovered is that it is REALLY important to clean your switches. Way back in the early eighties, after getting my unit back from my repair shop (just a single, dedicated technician), I noticed a massive change (to my younger ears) after he had worked on the unit. I'd not sent it to him for audio issues. He told me that, as a matter of course, he cleaned all the switches of clients' units when they came in. It was just that. Nobody has ever smoked in my apartment, so it was just general cruft that he had cleaned away. Frankly, I suspect you'll get much more bang for your buck, cleaning switches than replacing capacitors; perhaps a little weird, but I suspect it's most often true.
I'd check out each and every one of the resistors I have listed in the Excel file. There are pictures of quite a few of them in my earlier posts. Often the heat came from something 0.5 to 1 cm away. There may be indications of a warm board on either side of the board. The fibreglass discolours a bit, or the nearby components do. It takes holding the board under a strong light and moving the angle of the board with respect to you and the light quite a bit to be sure. In my case one P700 had a lot of heat in one area, but, when I looked at the other, it did not appear at first to have as much damage or indications of long-term heat. Upon further inspection, there was often an issue. Also, for the P700 and main power boards under them, if you replace resistors on one board, it may be best to replace the component on both boards, so that that part of each board is using more comparable components. Ultimately, matching with new components, carefully chosen to be of as good or better specs. can't be a bad thing, and saves having to dig back into the unit in a couple of years. Note how I often go to better % tolerance of resistors and capacitors than the specified values.
Please, please read ALL of the Introduction in the Excel spreadsheet. It describes the approach and rationales for the various sheets, and it tells you how to use them to upload the component lists you'd like to order from Mouser.
I hope this helps Marantz 2500 owners who are about to start the process of capacitor replacement.
Trevor.
P.S. if any of you find errors in the spreadsheet, please DM me and I'll update the file and upload the new version to this thread. Thanks.
P.P.S. If I've duplicated parts of my description above, please forgive me. I brought the text in from several places to set the context of the spreadsheet file.