• The move to the new server is done. There are some software and database maintenance updates in process. This has us passing the hat around to help out. We appreciate any donations. Seriously, even a dollar helps. The payment page may be found here - https://www.audiokarma.org/support.html

marantzfan's 4400 - All Out Restoration!

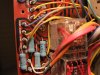
New filters installed today. Had to drill the bus bar a little to make room for the screws, this 4400 had solder lug type filters. It's a little tight, but the filters aren't too difficult to replace.

I added 3.3 uF bypass caps, and soldered the bleeder resistors to them. I bent the bypass cap legs into a little ring, and slipped the main filter screw through the ring. The thin layer of solder on the bus bar was left to give a little extra something to bite into.

I've procrastinated long enough now, time to bite the bullet and install the new relays tomorrow!
 

Attachments

  • IMG_1383.jpg
    IMG_1383.jpg
    101.2 KB · Views: 402
  • IMG_1384.jpg
    IMG_1384.jpg
    100 KB · Views: 373
Heat the big eyelets that the speaker terminals are soldered into and gently pry the terminals off. This is a 4300, but the process is similar.
Nice work, BTW!

Tom

Thanks for the tip, Tom! That's gonna make this a helluva lot easier.
 
Very nice work! Your attention to detail is impeccable! I have two 4400s sitting on the shelf waiting their turn, and I suspect your efforts will save me hours of trying to figure out how to navigate the jigsaw puzzle! Thanks for posting!!! :thmbsp:
 
Finished the relays today. Replacing these is so difficult that I had tears in my eyes, it's really that frustrating.

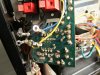
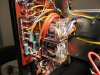
You'll need to desolder those tabs you see in the first picture. There's two more hidden by the relays in the pic. It's not too hard to route the wires out of the way of your iron. I then unscrewed the center tabs of the terminals, as you see in the second picture. You now have easy access to the relays. Next pic is the new relays installed (Omron MY4-02-DC48), clean up the old Marantz flux as best you can. Then flip the board over and admire your pretty new relays! :D

I put everything back together for a test. Filters, power supply, and relay are new at this point. Checked PS voltage, spot on 35V. Relays engaged fine, with less than 10mV DC offset on all terminals. Nice! :banana: Scope still doesn't work yet.
 

Attachments

  • IMG_1386.jpg
    IMG_1386.jpg
    94.3 KB · Views: 371
  • IMG_1389.jpg
    IMG_1389.jpg
    87.1 KB · Views: 365
  • IMG_1390.jpg
    IMG_1390.jpg
    102.3 KB · Views: 323
  • IMG_1391.jpg
    IMG_1391.jpg
    97.3 KB · Views: 367
Finished the relays today. Replacing these is so difficult that I had tears in my eyes, it's really that frustrating.

I hear that. I have two new Omron MY4-02-DC48's sitting on my work bench for this very reason. Got two of the eyes desoldered, and just gave up. The original relays still work fine on my 4400 though.
 
Still crossing my fingers that at some point that scope will work. The guy that sold it to me was surprised that it didn't work. He didn't remember it ever going out, so I'm hoping thats a good sign...?? :scratch2:
 
Usually simple stuff like overheated driver board transistors or fets take out the scope, not a big deal. All it takes is one to be gone and the scope centering is gone for a shite. I think by that point they solved the hv transformer winding issues.
 
Usually simple stuff like overheated driver board transistors or fets take out the scope, not a big deal.

+1!

If the CRT filament is lighting up and you've recapped the PS board, it's probably a bad 2SK30. I usually replace all four whether the scope works or not.
 
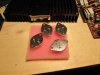
And jailtime, if you need 2sk30's I just ordered 20 from Germany, real ones, not subs.

If I come to needing those, I'd be thrilled to get my hands on a few. Thanks for the offer!

4400 progress - Right amp board is under the knife now. Heatsink is cleaned up, and outputs re-greased, installed with new insulators.
 
Great work, Kyle! :thmbsp: I really enjoy this thread. :tresbon:

Replacing the speaker relais is a real pain. :sigh: ....taking me hours of work...

In case, you will ever do this work again, :D , I think, there is no need to unsolder the speaker terminals the way you did.
Not sure, but it might be easier this way :scratch2: , who knows.... :


Good luck with your work!
 
Completed the right amp board today. Check out those shiny outputs. :D

Marantz, in all their wisdom, stuffed some 2SC458s under the driver heatsink. I replaced those with some KSC1845. The drivers and bias diodes were regreased and reinstalled. I then hFE matched KSA992 for the diff pairs. The troublesome VD1212 diodes were also replaced. The amp board connector received a Deoxit treatment, and the bias/offset pots did as well.

I was able to stuff some nice Elna Silmic II caps on the board. Kind of a tight fit, considering that they took the place of tantalum caps. Those axials are nice, expensive Vishay/Sprague.

DC offset and bias adjusted perfectly. Still haven't been able to do a sound check, the tone board is kinda hanging free, don't wanna break it. The left amp board is currently undergoing the same treatment as this one.
 

Attachments

  • IMG_1392.jpg
    IMG_1392.jpg
    77.7 KB · Views: 365
  • IMG_1394.jpg
    IMG_1394.jpg
    108.5 KB · Views: 378
  • IMG_1395.jpg
    IMG_1395.jpg
    104.6 KB · Views: 436
It looks like they pulled out all the stops when it came to the design engineering on that board. At least it unplugs from the harness and you didn't have to work it over while still in the unit.
 
If I come to needing those, I'd be thrilled to get my hands on a few. Thanks for the offer!

4400 progress - Right amp board is under the knife now. Heatsink is cleaned up, and outputs re-greased, installed with new insulators.
I have them now, amazing how transistors can get here from germany quicker than a tube from the states :scratch2:


UPDATE- swapped all the non 2sk30 fets today in the 120 today for these and they worked perfectly, they aren't fakes.
 
Last edited:
Back
Top Bottom