• The move to the new server is done. There are some software and database maintenance updates in process. This has us passing the hat around to help out. We appreciate any donations. Seriously, even a dollar helps. The payment page may be found here - https://www.audiokarma.org/support.html

McIntosh cabinet DIY results

Megaladoink

Active Member
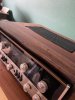
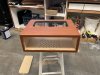
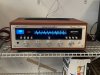
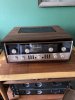
Hey guys. Wanted to share my results from making my own cabinet from the dimensions that I got off AK somewhere. Was a good lesson in woodworking. Made a few mistakes but those also helped me learn. In hindsight I actually think the love edge isn’t as aesthetically pleasing. Something about a nice flush meetup.
I didn’t add the pan loc as I made it so you can screw right into the bottom where the feet screw holes are.


Next project I’m onto a audio rack for my mc275, c22, 2@carver TFM-15cb and beogram 4004.
E6311A76-BEFB-4592-AC21-BF34D09D1C75.jpeg DF481760-277B-43DB-8FF4-296890FE35B1.jpeg ED5FBD64-29D2-43D0-9459-AE7C78F61928.jpeg
 
Register to hide this ad
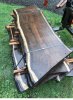
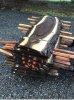
Oh, and for my audio rack, I scored this walnut from a local guy. I got 4 from this batch and it is beautiful. These photos are taken shortly after cutting down the tree but should be close after finishing.
 

Attachments

  • C7A797FD-32A1-4925-8F22-FB50688C0868.jpeg
    C7A797FD-32A1-4925-8F22-FB50688C0868.jpeg
    167.8 KB · Views: 71
  • 480133F4-D44D-4A53-94C6-C7CFC0B45A34.jpeg
    480133F4-D44D-4A53-94C6-C7CFC0B45A34.jpeg
    181.5 KB · Views: 66
It is a great thing that you decided to build your own Mcintosh cabinet and audio rack. The Walnut looks great to say the least. If you can gain access to a table saw, it makes building cabinets, audio rack a lot easier, when everything is cut straight. If pieces are cut straight, it is a lot easier to assemble the cabinet squarely, along with the making the finished product look great. You can cut pieces straight with a long metal straight edge, good clamps and a good power hand saw with a finish blade on it. You don't need many tools and surely don't need to have a full woodworking shop to make it happen.


If you can read a tape measure, you can build cabinets that look great. Measure twice, cut once and when first starting out it is best to tack your cabinet carcass together, so you can check the final product before you assemble it for the last time. Do not worry about making mistakes, as you need to break eggs to make an omelet. Dare to fail and you will probably surprise yourself if you do.
 
the wood grain looks cool but the live edge makes it look a little like the case is worn away or burned. Like you said, a nice clean straight edge would go better with the Mac. If possible, I'd recommend using a router with a template to cut the vent hole in top. The big walnut slabs look gorgeous. Keep at it! I built the plinth for my turntable out of rosewood and it's rewarding to create stuff like that.
 
the wood grain looks cool but the live edge makes it look a little like the case is worn away or burned. Like you said, a nice clean straight edge would go better with the Mac. If possible, I'd recommend using a router with a template to cut the vent hole in top. The big walnut slabs look gorgeous. Keep at it! I built the plinth for my turntable out of rosewood and it's rewarding to create stuff like that.
Yeah I forgot to cut the vent holes until I glued it together. made it tough as hell to router that out. But it's mine and it has character. With all I learned my audio rack will be way better.
 
the wood grain looks cool but the live edge makes it look a little like the case is worn away or burned. Like you said, a nice clean straight edge would go better with the Mac. If possible, I'd recommend using a router with a template to cut the vent hole in top. The big walnut slabs look gorgeous. Keep at it! I built the plinth for my turntable out of rosewood and it's rewarding to create stuff like that.
Well for a computer programmer it turned out pretty good. I’m upgrading to a track saw so that will best my diy track jig. And you just gave me ptsd from all those years as a brunch cook. I’be probably cooked 1 million eggs.
Next I might make a plinth for my mc275. With air flow of course. Girl gets hot!!!
 
Your cabinet looks beautiful! Nice choice of wood.

As TX_Tube said “ if you can gain access to a table saw” I also recommend that. If you will be doing wood working a lot and have the funds and room buy one. It’s a good investment for a good hobby. Joints will be tighter and better aesthetic overall.

This is probably premature but important.
Use good safety measures. Safety googles and push sticks.
 
Yeah I forgot to cut the vent holes until I glued it together. made it tough as hell to router that out.

Different grits of sandpaper are you friends in situations like this. Doesn't take much to sand out any imperfections in radius cuts, along with straight cuts. A flat block of wood, that can be any size to fit the project, can be wrapped with sand paper. Use the flat side of the block to sand the piece, to help smooth out the rough edges on a straight cut. Round wooden dowels wrapped in sandpaper, can help you smooth out the radius cuts. All cut edges, along with all other wood pieces that will be seen, should be sanded anyways, if you want a slick finish to your work. You will gain an education, have a great looking project when you are done, along with saving some money. Tough to beat. Throw some pics up of your audio rack, as that is gorgeous Maple stock and will look great once assembled.
 
Different grits of sandpaper are you friends in situations like this. Doesn't take much to sand out any imperfections in radius cuts, along with straight cuts. A flat block of wood, that can be any size to fit the project, can be wrapped with sand paper. Use the flat side of the block to sand the piece, to help smooth out the rough edges on a straight cut. Round wooden dowels wrapped in sandpaper, can help you smooth out the radius cuts. All cut edges, along with all other wood pieces that will be seen, should be sanded anyways, if you want a slick finish to your work.

Thanks for the tip. Yeah I should have sanded it to make a little more clean. (Fingers Crossed)Next time!!!!

that is gorgeous Maple stock.
It's actually walnut. Its just gorgeous. I almost want to go back and get a few more slabs or future projects.
 
Great job! Real satisfaction in building things yourself - nobody else has one exactly like that one. My last McIntosh wood case project was just the slant legs on a case I got with the legs removed. I also refinished a pair of ML-1Cs that were great on the inside and really bad on the outside. Hard to find walnut down here in Louisiana.
Keep testing your limits and learning new skills!
 
Simply beautiful.
A friend of mine shared his grandfather's ethos with me, and it became one of my guiding principles.
His ethos: "Everything is a kit"
Everything in the world can be made better through your efforts. Nothing is finished until you have your way with customizing it and making it the best that it can be. It seems to me you're already hip to this philosophy.
Sure you pay a lot for a McIntosh, but that doesn't change the fact that it's a kit.
It's not complete without your loving effort.
Looks great.
Real solid walnut is what a McIntosh deserves. The bean counters will always insist on sawdust sandwich cabinets, but they're in the rearview and this is your kit now...
 
I would cut some really thin pieces of the walnut and trim out the vent cutout. That would look better than the rough cut. Beautiful wood!
 
When I did mine recenty for a marantz, my cutout was the toughest part. Fortunately, I have a complete set of different still sanding blocks including the cyclinder type. So for the round corners used that and for the straight runs, flat blocks...I use 120 grit and then 400 grit final on the edges

20220608_030848946_iOS.jpg

20220609_024405054_iOS.jpg
 
When I did mine recenty for a marantz, my cutout was the toughest part. Fortunately, I have a complete set of different still sanding blocks including the cyclinder type. So for the round corners used that and for the straight runs, flat blocks...I use 120 grit and then 400 grit final on the edges

View attachment 2591440

View attachment 2591441

Absolutely fantastic. Looks great with that reddish-brown. And your grill looks great. Id like to router/bevel the vent hole side to like a 65-70 degree inwards, that way I wont have to bend the perf metal so much. But this was a great experience. I bought a table saw so I might make another one, just to see how precise I can get it. And who knows. Maybe sell one to someone that needs it.???? Only if it turns out 110% proper.
 
Back
Top Bottom